# Introduction
Read our documentation and get up to speed on how to access our API capabilities.
### Documentation Overview
Welcome to the inabit Developer Portal!
Here, you'll find everything you need to start using our API and seamlessly integrate it into your existing solutions. Our comprehensive API reference, code libraries, and tutorials are designed to help you get up and running quickly while also enabling you to build advanced features with ease.
***
### Explore & Learn
Discover inabit’s platform, features, and cutting-edge security technology. Whether you're setting up test or production environments, these guides will walk you through the essentials to ensure a smooth start. When you're ready, head over to the Quick Start section to make your first request.
***
Quick Start Learn the basics and send your first request.
{% hint style="info" %}
#### Need Help?
If you have questions or suggestions, our support team is here for you: **.**
{% endhint %}
# What is inabit?
Read our documentation and get up to speed on how to access our API capabilities.
inabit is a Crypto Finance Control Center designed to simplify the management of digital assets and streamline crypto-to-fiat transactions. Built with cutting-edge technology, inabit provides businesses and individuals with the tools they need to seamlessly manage, transfer, and convert cryptocurrencies while ensuring security, compliance, and efficiency.
### **Why Choose inabit?**
* **Comprehensive Crypto-to-Fiat Services**\
inabit acts as an aggregator for on-and-off ramp services, offering the best rates across multiple providers based on your region and currency. Easily convert cryptocurrencies like USDT to fiat currencies and transfer funds directly to bank accounts.
* **Secure Digital Asset Management**\
Our platform ensures your assets remain safe with robust encryption and security measures. With features like WalletConnect integration, you can connect your wallet to any dApp while maintaining security and control.
* **Customizable API for Seamless Integration**\
Access inabit’s powerful API to integrate our services into your existing infrastructure. From crypto payments to user authentication, our API supports a variety of use cases and scales with your business needs.
* **Innovative Features**
* **Gas Wallet:** Purchase blockchain gas fees with a credit card when funds are low.
* **Replace Account Owner:** Change account ownership seamlessly.
* **KYB-Verified Transactions:** Fast and compliant fund transfers after Know Your Business (KYB) verification.
### **Who is inabit For?**
inabit is designed for businesses and individuals who require secure, efficient, and compliant solutions for managing digital assets and fiat transactions. Whether you're a crypto exchange, a fintech startup, or an individual user, inabit provides the tools to make crypto transactions simple and reliable.
### **Key Benefits**
* **Speed:** Instant transactions and fund transfers.
* **Scalability:** Built to handle large volumes of transactions with ease.
* **Compliance:** Adheres to regulatory standards for crypto and fiat transactions.
### **Use Cases**
* Automating crypto-to-fiat payments for businesses.
* Managing multi-chain assets through a unified platform.
* Offering end users secure and simple on-and-off ramp solutions.
{% content-ref url="/pages/CXwwloJXnmfXpFRrHgFt" %}
[Use Cases](/use-cases/inabit-wallet-as-a-service)
{% endcontent-ref %}
# Data Privacy and Protection
inabit API's Data Privacy and Protection Policy Guidelines
## **Data Privacy and Protection**
At **inabit**, privacy and data protection are foundational principles. Our platform is designed to operate without handling or storing any **Personally Identifiable Information (PII)**. This ensures that businesses using inabit can maintain the highest level of data security and compliance with global regulations like GDPR, CCPA, and others.
***
### **How inabit Protects Privacy**
#### **No PII Handling**
* **Anonymized Data Only**: inabit works exclusively with anonymized tokens, such as **Universally Unique Identifiers (UUIDs)**, to represent client data.
* **Customer Responsibility**: Businesses using inabit retain full control of their sensitive client data. They are responsible for mapping anonymized tokens to actual client identifiers in their internal systems, ensuring that sensitive data never resides within inabit’s infrastructure.
#### **Integration with inabit’s GraphQL API**
* All interactions with inabit’s platform, including wallet management and transaction operations, must use **anonymized tokens** when sending client-related data via our GraphQL API.
* This ensures that persistent fields where customer-related data is stored contain only anonymized references, never actual client PII.
***
### **Recommended Practices for Customers**
To align with inabit's privacy policies and maximize security, we recommend the following practices:
1. **Generate Anonymized Tokens**:
* Use UUIDs or other anonymized identifiers to represent client data in your system.
* Ensure that these tokens are unique and securely mapped to real client data within your environment.
2. **Secure Internal Mapping**:
* Maintain a secure and encrypted mapping between anonymized tokens and actual client identifiers in your systems.
* Use role-based access controls to limit who can access this mapping.
3. **GraphQL API Usage**:
* Always pass anonymized tokens when interacting with inabit's GraphQL API.
* Avoid including any sensitive information or PII in your API requests.
***
### **inabit API Fields Requiring Anonymized Tokens**
The table below outlines key fields in inabit’s GraphQL API where customer-related information might be referenced. These fields must contain anonymized tokens:
| **GraphQL Query/Mutation** | **Field Name** | **Description** |
| -------------------------- | ----------------------- | ----------------------------------------------------- |
| `createWallet` | `externalWalletId` | An identifier used to associate wallets with clients. |
| `createTransferRequest` | `externalTransactionId` | A unique identifier to track client transactions. |
| `addContact` | `externalContactId` | Used to identify contacts of asset transfers. |
By ensuring these fields only contain anonymized tokens, you can maintain robust privacy and compliance while leveraging inabit’s platform.
***
### **Benefits of This Approach**
1. **Enhanced Security**:
* Sensitive client data stays under your control and never enters inabit’s systems, reducing the risk of breaches.
2. **Regulatory Compliance**:
* This setup supports compliance with privacy regulations like GDPR, CCPA, and other regional laws.
3. **Operational Flexibility**:
* Anonymized tokens enable seamless integration with inabit’s API without compromising sensitive data.
4. **Client Trust**:
* By adhering to a privacy-first approach, you demonstrate a strong commitment to protecting your clients’ data.
***
### **Policy Summary**
inabit’s platform is built with a privacy-first architecture, ensuring that sensitive client data remains entirely under the control of the businesses we serve. By leveraging anonymized tokens and securely managing data mappings within your systems, you can safely utilize inabit's advanced wallet and transaction management features while maintaining the highest data protection standards. For further assistance or questions, please contact our support team.
# Trusted Computing Mechanism
Trusted Execution Environment (TEE)
## Trusted Execution Environment (TEE) in Inabit
Inabit prioritizes the security of your data and transactions. One key layer of protection we employ is **Trusted Execution Environment (TEE)** technology. TEE creates a secure enclave within the main processing unit, acting as a dedicated vault for sensitive information and operations.
### **What is TEE?**
Imagine a secure room within your hardware, isolated from the main operating system. This protected space, enabled by TEE, safeguards sensitive data and code from unauthorized access, even if the main system is compromised. This isolation ensures:
* **Confidentiality:** Your data remains encrypted and unreadable outside the TEE enclave.
* **Integrity:** Any code or data stored within the enclave cannot be tampered with.
* **Attestation:** You can verify the authenticity and integrity of the TEE environment itself.
### **How does Inabit use TEE?**
In Inabit systems, TEE can be utilized in various ways to enhance security, including:
* **Protecting sensitive user credentials:** Login details, encryption keys, and other critical information can be stored and processed within the TEE enclave, minimizing the risk of theft or misuse.
* **Securing critical system functions:** Specific system functions handling sensitive data or transactions can be executed within the TEE, isolating them from potential vulnerabilities in the main system.
* **Enabling secure communication channels:** TEE can establish secure tunnels for data communication between Inabit's systems and your devices, ensuring the integrity and confidentiality of data in transit.
By incorporating TEE, Inabit strives to provide an additional layer of defense for your data and transactions, fostering a more secure and trustworthy user experience.
# Confidential Computing
# inabit Wallet-As-A-Service
An example use case of how inabit's API Infrastructure is utilized.
## Overview
In an era where digital wallets are transforming the landscape of financial services, inabit offers a robust infrastructure tailored to meet the dynamic needs of crypto wallet providers. This guide is designed to navigate you through the seamless integration and management of your crypto wallet operations, empowering you with security, flexibility, and scalability like never before.
Whether you're a growing startup or an established player in the crypto ecosystem, inabit's WaaS solution provides the foundation for building and managing feature-rich wallets that cater to the evolving demands of your users. From secure storage to efficient transaction processing, our infrastructure is engineered to enhance the user experience while ensuring the highest standards of security.
## Prerequisites
Before diving into the setup, ensure you have:
* Have an [API Admin](/guides/user-roles-in-inabit#api-admin) user created for your organization in inabit.
* Access to the inabit platform (as the wallet provider):
* Have an account ready to be used.
* Registering to our webhook services with your service URL.
> #### :construction: One-time Must-Have Setup:
>
> Please ensure that you complete the [Approvals Docker Configuration](broken://pages/ccXJuwRwg2gczKSBaHay) and execute the [API signer Setup](broken://pages/0VYX2RSRtyBlvXJfXQqb) as a one-time prerequisite. Once this step is accomplished, you will be able to create your API wallets and addresses as needed.
### Additional Reference
We highly advise taking a look at the following guides as you start developing your wallet as a service with inabit.
* [API Login Access / Authentication](broken://pages/yGcNLF6nqjepcTpKqBXn)
* [Create Transfer Requests in API](broken://pages/K4GkRLVxss9hUk7ntC5H)
* [Create API wallet addresses](broken://pages/NrtC3jkcvkTrmIztgsg5)
* [Remote & Automatic Approvals (Docker Configuration)](broken://pages/ccXJuwRwg2gczKSBaHay)
* [Automate Signing Transactions](broken://pages/0VYX2RSRtyBlvXJfXQqb)
* [Receive Webhooks on Transaction Events](broken://pages/kUcWJEheyX7D0ertCXcn)
## Technical Architecture: Customer Wallet Flows
The architectural diagram depicts the wallet infrastructure utilizing inabit's wallet-as-a-service solution. Below we explain the flow's process from the beginning of a customer's interation in the interface until a transaction is sent successfully.
### Transactions Flow Explained
Customer B (Wallet provider's customer)
* When there's a wallet creation process occuring in the provider's (you) interface, initiate a request to inabit's API to generate a dedicated deposit address (API wallet) for the customer (step 1 in the flow).
* This part isn't really visible in the flow, but you can see that the provider's inabit account contains multiple customer API wallets.
* Refer to the first section below to learn how to [generate API wallet addresses](https://docs.inabit.com/use-cases/inabit-x-crypto-clearing-services#id-1.-generate-api-wallet-addresses).
* Customer **B** is requesting a withdrawal from using your wallet's interface (the provider).
* Send a Money Transfer Request to inabit's API.
* The transaction goes through approval process (Docker Signer)
* The approval/rejection logic will rely on anything you develop on your end. You can decide what ever you want.
* Once transaction is approved, funds are taken out of Customer **B**'s API wallet (within the wallet provider's inabit account) and the transaction is broadcasted to the blockchain.
* Once the transaction is broadcasted and completed, inabit sends two notifications (via webhooks) to notify the following:
* Transaction was completed
* Customer B's wallet (and asset) balance we're updated.
> #### Now that the flow is clear, let's review the implementation process step by step! :sparkles:
### 1. a. Generate API Wallets for Customers
The wallet provider (you) develops a logic that on every wallet creation/generation in your interface, a new inabit API wallet is created for your end-customer.
We recommend saving the inabit API `walletId` to associate it with your customer in your database.
In order to generate the API wallet address for the customer's deposit, call the following mutation:
> Remember to authenticate to call our graphQL API using an access token (bearer) with your **API** **Admin** credentials. (If you're not sure how, refer to [Authentication](https://docs.inabit.com/introduction-to-graphql/authentication))
>
> Don't have an API Admin/API Signer yet? contact us at to create one!
**CreateApiWalletAddress Mutation:**
```graphql
mutation CreateApiWalletAddress($data: ApiWalletCreateAddressInput!) {
createApiWalletAddress(data: $data) {
address
walletId
}
}
```
**Body (****ApiWalletCreateAddressInput**** object)**
| Name | Type | Description |
| -------------------------------------------------- | ------ | --------------------------------------------------------- |
| blockchainId\* | string | ID of the blockchain in inabit |
| financialAssetId\* | string | ID of the financial asset in inabit (can be token/native) |
| organizationId\* | string | ID of the organization in inabit |
Example body:
```graphql
{
"data": {
"blockchainId": "clefn78cl00i3lc6rih442mx9",
"financialAssetId": "clefn78h5012plc6rxbmofnop",
"organizationId": "clsu8bel7000dlciyfdfbmwcw"
}
}
```
#### Response
{% tabs %}
{% tab title="🟢 Success" %}
```graphql
{
"data": {
"createApiWalletAddress": {
"address": "0xcc918e16bc528bf58fc250f56898c7d917d33de2",
"walletId": "cluicfnpb000066015d3narbc"
}
}
}
```
{% endtab %}
{% tab title="🔴 Failure" %}
```graphql
{
"error": "Invalid request"
}
```
{% endtab %}
{% endtabs %}
In the mutation's response, you should receive the deposit address for the blockchain and asset you've requested, as well as the inabit API wallet ID for the customer (which you can later save and relate to the specific customer, in order to identify a customer's inabit API wallet).
In the mutation's response, you should receive the deposit address for the blockchain and asset you've requested, as well as the inabit API wallet ID for the customer (which you can later save and relate to the specific customer, in order to identify a customer's inabit API wallet).
{% hint style="info" %}
Reminder - You can always query data and fetch all API wallets & their blockchain address in your organization when needed. Refer to [Wallets Info](https://docs.inabit.com/api-reference/api-reference/wallets/wallets-info).
{% endhint %}
### 1. b. Initiate Transaction Request
Once a customer in your interface triggers a withdrawal, initiate a withdrawal request to inabit's API. The following mutation is used to create a transfer request (withdrawal):
**CreateWithdrawal Mutation:**
```graphql
mutation CreateWithdrawal($data: WithdrawalCreateInput!) {
createWithdrawal(data: $data) {
id
}
}
```
**Body (****WithdrawalCreateInput**** object)**
| Name | Type | Description |
| -------------------------------------------------- | ------- | ------------------------------------------------------------ |
| walletId\* | String | Wallet ID |
| financialAssetId\* | String | Asset ID |
| address\* | String | From Address (Source) |
| amount\* | Integer | Transfer amount |
| blockchainId\* | String | Blockchain ID |
| note | String | Transaction Note |
| priority | String |
Transaction Priority
(Slow, medium, fast, etc.)
|
Example body:
```graphql
{
"data": {
"wallet": {
"id": "clol7o576002oaz011mmtnvru"
},
"financialAsset": {
"id": "clefn78gv011olc6rcwtt0wel"
},
"address": "0x7582f3483116105e0b7845ac1a0df5eb0c8cd062",
"amount": 5,
"blockchain": {
"id": "clefn78em00mslc6r3lzf3h5a"
},
"note": "",
"priority": "Medium"
}
}
```
#### Response
{% tabs %}
{% tab title="🟢 Success" %}
```graphql
{
"data": {
"createWithdrawal": {
"id": "clpgvrjb700136g01lr3o0tgv",
}
}
}
```
{% endtab %}
{% tab title="🔴 Failure" %}
```graphql
{
"error": "Invalid request"
}
```
{% endtab %}
{% endtabs %}
In the mutation's response, you should receive the withdrawal ID.
### 2. Approving Customers Transaction
> **🚧 Approval Required**
>
> Note that withdrawals will require an approval. In this case, approvals are given automatically according to the logic decided by the clearer (you), through the automatic approvals application (**docker**).
>
> If you feel like you've missed this step, please check prerequisite once more and refer to our additional reference section at the beginning of the page.
The provider (you) needs to develop a logic to approve transactions using our approvals application tool. Please refer to the following subpage to learn more about how to [Automate Signing Transactions](broken://pages/0VYX2RSRtyBlvXJfXQqb).
### 3. Broadcast Crypto Transaction to the Blockchain
There's no extra work needed in this step.
Once the transaction (withdrawal) request is approved using the API signer, the transaction will be broadcasted to the blockchain automatically.
### 4. Receive Transactions & Balance Webhooks
In order for the wallet provider (you) to be able to monitor the statuses of transactions executed from your customer's wallets, you can register to our webhook service and subscribe to specific notifications allowing you to identify new incoming/outgoing transaction events, as well as status updates and wallet balance updates.
Please refer to [Webhooks and Notifications ](https://docs.inabit.com/remote-infrastructure/webhooks-and-notifications#webhooks-information)📣 for further information.
### Congratulations! :tada::clap:
You are fully set to operate as a wallet provider using inabit's secured remote wallets infrastructure!
If you encounter any challenges in the process or need further clarification on any aspect, please don't hesitate to reach out to us at .
# inabit x Crypto Clearing Services
An example use case of how inabit's API Infrastructure is utilized
## Overview
Welcome to the comprehensive guide on leveraging inabit's digital wallet infrastructure. As a digital wallet infrastructure provider, inabit is dedicated to streamlining operations for clearing services like yours. This guide will walk you through the seamless integration and management of your digital wallet operations, ensuring security, efficiency, and scalability.
## Prerequisites
Before diving into the setup, ensure you have:
* Have an [API Admin](/guides/user-roles-in-inabit#api-admin) user created for your organization in inabit.
* Access to the inabit platform (as the Clearer):
* Have an account ready to be used.
* Create an inabit "Main" wallet via the platform's UI.
* This wallet will serve as the **funding** **route** for the Clearer.
* Create an additional inabit wallet and deposit **funds for fee:**
* If you're clearing Ethereum / tokens in Ethereum chain - deposit ETH.
* If you're clearing in TRON / tokens in TRON chain - deposit TRX.\
(and so on, refer to [Supported Blockchains](/what-we-support/blockchains))
* Necessary access permissions setup.
* Eligible roles - Owner / Admin / API Admin.
> #### :construction: One-time Must-Have Setup:
>
> Please ensure that you complete the [Approvals Docker Configuration](broken://pages/ccXJuwRwg2gczKSBaHay) and execute the [API signer Setup](broken://pages/0VYX2RSRtyBlvXJfXQqb) as a one-time prerequisite. Once this step is accomplished, you will be able to create your API wallets and addresses as needed.
### Additional Reference
We highly advise taking a look at the following guides as you develop your crypto clearing application with inabit:
* [API Login Access / Authentication](broken://pages/yGcNLF6nqjepcTpKqBXn)
* [Create Transfer Requests in API](broken://pages/K4GkRLVxss9hUk7ntC5H)
* [Create API wallet addresses](broken://pages/NrtC3jkcvkTrmIztgsg5)
* [Remote & Automatic Approvals (Docker Configuration)](broken://pages/ccXJuwRwg2gczKSBaHay)
* [Automate Signing Transactions](broken://pages/0VYX2RSRtyBlvXJfXQqb)
* [Receive Webhooks on Transaction Events](broken://pages/kUcWJEheyX7D0ertCXcn)
## Technical Architecture: How Transactions Flow?
The architectural diagram depicts the wallet infrastructure utilizing Inabit for clearers (Clearing service providers). The process primarily involves customer actions and the reception of API information. Below is a breakdown of the workflow outlined in the diagram:
### Clearer Flow Explained
Customer (Clearer's customer)
* **Customer** is requesting to deposit funds in crypto and be credited with balance in the clearer's application.
* Clearer initiates a request to inabit's API to generate a dedicated deposit address (API wallet) for the customer (step 1 in the flow).
* Refer to the first section below to learn how to [generate API wallet addresses](https://docs.inabit.com/use-cases/pages/xXAx4HCLmuvtXZRd27o6#id-1.-generate-api-wallet-addresses).
* The Clearer fetches the address and displays it in the Clearing Service UI for customer
* Customer copies the address from the Clearer's UI and deposits crypto funds to the address. (step 2)
* Funds are retrieved to the inabit generated wallet & address for customer (Customer's **inabit API wallet** ).
* Notice that there are more than one customer API wallet within the Clearer's inabit account. This is to emphasize that the clearer needs only one inabit account. ()
* inabit also sends a new transaction event webhook to the clearer during this time.
* The clearer issues a withdrawal from the inabit wallet that contains native assets (for fee payment purposes) and transfers the "gas" to the desired customer API wallet (API wallet F in this case) (step 3)
* Once gas funds arrive to customer API wallet, the clearer issues a second withdrawal to release the deposited funds that customer deposited earlier. (step 4)
> #### Now that the flow is clear, let's review the implementation process step by step! :sparkles:
### 1. Generate API Wallet Addresses for Customers
The clearing service (clearer) develops a logic that on every crypto deposit request their customer makes, a new inabit API wallet and address are created.
The clearer then saves this API `walletId` to associate it with their customer in the clearer's database.
In order to generate the API wallet address for the customer's deposit, call the following mutation:
> Remember to authenticate to call our graphQL API using an access token (bearer) with your **API** **Admin** credentials. (If you're not sure how, refer to [Authentication](broken://pages/yGcNLF6nqjepcTpKqBXn))
>
> Don't have an API Admin/API Signer yet? contact us at to create one!
**CreateApiWalletAddress Mutation:**
```graphql
mutation CreateApiWalletAddress($data: ApiWalletCreateAddressInput!) {
createApiWalletAddress(data: $data) {
address
walletId
}
}
```
#### **Body (**ApiWalletCreateAddressInput object)
| Name | Type | Description |
| -------------------------------------------------- | ------ | --------------------------------------------------------- |
| blockchainId\* | string | ID of the blockchain in inabit |
| financialAssetId\* | string | ID of the financial asset in inabit (can be token/native) |
| organizationId\* | string | ID of the organization in inabit |
Example body:
```graphql
{
"data": {
"blockchainId": "clefn78cl00i3lc6rih442mx9",
"financialAssetId": "clefn78h5012plc6rxbmofnop",
"organizationId": "clsu8bel7000dlciyfdfbmwcw"
}
}
```
#### Response
{% tabs %}
{% tab title="🟢 Success" %}
```graphql
{
"data": {
"createApiWalletAddress": {
"address": "0xcc918e16bc528bf58fc250f56898c7d917d33de2",
"walletId": "cluicfnpb000066015d3narbc"
}
}
}
```
{% endtab %}
{% tab title="🔴 Failure" %}
```graphql
{
"error": "Invalid request"
}
```
{% endtab %}
{% endtabs %}
In the mutation's response, you should receive the deposit address for the blockchain and asset you've requested, as well as the inabit API wallet ID for the customer (which you can later save and relate to the specific customer, in order to identify a customer's inabit API wallet).
{% hint style="success" %}
Reminder - You can always query data and fetch all API wallets & their blockchain address in your organization when needed. Refer to [Wallets Info](broken://pages/LDMCAA71iJc6CUHpEtNl).
{% endhint %}
### 2. Customer Transfers Crypto to their Wallet Address
In order to receive a notification that the customer sent funds successfully to their inabit API wallet address, you will need to register to our webhook subscription service and create a subscription for your organization.
Please refer to [Webhooks and Notifications ](broken://pages/kUcWJEheyX7D0ertCXcn#webhooks-information)📣 for further information.
### 3. Clearer Transfers Fees/Gas from their Wallet to Customer's Wallet
Once the clearer (you) receives a successful webhook for a received transaction in the customer's wallet (status update that txn was successful and funds are in the customer's wallet)
The clearer should issue an additional transfer from the wallet intended for fees, to the customer's wallet in order be able to withdraw the customer's deposited funds.
{% hint style="info" %}
This step is applicable only in cases where the user transfers tokens, native blockchain assets can be transferred if they complete a sufficient amount to pay for the transaction fee.
Take this into consideration when transferring funds from your "fees" wallet.
{% endhint %}
Let's put this into an actual example:
* Customer transfers **USDT** in **Ethereum** blockchain.
* Clearer (you) receives transaction webhook that it was completed.
* Clearer (you) initiates a withdrawal for **Ethereum** from the fees API wallet to the designated customer wallet, in order to withdraw the funds afterwards. (step 4)
> #### How to Withdraw/Transfer Gas Funds to the Customers Wallet?
#### CreateWithdrawal Mutation:
```graphql
mutation CreateWithdrawal($data: WithdrawalCreateInput!) {
createWithdrawal(data: $data) {
id
}
}
```
#### **Body (**WithdrawalCreateInput object)
| Name | Type | Description |
| -------------------------------------------------- | ------- | ------------------------------------------------------------ |
| walletId\* | String | Wallet ID |
| financialAssetId\* | String | Asset ID |
| address\* | String | From Address (Source) |
| amount\* | Integer | Transfer amount |
| blockchainId\* | String | Blockchain ID |
| note | String | Transaction Note |
| priority | String |
Transaction Priority
(Slow, medium, fast, etc.)
|
Example body:
```graphql
{
"data": {
"wallet": {
"id": "clol7o576002oaz011mmtnvru"
},
"financialAsset": {
"id": "clefn78gv011olc6rcwtt0wel"
},
"address": "0x7582f3483116105e0b7845ac1a0df5eb0c8cd062",
"amount": 5,
"blockchain": {
"id": "clefn78em00mslc6r3lzf3h5a"
},
"note": "",
"priority": "Medium"
}
}
```
#### Response
{% tabs %}
{% tab title="🟢 Success" %}
```graphql
{
"data": {
"createWithdrawal": {
"id": "clpgvrjb700136g01lr3o0tgv",
}
}
}
```
{% endtab %}
{% tab title="🔴 Failure" %}
```graphql
{
"error": "Invalid request"
}
```
{% endtab %}
{% endtabs %}
In the mutation's response, you should receive the withdrawal ID.
> #### :construction: Approval Required
>
> Note that withdrawals will require an approval.\
> In this case, approvals are given automatically according to the logic decided by the clearer (you), through the automatic approvals application (**docker**).
>
> If you feel like you've missed this step, please check prerequisite once more and refer to our additional reference section at the beginning of the page.
### 4. Clearer Sends Funds From Customer's Wallet to their "Main" Wallet
Now that the customer's API wallet has enough funds for fee, the final step of the flow would be to send the crypto amount deposited by the customer - to the clearer's (you) "main" wallet. *(that we created as a prerequisite.*
This step would require an additional withdrawal mutation to be called upon, but this time using the customer's `walletId` with the `financialAssetId` of the deposited crypto, and to the destination address in the main wallet.
> #### :construction: Approval Required
>
> Once again, approvals in this step are happening automatically according to the logic decided by the clearer, within the automatic approvals application (docker).
>
> If you feel like you've missed this step, please check prerequisite once more and refer to our additional reference section at the beginning of the page.
### Congratulations! :tada::clap:
Your clearing service, powered by our infrastructure, is fully operational, functional, and secure!
If you encounter any challenges in the process or need further clarification on any aspect, please don't hesitate to reach out to us at .
# Use inabit to Build an Exchange
An example use case of how inabit's API Infrastructure is utilized
## Overview
The following guide provides a comprehensive explanation on leveraging inabit's wallet infrastructure and building an automated transactions flow, as you would expect in an exchange.
As a provider of a secured wallet infrastructure, Inabit is committed to simplifying processes for exchanges such as yours. This manual will guide you through integrating and managing your digital wallet operations effortlessly, prioritizing security, effectiveness, and adaptability.
## Prerequisites
* Have an [API Admin](/guides/user-roles-in-inabit#api-admin) user created for your organization in inabit.
* Access to the inabit platform (as the Exchange):
* Have an account ready to be used.
* Create an inabit "Withdrawals" wallet via the platform's UI for your withdrawal operations.
* This wallet will serve as the **funding** **route** for the exchange users withdrawals.
* Create an additional API wallet and deposit funds to it **for fee/gas:**
* If you're fueling Ethereum / tokens in Ethereum chain - deposit ETH.
* If you're fueling TRON / tokens in TRON chain - deposit TRX.\
(and so on, refer to [Supported Blockchains](/what-we-support/blockchains))
* Necessary access permissions setup.
* Eligible roles - Owner / Admin / API Admin / API Signer
> #### :construction: One-time Must-Have Setup:
>
> Please ensure that you complete the [Approvals Docker Configuration](broken://pages/ccXJuwRwg2gczKSBaHay) and execute the [API signer Setup](broken://pages/0VYX2RSRtyBlvXJfXQqb) as a one-time prerequisite. Once this step is accomplished, you will be able to create your API wallets and addresses as needed.
### Additional Reference
We highly advise taking a look at the following guides as you develop your crypto clearing application with inabit:
* [API Login Access / Authentication](broken://pages/yGcNLF6nqjepcTpKqBXn)
* [Create Transfer Requests in API](broken://pages/K4GkRLVxss9hUk7ntC5H)
* [Create API wallet addresses](broken://pages/NrtC3jkcvkTrmIztgsg5)
* [Remote & Automatic Approvals (Docker Configuration)](broken://pages/ccXJuwRwg2gczKSBaHay)
* [Automate Signing Transactions](broken://pages/0VYX2RSRtyBlvXJfXQqb)
* [Receive Webhooks on Transaction Events](broken://pages/kUcWJEheyX7D0ertCXcn)
## Technical Architecture: How The Integration Works?
### Flow Explained: How Does It Work?
* TBD
### Congratulations! :tada::clap:
Your exchange's wallets & operations infrastructure is operational, functional, and secure!
If you encounter any challenges in the process or need further clarification on any aspect, please don't hesitate to reach out to us at .
# Integrate Accounting Firms with inabit
An example use case of how inabit's API Infrastructure is utilized
## Overview
In integrating with major accounting firms, inabit streamlines the process of accessing and managing transaction data and balances within their platforms. Through a straightforward integration process, users can grant viewing permissions to their accounts, allowing accounting firms to retrieve essential information via a custom-tailored Access Token. This seamless connection empowers users to monitor their finances effortlessly through their preferred accounting firm's interface, ensuring a smooth and efficient experience.
## Prerequisites
Before diving into the setup, please ensure the following:
* Access to the inabit platform (as the wallet provider):
* Have an account ready to be used.
* You've contacted our support and we've generated a custom tailored `token.`
* This token is for your accounting firm to have access and connect to your inabit account and have access credentials through our GraphQL API.
### Additional Reference
We highly recommend using **Cryptoworth** as your preferred crypto accounting firm to track your crypto finances made through inabit.
See how the collaboration with them is utilized and what are the benefits:
{% embed url="" %}
## Technical Architecture: How The Integration Works?
### Flow Explained: How Does It Work?
* The overall integration process between inabit and a crypto accounting firm is very simple. When we receive a request from an account owner, to integrate with an accounting firm - we generate an API Viewer user with viewing permissions to the account (and its organizations)
* After the API Viewer was created, inabit sends the owner a customer tailored `Access Token` to the owner's email.
* The owner sends that token to the accounting firm to integrate to inabit.
* That's it! -> The accounting firm (cryptoworth for example) can use the access token to integrate to our API and call transactions information, balances and more.
* From then on, the accounting firm will display the data retrieved on the inabit account in their interface for the users to view.
### You're All Set! :ballot\_box\_with\_check:
You're fully set to work with inabit and view the entire information on your transactions, while tracking your balance - in your accounting firm's interface.
If you encounter any challenges in the process or need further clarification on any aspect, please don't hesitate to reach out to us at .
# Platform Overview
inabit's platform offers a comprehensive suite of features designed to provide secure, seamless, and user-driven digital asset management. Below is an overview of the platform's key capabilities:
### **Security at the Core**
inabit employs a Trusted Computing Mechanism (TCM) to ensure that your private keys are accessible only on authorized devices under your control, never exposed to unauthorized parties. This approach combines user-friendly design with security standards that exceed industry norms.
### **End-to-End Encryption**
* **Private Keys Protection:** Your private keys remain secure during storage, transit, and usage.
* **Military-Grade Encryption:** Utilizes encryption methods trusted by defense organizations and governments worldwide.
* **Proven Cryptographic Reliability:** Incorporates security mechanisms with decades of proven reliability.
### **Complete Asset Control**
With inabit's secured self-custody solution, you retain total ownership of your private keys, minimizing third-party risk and ensuring uninterrupted access. Comprehensive disaster recovery options guarantee business continuity.
### **Unified Asset Management**
Manage your entire digital portfolio within a single, secure platform. Connect your existing wallets, including exchange and DeFi accounts, to streamline management and enhance security.
### **Transacting with inabit**
* **Reliable Crypto Swaps:** Execute seamless crypto-to-crypto swaps at a competitive fee of 0.15%, maximizing trading flexibility and reducing costs.
* **Validated Transfers:** Each transaction undergoes thorough compliance and accuracy checks using Know Your Transaction (KYT) analysis to meet Anti-Money Laundering (AML) standards.
* **Financial Reporting:** Easily export detailed transaction reports across all organizational wallets, facilitating financial oversight and accuracy for CFOs, accountants, and finance professionals.
### **Governance & Policy**
Define precise roles, permissions, and approval workflows to ensure every action aligns with your organization's security and compliance standards. Configure approvers, transaction rules, and approval workflows across all wallets, users, and transactions, ensuring no operation proceeds without the necessary approvals.
# Features & Capabilities
Read our documentation and get up to speed on how to access our API capabilities.
## inabit GraphQL API Docs
Welcome to the inabit's developers API documentation.
Here you'll discover here a comprehensive array of resources essential for initiating the utilization of our API and seamlessly incorporating it into your current solution.
Our extensive API reference documentation and libraries of code are designed to expedite your initial steps, while our tutorials and guides are tailored to assist you in crafting sophisticated features and seamless integrations with our API.
### Getting Started
This is where your journey with Inabit begins. Here, you'll delve into our platform, explore its features, and gain insights into our cutting-edge security technology.
These guides will help you set up and test your test and production environments for development.
Feeling ready to jump in? Head to the quick start section and proceed with making your first request:
{% content-ref url="/pages/bKogz62fBtjL88EO3DLz" %}
[Broken mention](broken://pages/bKogz62fBtjL88EO3DLz)
{% endcontent-ref %}
### Developing with inabit
#### API Reference
Dive a little deeper and start exploring our API reference to get an idea of what's possible to achieve using the API:
{% content-ref url="/pages/X0iUk7M41qljvTxMV7cj" %}
[Broken mention](broken://pages/X0iUk7M41qljvTxMV7cj)
{% endcontent-ref %}
* With our API, you can easily gain access to your own user created especially for API access.
* For your comfort, each API query/mutation is explained in a different page. (refer to "API Reference")
* If you have any questions or suggestions, feel free to reach out to our support team: ****
### Use Cases
Curious about how other customers use our API? Take a high-level look at popular financial and Web3 use cases we created that will demonstrate a full development flow using inabit's infrastructure.
{% content-ref url="/pages/5Rnwi1kTDwxePD3kh0qX" %}
[inabit Wallet-As-A-Service](/use-cases/inabit-wallet-as-a-service)
{% endcontent-ref %}
{% content-ref url="/pages/xXAx4HCLmuvtXZRd27o6" %}
[inabit x Crypto Clearing Services](/use-cases/inabit-x-crypto-clearing-services)
{% endcontent-ref %}
# Off-Ramp: Crypto to Fiat
Part of inabit's Crypto <> Bank Service
{% hint style="success" %}
Enable Off-Ramping for your inabit account? [**Apply Here**](https://docs.google.com/forms/d/12NUVO7QbFCeHTUVeQbmmWOcBhqYTnVmws5aIBlHP1vo/prefill)
{% endhint %}
## What is Off-Ramp?
An Off-Ramp is the opposite process, where users convert cryptocurrency back into fiat currency. This is essential for cashing out your digital assets into a traditional bank account or other fiat-based financial systems.
## Which countries are supported?
inabit proudly extends its support to diverse regions worldwide, spanning over 150 countries across 5 continents. Our commitment to global accessibility ensures that users from virtually anywhere can benefit from our platform's services. Whether you're in North America, Europe, Asia, Africa, or Oceania, we've got you covered.
{% hint style="info" %}
See the complete list of supported countries [here](/crypto-less-than-greater-than-fiat/supported-countries).
{% endhint %}
## Which currencies are supported?
We are proud to support a wide range of currencies, including all major ones such as USD, EUR, INR, JPY and many more. In fact, we support 45 different currencies, ensuring that our platform is accessible and convenient for users around the world.
{% hint style="info" %}
See the full list of supported currencies [here](/crypto-less-than-greater-than-fiat/supported-currencies).
{% endhint %}
## Which crypto tokens are accepted?
Inabit supports USDT on the Ethereum, TRON, and Polygon networks, as well as USDC on the Ethereum network.
# On-Ramp: Fiat to Crypto
Part of inabit's Crypto <> Bank Service
{% hint style="success" %}
Enable On-Ramping for your inabit account? [**Apply Here**](https://docs.google.com/forms/d/12NUVO7QbFCeHTUVeQbmmWOcBhqYTnVmws5aIBlHP1vo/prefill)
{% endhint %}
## What is On-Ramp?
An On-Ramp is a service or process that allows users to purchase cryptocurrency using traditional fiat currency. This is typically done through a cryptocurrency exchange or a payment service that accepts fiat currency (e.g., credit/debit card, bank transfer) in exchange for digital assets like Bitcoin, Ethereum, etc.
## Which countries are supported?
inabit proudly extends its support to diverse regions worldwide, spanning over 150 countries across 5 continents. Our commitment to global accessibility ensures that users from virtually anywhere can benefit from our platform's services. Whether you're in North America, Europe, Asia, Africa, or Oceania, we've got you covered.
{% hint style="info" %}
See the complete list of supported countries [here](/crypto-less-than-greater-than-fiat/supported-countries).
{% endhint %}
## Which currencies are supported?
We are proud to support a wide range of currencies, including all major ones such as USD, EUR, INR, JPY and many more. In fact, we support 45 different currencies, ensuring that our platform is accessible and convenient for users around the world.
{% hint style="info" %}
See the full list of supported currencies [here](/crypto-less-than-greater-than-fiat/supported-currencies).
{% endhint %}
## Which crypto tokens are accepted?
Inabit supports USDT on the Ethereum, TRON, and Polygon networks, as well as USDC on the Ethereum network.
# Supported Currencies
Part of inabit's Crypto <> Bank Service
| Currency | Availability |
| -------- | -------------- |
| AED | SWIFT |
| ARS | Bank Transfer |
| AUD | SWIFT |
| BOB | on request |
| BRL | on request |
| BWP | Launching Soon |
| CAD | SWIFT |
| CHF | SWIFT |
| CLP | on request |
| CNY | on request |
| COP | Bank Transfer |
| CRC | on request |
| DOP | on request |
| Euro | SEPA or SWIFT |
| GBP | SWIFT |
| GHS | on request |
| GTQ | on request |
| HNL | on request |
| HKD | SWIFT |
| IDR | SWIFT |
| INR | SWIFT |
| JPY | SWIFT |
| KES | on request |
| KRW | SWIFT |
| MWK | Launching Soon |
| MXN | on request |
| MYR | SWIFT |
| MZN | on request |
| NGN | on request |
| NZD | on request |
| PEN | on request |
| PHP | SWIFT |
| PYG | on request |
| SGD | SWIFT |
| THB | Launching Soon |
| TZS | on request |
| UGX | ACH or SWIFT |
| USD | on request |
| UYU | Launching Soon |
| VND | Launching Soon |
| XAF | on request |
| XOF | SWIFT |
| ZAR | on request |
| ZMW | on request |
| ZWL | on request |
| ZWL | Launching Soon |
| VND | Launching Soon |
| MWK | Launching Soon |
| MWK | Launching Soon |
# Supported Countries
Part of inabit's Crypto <> Bank Service
| Country | Can Pay From | Can Pay To |
| --------------------------------- | ------------ | ---------- |
| Afghanistan | ✘ | ✘ |
| Albania | ✘ | ✘ |
| Algeria | ✔ | ✔ |
| American Samoa | ✔ | ✔ |
| Andorra | ✔ | ✔ |
| Angola | ✔ | ✔ |
| Anguilla | ✔ | ✔ |
| Antarctica | ✔ | ✔ |
| Antigua And Barbuda | ✔ | ✔ |
| Argentina | ✔ | ✔ |
| Armenia | ✔ | ✔ |
| Aruba | ✔ | ✔ |
| Australia | ✔ | ✔ |
| Austria | ✔ | ✔ |
| Azerbaijan | ✔ | ✔ |
| Bahamas | ✔ | ✔ |
| Bahrain | ✔ | ✔ |
| Bangladesh | ✔ | ✔ |
| Barbados | ✘ | ✘ |
| Belarus | ✘ | ✘ |
| Belgium | ✔ | ✔ |
| Belize | ✔ | ✔ |
| Benin | ✔ | ✔ |
| Bermuda | ✔ | ✔ |
| Bhutan | ✔ | ✔ |
| Bolivia | ✔ | ✔ |
| Bonaire Saint Eustatius And Saba | ✔ | ✔ |
| Bosnia & Herzegovina | ✔ | ✔ |
| Botswana | ✔ | ✔ |
| Bouvet Island | ✔ | ✔ |
| Brazil | ✔ | ✔ |
| British Indian Ocean Territory | ✔ | ✔ |
| Brunei Darussalam | ✘ | ✘ |
| Bulgaria | ✔ | ✔ |
| Burkina Faso | ✔ | ✔ |
| Burundi | ✔ | ✔ |
| Cabo Verde | ✘ | ✘ |
| Cambodia | ✔ | ✔ |
| Cameroon | ✘ | ✘ |
| Canada | ✘ | ✘ |
| Cayman Islands | ✔ | ✔ |
| Central African Republic | ✔ | ✔ |
| Chad | ✔ | ✔ |
| Chile | ✔ | ✔ |
| China | ✔ | ✔ |
| Christmas Island | ✔ | ✔ |
| Cocos (Keeling) Islands | ✔ | ✔ |
| Colombia | ✘ | ✘ |
| Comoros | ✔ | ✔ |
| Congo | ✔ | ✔ |
| Cook Islands | ✘ | ✘ |
| Costa Rica | ✘ | ✘ |
| Croatia | ✔ | ✔ |
| Cuba | ✔ | ✔ |
| Curacao | ✔ | ✔ |
| Cyprus | ✔ | ✔ |
| Czech Republic | ✔ | ✔ |
| Côte d'Ivoire | ✔ | ✔ |
| Denmark | ✔ | ✔ |
| Djibouti | ✔ | ✔ |
| Dominica | ✔ | ✔ |
| Dominican Republic | ✔ | ✔ |
| Ecuador | ✔ | ✔ |
| Egypt | ✔ | ✔ |
| El Salvador | ✔ | ✔ |
| Equatorial Guinea | ✘ | ✘ |
| Eritrea | ✔ | ✔ |
| Estonia | ✔ | ✔ |
| Ethiopia | ✔ | ✔ |
| Falkland Islands | ✔ | ✔ |
| Faroe Islands | ✔ | ✔ |
| Fiji | ✔ | ✔ |
| Finland | ✔ | ✔ |
| France | ✔ | ✔ |
| French Guiana | ✔ | ✔ |
| French Polynesia | ✔ | ✔ |
| French Southern Territories | ✔ | ✔ |
| Gabon | ✘ | ✘ |
| Gambia | ✔ | ✔ |
| Georgia | ✔ | ✔ |
| Germany | ✔ | ✔ |
| Ghana | ✔ | ✔ |
| Gibraltar | ✔ | ✔ |
| Greece | ✘ | ✘ |
| Greenland | ✔ | ✔ |
| Grenada | ✔ | ✔ |
| Guadeloupe | ✘ | ✘ |
| Guam | ✘ | ✘ |
| Guatemala | ✔ | ✔ |
| Guernsey | ✘ | ✘ |
| Guinea | ✔ | ✔ |
| Guinea-Bissau | ✔ | ✔ |
| Guyana | ✔ | ✔ |
| Haiti | ✔ | ✔ |
| Heard Island And McDonald Islands | ✔ | ✔ |
| Honduras | ✔ | ✔ |
| Hong Kong | ✘ | ✘ |
| Hungary | ✔ | ✔ |
| Iceland | ✔ | ✔ |
| Åland Islands | ✔ | ✔ |
| India | ✔ | ✔ |
| Indonesia | ✘ | ✘ |
| Iran | ✔ | ✔ |
| Iraq | ✔ | ✔ |
| Ireland | ✔ | ✔ |
| Isle Of Man | ✔ | ✔ |
| Israel | ✔ | ✔ |
| Italy | ✔ | ✔ |
| Jamaica | ✔ | ✔ |
| Japan | ✔ | ✔ |
| Jersey | ✔ | ✔ |
| Jordan | ✘ | ✘ |
| Kazakhstan | ✔ | ✔ |
| Kenya | ✔ | ✔ |
| Kiribati | ✔ | ✔ |
| Kosovo | ✔ | ✔ |
| Kuwait | ✔ | ✔ |
| Kyrgyzstan | ✔ | ✔ |
| Laos | ✔ | ✔ |
| Latvia | ✔ | ✔ |
| Lebanon | ✘ | ✘ |
| Lesotho | ✔ | ✔ |
| Liberia | ✔ | ✔ |
| Libya | ✘ | ✘ |
| Liechtenstein | ✔ | ✔ |
| Lithuania | ✔ | ✔ |
| Luxembourg | ✔ | ✔ |
| Macao | ✔ | ✔ |
| Macedonia | ✔ | ✔ |
| Madagascar | ✔ | ✔ |
| Malawi | ✔ | ✔ |
| Malaysia | ✔ | ✔ |
| Maldives | ✔ | ✔ |
| Mali | ✘ | ✘ |
| Malta | ✔ | ✔ |
| Marshall Islands | ✔ | ✔ |
| Martinique | ✔ | ✔ |
# Devices Pairing
Learn about inabit's device pairing and its use in our platform
## What is Device Pairing in inabit?
Device pairing in inabit refers to the process of connecting a mobile device of a signer (or higher level) user to the inabit platform. This connection establishes a secure communication channel between the user's mobile device and the wallets enclave within the inabit platform. By pairing a device, we can securely identify and authenticate the user, ensuring that all interactions and transactions carried out via the mobile device are legitimate and protected.
### Why is Device Pairing Important?
Device pairing is crucial for several reasons:
* **Security**: It ensures a secure connection between the user's device and the inabit platform, protecting sensitive information and transactions.
* **Authentication**: It helps in verifying the identity of the user, preventing unauthorized access.
* **User Experience**: It streamlines the process of accessing inabit services, making it convenient for users to perform transactions directly from their mobile devices. Approvers can easily open their mobile app and decide if they wish to approve or reject a transaction by a simple click.
{% hint style="info" %}
Pairing a device in inabit can only be performed by "Approver" roles. (User roles with potential signing permissions).
{% endhint %}
## How to Pair Your Device
Follow these steps to pair your mobile device with the inabit platform:
#### Step 1: Install the inabit Mobile App
1. **Download the App**:
* For iOS devices, visit the App Store.
* For Android devices, visit the Google Play Store.
* Search for "inabit" and download the app.
2. **Install the App**:
* Follow the on-screen instructions to install the inabit app on your mobile device.
#### Step 2: Launch the inabit Mobile App
1. **Open the App**:
* Locate the inabit app icon on your mobile device and tap to open it.
2. **Sign In with your preferred cloud of choice:**
* Google Drive (iOS / Android)
* iCloud (Exclusive to iOS)
#### Step 3: Initiate Device Pairing
1. **Navigate to Pairing Section**:
* Once logged in, go to the "Settings" or "Account" section of the app.
* Find and select the option for "Device Pairing" or "Pair Device."
2. **Scan the QR code to get the Pairing Code in the App:**
* The inabit platform will generate a unique pairing code or QR code.
#### Step 4: Pair the Device with inabit Platform
1. **Log In to inabit Platform**:
* On your computer or another device, log in to the inabit platform using your account credentials.
2. **Access Device Pairing Option**:
* Navigate to your user and find the option of "Pair Device".
* You will also have the option highlighted on any screen in the web platform, if you're in an approver-fitting role
3. **Enter Pairing Code From The App**:
* Enter the pairing code generated by the mobile app.
#### Step 5: Confirm Pairing
1. **Verify Pairing / Pairing in Progress**:
* A confirmation period will occur and you will need to wait with the screen opened on your mobile app
{% hint style="danger" %}
**WARNING**: Do not close the mobile application while device pairing is in progress!
{% endhint %}
1. **Successful Pairing**:
* Once confirmed, your mobile device will be securely paired with the inabit platform.
* You will be displayed with a green screen of "Pairing Completed" in the mobile app.
* Once the screen is displayed, you will instantly be moved to the next step of your mobile app onboarding.
#### Step 6: Test the Pairing Connection:
1. **Test Functionality**:
* Perform a test transaction or action within the inabit app to ensure the device pairing is working correctly.
* You should be receiving an approval request for every transaction within a wallet's policy that you're a set approver of.
#### Troubleshooting
If you encounter any issues during the pairing process, consider the following tips:
* **Ensure Internet Connection**: Both your mobile device and computer should have a stable internet connection.
* **Update the App**: Make sure you have the latest version of the inabit app installed.
* **Restart Devices**: Sometimes, restarting your devices can resolve connectivity issues.
* **Contact Support**: If problems persist, contact inabit customer support for assistance.
### Summary
Device pairing is a vital security feature that enhances the safety and convenience of using the inabit platform. By following this guide, users can easily pair their mobile devices, ensuring a secure and seamless experience.
For any further assistance, please refer to the inabit support resources or contact our support team.
***
This guide should help your users understand and execute the device pairing process efficiently. If you have any additional information or specific requirements, feel free to provide them!
# User Roles in inabit
Learn about inabit's role system and its permissions per each role
## inabit Roles Hierarchy
The following page describes inabit roles system by order "highest" to "lowest"
### Owner
The owner is the one that approves signing devices and new users and is granted with **all of the permissions** in the entire system (account).
There's only one owner to an inabit account
> Reminder -> there can be multiple organizations in an inabit account, but there cannot be multiple inabit accounts under the same owner.
### Admin
An admin has access to everything in the system except being able to open new organizations, viewing the account settings & remove the owner.
An inabit account can have multiple admins per organization and an admin can be a set as a different user per each and every organization.
### Signer
Signers are users similar to admins but their sole purpose is to approve or reject transactions. The signer can't perform administrative operations like add/remove new users to/from an organization.
### Editor
Editors can access everything in the system but creating new wallets, approving/rejecting transactions and editing organization settings and its users.
They are still capable of creating transaction requests.
### Viewer
A viewer only has viewing permissions in an inabit organization and he/she cannot initiate transactions or edit any of the settings but their own. (User photo, email, password, etc.)
## API User Roles
In order to access our API capabilities and authenticate queries and mutations,\
you must create an **API** **Admin/Viewer**.
### API Admin
\
The API admin role is internally generated by inabit when an organization desires to utilize inabit's API infrastructure. Upon receiving such a request, we establish an "API user" devoid of access credentials to the platform's UI. This user's sole function is to issue an access token for inabit's API.
By utilizing the access token provided through this user's credentials, you gain access to inabit's queries and mutations within our GraphQL schema. A significant distinction between this role and other API user roles is that this API user possesses equivalent permissions to a standard Admin within the system.
With this role, you can execute various actions such as creating transactions, adjusting organization settings, inviting new users to your organizations, establishing wallets, and much more - **all through the API**.
#### How to create an API Admin?
* Contact inabit's support at [support@inabit.com](broken://spaces/dzwIwuSG3JXyzSwstYiN)\
to retrieve login access credentials and fetch a JWT access token when you authenticate.
* Use the token as a bearer across all of your queries and mutations.
{% hint style="info" %}
Note - You can also decide to create an **API** **Viewer**. The same role permissions are applied to the Viewer role in the platform, doing so you will only receive API capabilities of a **viewer**.
{% endhint %}
### API Signer
API signer is a unique user created by inabit that is separated from an API admin/viewer.
This API user is created for the sole purpose of serving as the "API approver" to sign transactions using inabit's developed tool we call the "Docker Signer".
In a nutshell, this role's purpose is to serve as a "remote approval" application to simulate/replace the standard inabit mobile approvals app for services that develop and build their infrastructure with inabit.
* You can learn all about this in our [Remote Infrastructure](broken://pages/tZP512vBBTeYfgAsxyWV) section.
* If you still find it hard to understand, feel free to contact us for tailored support:
### API Viewer
The API viewer is another role generated (currently) by inabit internally when an organization wishes to operate and utilize inabit's API infrastructure.
The sole difference between an API admin and API viewer is the permission access to the capabilities of the API.
* The API viewer isn't capable of calling mutations such as `createTransferRequest` or `createApiWalletAddress`.
# Hierarchy in inabit
## inabit Account Hierarchy
This page clarifies the relationships between accounts, organizations, and users within the Inabit system.
### **Key Terms:**
* **Account:** Represents a single entity that uses the Inabit system.
* **Organization:** A group of users that belong to the same account. An account can have multiple organizations.
* **User:** An individual who has access to the Inabit system and belongs to a specific organization. An organization can have multiple users. A user can be associated with multiple organizations as well.
### **Relationships:**
* One account can have many organizations (1:N).
* One organization belongs to one account (N:1).
* One organization can have many users (1:N).
* One user belongs to one organization (N:1).
**Example:**
* Inabit Corporation (Account)
* Marketing Department (Organization)
* User1 (Marketing Manager)
* User2 (Social Media Specialist)
* Sales Department (Organization)
* User3 (Sales Representative)
* User4 (Account Manager)
# Accounts
## **Overview**
This page explains the concept of Accounts in the Inabit system. An account represents a single entity that uses the Inabit platform. This could be an individual, a company, or any other type of organization. Each account has its own unique identifier and is the top level of the Inabit hierarchy.
### **Key functionalities:**
* Create and manage organizations within the account.
* View and manage user access and permissions.
* Access administrative functionalities for the account.
* Billing and subscription information are all based on the account. (account-level)
### **Relationships:**
* An account can have many organizations (1:N).
* Organizations within an account share access to certain resources and settings.
**Additional Information:**
* You can find information on creating and managing accounts in the Account Management API documentation: link.
* For details on available permissions and roles, refer to the User Management section of the API reference.
# Organizations
## **Overview**
This page defines Organizations within the Inabit system. An organization represents a group of users that belong to the same account. It allows for granular access control and management within the platform.
### **Key functionalities:**
* Create and manage users within the organization.
* Assign specific roles and permissions to users.
* Manage organization-specific settings and resources.
* Track user activity and data within the organization.
### **Relationships:**
* An organization belongs to one account (N:1).
* An organization can have many users (1:N).
* Users within an organization share access to specific resources and data based on their permissions.
**Additional Information:**
* You can find information on creating and managing organizations in the Organization Management API documentation: link.
* For details on user roles and permissions, refer to the User Management section in the API reference.
# Users
## **Overview**
This page outlines the Users concept in the Inabit system. A user represents an individual who has access to the platform and belongs to a specific organization. Each user has a unique identifier and associated profile information.
### **Key functionalities:**
* Access and use assigned resources and data within the organization.
* Perform specific actions based on assigned roles and permissions.
* Update personal profile information.
* Manage individual settings and preferences.
### **Relationships:**
* A user belongs to one organization (N:1).
* Users within the same organization may have different access levels and permissions.
**Additional Information:**
* You can find information on managing user accounts in the User Management API documentation: link.
* For details on available roles and permissions, refer to the User Management API documentation: link.
# inabit Wallet Types
See which wallet types are supported on our platform.
inabit provides a robust and secure wallet infrastructure designed to meet diverse needs for managing, transacting, and storing digital assets. Each wallet type serves a specific purpose and is tailored to different user profiles, ranging from businesses to developers and individual users. Below is a detailed breakdown of the wallet types we offer:
***
### **inabit Wallets**
The core offering of inabit, these wallets are designed for seamless management of digital assets within the inabit ecosystem.
#### **Key Features:**
* **Multi-Asset Support:** Manage a variety of cryptocurrencies across multiple blockchains.
* **User-Friendly Interface:** Accessible through the inabit platform, providing an intuitive experience for users of all skill levels.
* **Secure Storage:** Backed by industry-leading security protocols, including encryption and multi-signature (multi-sig) technology.
* **Gas Wallet Integration:** Includes an option to purchase and manage blockchain gas fees using a credit card for hassle-free transactions.
* **Recovery Options:** Built-in recovery tools to ensure assets remain accessible in case of technical or account issues.
#### **Use Cases:**
* Storing and managing personal or business digital assets.
* Performing blockchain transactions securely.
***
### **inabit**  **Wallets**
These wallets are purpose-built for developers and businesses who wish to integrate wallet functionality directly into their applications using the inabit API.
#### **Key Features:**
* **Customizable Workflows:** Full control over wallet creation, transaction management, and monitoring through API calls.
* **Secure API Authentication:** Uses API keys and secure authentication protocols to protect wallet operations.
* **High Scalability:** Ideal for businesses managing multiple wallets and transactions at scale.
* **Transaction Automation:** Automate processes like payroll in crypto, recurring payments, or bulk transactions.
#### **Use Cases:**
* Embedding crypto wallet functionality into fintech applications.
* Businesses needing bulk wallet creation and transaction execution.
***
### **Exchange Wallets**
Specifically tailored for companies managing assets on exchanges, these wallets are designed to simplify interactions with exchange platforms.
#### **Key Features:**
* **Exchange Integration:** Compatible with major cryptocurrency exchanges for seamless asset transfers.
* **Monitoring and Reporting:** Track incoming and outgoing transactions and maintain a clear record of balances and activity.
* **High-Speed Transfers:** Optimized for quick deposits and withdrawals between exchanges and inabit’s ecosystem.
* **Multi-Exchange Support:** Manage multiple exchange accounts from a single interface.
#### **Use Cases:**
* Traders and institutions managing assets across multiple exchanges.
* Businesses requiring swift liquidity management.
***
### **Web3 Wallets**
These wallets connect directly with decentralized applications (dApps) and smart contracts, empowering users in the Web3 ecosystem.
#### **Key Features:**
* **dApp Integration:** Securely connect and interact with decentralized finance (DeFi) platforms, NFT marketplaces, and more.
* **WalletConnect Support:** Integrated with WalletConnect, allowing users to connect their wallets to dApps effortlessly from their mobile or desktop devices.
* **Non-Custodial:** Users retain full control of their private keys and funds, ensuring decentralization and trustlessness.
* **Smart Contract Interaction:** Seamlessly execute transactions involving smart contracts.
#### **Use Cases:**
* Individuals and businesses engaging with DeFi protocols.
* Developers building Web3 applications requiring wallet connectivity.
***
### **Monitored Wallets**
These wallets are designed for businesses and organizations that require detailed transaction oversight and reporting.
#### **Key Features:**
* **Real-Time Monitoring:** Track all incoming and outgoing transactions in real-time.
* **Advanced Reporting:** Generate detailed transaction reports for accounting, compliance, or internal audits.
* **Policy Enforcement:** Enforce custom transaction policies, such as whitelisting addresses or setting spending limits.
* **Integrated Alerts:** Receive notifications for specific wallet activities (e.g., large transactions, low balances).
#### **Use Cases:**
* Compliance teams ensuring adherence to AML (Anti-Money Laundering) and other regulatory requirements.
* Organizations needing granular control over wallet activity and fund movement.
***
#### **Why Choose inabit Wallets?**
* **Security First:** All wallet types are protected by advanced security measures, including encryption, two-factor authentication (2FA), and optional multi-sig.
* **Scalability:** Flexible solutions for individuals, developers, and enterprises.
* **Seamless Integration:** Wallets integrate effortlessly with other inabit services, such as the inabit API and Gas Wallet.
* **Customizability:** Tailored options to meet specific use cases, from personal use to enterprise-grade requirements.
***
By offering a variety of wallet types, inabit ensures that every user—whether an individual, developer, or enterprise—can find a solution tailored to their needs. If you're ready to explore these wallets or need assistance selecting the right type, our support team is here to help!
# Wallets Policy Guide
## Overview
Creating strong policy rules is a vital step in maintaining control over your transaction outflows. Owner and admin can set the policies rules, such as whitelisting addresses to prevent unauthorized transactions and setting spending limits for both the entire wallet and individual transactions.
Only approvers are allowed to edit/change a wallet's policy. (both tiers & settings)
{% hint style="info" %}
#### Who's an Approver?
An approver is a platform user with signing permissions that successfully paired their device. Applicable approver roles: (signer, admin, owner)
{% endhint %}
## Wallet Policy Settings
Our governance layer which we call "Transaction Policy", is defined per wallet, meaning each wallet can have its own custom policy settings.
The organization owner and his admins are the ones allowed to edit/change a wallet's policy settings.
Do note that every change in a wallet's policy setting will require the owner's approval via the mobile application.
You can view the list of wallets and their policies in the Policy tab.
Clicking on a wallet from the list will open the tiers tab first by default, you can then switch to the "Wallet Settings" tab.

Currently, there are two settings that can be changed within a wallet's policy:
* Allowance to send funds exclusively to saved addresses that the user defines.
* Allowance to perform off-ramp transfers from the wallet.
### Set Whitelisted Addresses
This policy setting is selected by default and allows you to send a wallet's funds to specific addresses that are saved (whitelisted) within the dedicated whitelist addresses list.
You can add/remove saved addresses directly through the wallet policy settings interface, as well as decide if you'd like to disable this setting (by toggling off the button).
### Allow Off Ramp Transfers
This policy setting is also selected by default and defines wether the wallet's funds can be used for off ramp transfers or not.
{% hint style="info" %}
**Reminder** - Each change made on the wallet settings / policy tiers will require the account's owner mobile approval.
{% endhint %}
## Wallet Policy Tiers
Wallet policy tiers are essentially an advanced policy setting that can be enabled on a wallet to apply an additional layer of security to govern your wallets assets.
There are three fields you can set according to your liking in a policy tier:
1. Transaction amount range.
2. Dedicated transaction approvers.
3. Minimum amount of approvals. (Taken from the dedicated transaction approvers)
{% hint style="info" %}
Note that changing a wallet's policy tiers can only be done by a signer or above. (applicable approver - Signer/Admin/Owner).
In addition, any change on the policy will require the account's owner mobile approval.
{% endhint %}
### Default Policy Tier
The default policy tier is essentially the default transaction policy set upon creation of an inabit wallet. There's a difference between the default policy tier of a standard inabit wallet and an API wallet.
Here's a table explaining the differences:
| Wallet Type | Default Setting |
| -------------- | ------------------------------------------------------------------------------------------------ |
| Regular Wallet | Owner is the sole approver for any tx amount, and transacted only to whitelisted addresses. |
| API Wallet | API Signer is the sole approver for any tx amount, and transacted only to whitelisted addresses. |
Do note that the policy default tier cannot be removed, but can be changed. You can still decide on the approvers and the minimum required approvals of a policy rule.
#### Removing Policy Tiers
You can dispose of a previous tier by clicking on the trash icon on the right hand side of the tier -
## Approve Policy Changes
Once a change request has been made, the wallet's policy status will be changed to `Pending`.\
Afterwards the account owner will receive a mobile request.
Anyone can still view the policy settings and tiers of a wallet's policy that's pending approval by visiting the policy page and clicking on the wallet for its policy details.
You will notice that when a wallet's in `Pending` status, you will be able to review the changes that are waiting for an approval, as well as what's the current rule settings that are set, by switching through the toggle shown above.
The owner of the account can also view the changes and the current state of the wallet policy settings before approving on his/her mobile device:
If the owner rejected the changes, they will have the option to **undo** the rejection for a duration of 3 seconds after the rejection was made, on their mobile screen.
When a rejection was set, the rule changes back to `Live` status and the old settings of the wallet are still applicable. When approved -> the new changes take place.
{% hint style="info" %}
If you have any further questions regarding the wallet's policy (governance) feature, don't hesitate to contact us at: .
{% endhint %}
# Transaction Acceleration (CPFP)
Accelerating transactions in Bitcoin - How does it work and how inabit utilizes it?
### **Accelerating a Bitcoin Transaction**
Bitcoin transactions are typically processed by miners on the blockchain network, but sometimes they can take longer than expected to confirm. This delay can be frustrating, especially if you're in urgent need of completing a transaction. Fortunately, there are methods to accelerate your Bitcoin transaction, ensuring it gets confirmed faster. One such method is using **Child-Pays-for-Parent** (**CPFP**) technique.
### **What is CPFP (Child-Pays-for-Parent)?**
CPFP is a method used to prioritize the confirmation of a Bitcoin transaction by attaching a high fee to a related transaction. When a Bitcoin transaction is created, it often includes multiple inputs and outputs. If one of these transactions is unconfirmed due to a low fee, CPFP allows users to create a new transaction that spends the unconfirmed output of the original transaction.
Miners are incentivized to include both the original (parent) transaction and the new (child) transaction in the same block because the combined fees from both transactions are higher than those of individual transactions. This method is particularly useful when the sender of a transaction urgently needs it to be confirmed and is willing to pay a higher fee to expedite the process.
In summary, CPFP is a valuable tool for accelerating Bitcoin transactions, especially in situations where time is of the essence. By attaching a high fee to a related transaction, users can incentivize miners to prioritize the confirmation of both transactions, ensuring faster processing on the blockchain network.
### Accelerating Transactions in inabit
inabit utilizes the CPFP technique to accelerate Bitcoin transactions for its platform wallets. (inabit native wallets).
Everytime there's a Bitcoin transaction being broadcasted, you can accelerate the transaction through the transaction's page.
Accelerate transaction button
{% hint style="info" %}
Note that accelerating Bitcoin transactions will require an additional approval (For the accelerated transaction) as well as a charge higher fee than a regular Bitcoin transaction.
{% endhint %}
# UTXO Consolidation in inabit
Trusted Execution Environment (TEE)
## What is a UTXO?
**UTXO** stands for **Unspent Transaction Output**, and it's a fundamental concept in cryptocurrencies\
like Bitcoin.
Every transaction output in the Bitcoin blockchain that has not been spent yet is considered an unspent transaction output (UTXO). Each UTXO has an associated value (the amount of bitcoins) and a locking script, which specifies the conditions under which the bitcoins can be spent (usually by providing a public key or a script that corresponds to a private key).
## What is UTXO Consolidation?
If you regularly run operations on the Bitcoin blockchain, you will likely notice that the list of UTXOs in your wallets grows very quickly. This can be a major problem for retail-facing operations.
A process utilized by most companies is "consolidating UTXOs", or creating a transaction that will take many small unspent UTXOs and turn them into a **single larger UTXO (Consolidated UTXO)**.
## UTXO Consolidation in inabit
Every UTXO created from your transactions in Bitcoin or example, is saved in a database table with all UTXO relevant data (such as UTXO amount, is\_spent flag, etc.)
inabit developed a unique logic to calculate which UTXOs should be used to send a transaction in Bitcoin, instead of registering a new UTXO from a new transaction.
{% hint style="success" %}
By applying this logic, inabit takes another step forward towards optimizing Bitcoin transactions, making them much more efficient.
{% endhint %}
# Recovery and Backup
Discover what Disaster Recovery means in cryptocurrency and how it works in inabit
## What is Disaster Recovery?
In crypto, **Disaster Recovery** (**DR**) involves plans and procedures to restore and access digital assets after major disruptions (disasters) like cyberattacks or hardware failures. It includes backup systems, security measures, geographic redundancy, testing, communication plans, and regulatory compliance to ensure the safety and availability of assets in emergencies.
inabit - being a self-custody wallet solution, offers the option to recover digital assets from its wallets.
## Disaster Recovery in inabit
inabit offers an organization-based disaster recovery (DR).
In order to fully execute a truely self-custody recovery solution and ensuring the safety of the sensitive files (such as the encrypted wallet.dat file - the file in which all of the mnemonic seed phrases are held encrypted), inabit chose to partner with [Vaultinum](https://vaultinum.com/).
### About Vaultinum
**Vaultinum** is a trusted independent third party specialized in the protection and audit of digital assets.
Since 1976, they have enabled thousands of digital creators, digital businesses and tech investors secure their innovations by providing solutions to:
* Protect their Intellectual Property with IP Deposit and IP Audit.
* Ensure the continuity of their business activity with Software Escrow.
* Mitigate cyber and software risks through in-depth Technology Due Diligence (KYS-Know Your Software).
* Create an unforgeable proof of date and time of event with our Certified Time-stamping solution.
With secure servers based in Europe, ISO 27001 certification, and a unique double expertise in IT and legal, their clients benefit from the highest levels of security and protection for all their sensitive assets.
# Disaster Recovery Guide
inabit's Disaster Recovery guide using our Keys Recovery Tool
The following utility provides you with a simplified approach to generating a recovery package enabling you the ability to recovery your organization's keys in case of a disaster.
{% hint style="danger" %}
**WARNING:**
You should **never** perform this procedure unless a disaster event has occurred and you need to extract your private keys/mnemonic phrases. This procedure decrypts your encrypted keys and will revoke access to the organization!
{% endhint %}
In order to begin using inabit's recovery tool, you'll need to extract the following files:
1. **Encrypted Master Key**
2. **Encrypted Wallets Key**
3. **Encrypted Password** (for Wallets Key file)
## Recovery Flow Steps
The flow of recovering your all of your organization's mnemonics, is split between two parts:
1. Issuing disaster recovery through inabit's platform (as the account Owner) and downloading the recovery package from the mobile application.
2. Extracting the walletKey file from Vaultinum.
3. Decrypting the mnemonics file using all three files.
In this page we'll go over the recovery flow and all three steps above.
{% hint style="info" %}
**What's a "Backup Email"?**
A backup email, or what we also call "Recovery Email" is the owner's set email for disaster recovery. This is set by upgrading an organization's security level via the owner's settings.
Once there's a request to set a backup email, our support team is contacting the owner in order to define a specific email address to serve as "backup"/"recovery". (this email will receive the encrypted password file from Vaultinum) (See below for further).
{% endhint %}
## Step 1: Extract the Recovery Package
Let's begin by explaining the first step of your recovery - **Extracting the Recovery Package** for your organization:
* As the account owner, make sure you're set on the organization you wish to perform the DR in. Once you've confirmed you're on the right organization, go to your "Settings" tab at the bottom left of your screen.
* At the bottom of the "Settings" page, you'll find a red button mentioning: "Issue Disaster Recovery" - click on it and go through your user 2FA to confirm the action.
* Once you've issued the request, you'll receive a notification to your mobile device (inabit mobile app). You will need to approve the request in the app.
* After approving the request, the screen will display a **Download Recovery Package** button where you'll need to download the `recovery_package.zip` file to a secured location (wether if its your email, any folder you have on your mobile that's secured by your PIN/strong password, or you can also share the file to your desktop and save it on a secured location there - it's your call.
* Make sure to unzip the file in order to fetch all three files from the package:
* Encrypted master key, encrypted wallets key, a disaster recovery guide pdf.
> :white\_check\_mark: Great news! You've finished **step** **1** of your recovery flow! Move on to the next step below.
## Step 2: Extract Encrypted Password from Vaultinum
Step two of the recovery flow is explained as follows:
* The account owner requests to extract the walletKey from Vaultinum,
* Vaultinum then initiates a KYC verification that the owner (individual) must complete.
* Once the verification process is completed, Vaultinum sends the encrypted password file to the owner's recovery/backup email.
> :white\_check\_mark: Great news! You've finished **step** **2** of your recovery flow! Move on to the next step below.
## Step 3: Decrypt Mnemonics File Using All Files
### Prerequisite Checklist
Here's the full checklist of prerequisites you'll need before you can use our Python-based\
[Keys Recovery Tool](https://github.com/In-a-bit/keys-recovery-tool).
* [x] The owner issued Disaster Recovery in their platform settings. (for the specific organization)
* [x] Owner approved the DR request on their mobile app.
* [x] Owner downloaded the `recovery_package.zip` file from the mobile to a secured location and unzipped the package.
* [x] Owner contacts Vaultinum and successfully goes through a KYC process.
* [x] Owner recovers the Wallet Keys encrypted password file from his backup email.
> Done with the above? You're ready to use our python-based keys recovery tool! :heavy\_check\_mark:
### Using The Tool to Decrypt The Mnemonics:
inabit developed a self-service recovery tool to recovery your wallets' keys (mnemonic seed phrases).
The tool we provide is Python-based Keys Recovery Tool in our GitHub repository. (It will require basic knowledge of how to run code in Python)
Instructions on how to use the tool are provided in the repository's `README.md` file. The repository is public and can be viewed by anyone.
If instructions are still unclear, feel free to reach out to us for help: .
> #### :key: [inabit Keys Recovery Tool](https://github.com/In-a-bit/keys-recovery-tool)
# \[Name] x inabit - Integration Guide
Guide describing how inabit's API Infrastructure is utilized by Pragmatic Solutions
## Overview
This guide outlines the end-to-end integration flow between **Pragmatic Solutions** and **inabit**, enabling seamless crypto payment operations for gaming operators through a jointly managed setup.
The integration is designed to provide operators with a compliant, secure, and scalable infrastructure for managing crypto transactions and treasury operations using inabit's infrastructure, paired with Pragmatic's front-end gaming platform and back-office systems.
Operators onboard through inabit and gain access to a streamlined API-based system where **Pragmatic Solutions acts as the technical integrator**, managing API credentials, infrastructure components (like the inabit Approver Docker), and widget configurations on behalf of the operator.
#### Key Highlights of the Integration:
* **Dual API setup** under the operator’s inabit account to separate admin and signing roles.
* **Flexible deployment** of inabit’s Approver Docker by either Pragmatic or the operator.
* **Mobile app pairing flow** to securely authorize API access and infrastructure linkage.
* **Customizable widgets** set up and maintained by Pragmatic to reflect operator preferences (coins, sweep frequency, expiry, etc.).
* **Live data sync** via webhook and pull APIs for real-time balance updates and transaction visibility.
This integration ensures that the operator benefits from **full automation, visibility, and control**, while Pragmatic handles the complexity of configuration and ongoing updates, offering a plug-and-play experience for crypto enablement in gaming.
### API Introduction
Our API is based on **GraphQL**, allowing clients to query exactly the data they need with maximum flexibility and efficiency. This enables streamlined integration and reduces over-fetching or under-fetching of data.
{% hint style="info" %}
If you'd like to learn more, you're welcome to refer [here](/api-reference/introduction-to-graphql/what-is-graphql) for more information.
{% endhint %}
### Additional Reference
We highly advise taking a look at the following pages as you start developing:
* [API Login Access / Authentication](/api-reference/develop-with-inabit-api/getting-started/authentication)
* [Remote & Automatic Approvals (Docker Configuration)](broken://spaces/fUjQQn0pomEUaPpV3fnI/pages/ccXJuwRwg2gczKSBaHay)
* [Automate Signing Transactions](broken://spaces/fUjQQn0pomEUaPpV3fnI/pages/0VYX2RSRtyBlvXJfXQqb)
* [Supported Blockchains & Assets](/what-we-support/blockchains)
## Technical Architecture: Operator Onboarding
### Operator Onboarding Flow Explained
When a new Operator is onboarded to inabit, the process begins with registration and device pairing using the inabit mobile app.
Once the Operator is registered and paired:
* **inabit automatically generates two API users** under the Operator’s account:
* **API Signer** (used by Pragmatic/Operator)
* **API Admin** (used by Pragmatic)
The **Operator owner** then receives an approval request on their **inabit mobile app** and must approve the newly created API users.
After the API users are approved:
* **inabit securely shares the API credentials with Pragmatic Solutions**, enabling the next steps in the onboarding process.
Next, **Pragmatic installs the inabit Approver Docker** and pairs the **API Signer**.
> Note: The Operator can choose to host the Docker either on their own servers or let Pragmatic manage it.
To complete the pairing process:
* The **Operator enters a pairing code** into their inabit mobile app that is received from Pragmatic (via direct communication).
Now that pairing is done:
* **Pragmatic opens a Master Wallet** with the required blockchains.\
(This is an inabit wallet used as a central aggregator for the Operator)
Pragmatic then proceeds to **configure the inabit POS widget/s** based on the Operator’s requirements, including:
* Supported coins
* Sweeping frequency
* Expiration time
* And more.
After configuration, inabit supplies the implementation guide, and Pragmatic integrates the widget into the Operator’s platform using the provided code or script.
> #### Now that the flow is clear, let's review the implementation process step by step! :sparkles:
### 1. Operator Onboards to inabit
The Operator begins by creating an account on the inabit platform.
#### Step-by-Step:
1. **As an Operator, visit the onboarding URL:**\
2. On the **Plan Selection** screen, select **Enterprise**.\
This ensures the Operator is granted access to advanced platform features and API capabilities required for the Wallet as a Service integration.
3. Complete **Device Pairing**:\
As the final onboarding step, the Operator must pair their mobile device with the inabit platform. This process is critical for enabling **self-custody**—meaning the Operator remains the sole custodian of their customers' funds.
The paired device acts as a cryptographic key manager and approval layer, ensuring secure signing of all transactions and operations on the platform.
{% hint style="info" %}
#### [How to Perform Device Pairing](/guides/devices-pairing)
{% endhint %}
### 2. inabit Enables API Access
Inabit allowing access its API for Pragmatic by generating 2 API users under the operator's account.
1. **API Signer**:
1. This user is created for the sole purpose of serving as the "Approver" to sign transactions using inabit's "Approvals Docker".
2. **API Admin**:
1. In a nutshell, this user serves essentially as the API Key/Access for inabit's API endpoints.
Note that the owner operator will need to approve the creation of these users on their inabit mobile app.
{% hint style="info" %}
Learn more about API User Roles [here](https://docs.inabit.com/guides/user-roles-in-inabit#api-user-roles).
{% endhint %}
### 3. inabit Sends Access Tokens to Pragmatic
After the API users are approved:
* **inabit shares the API credentials with Pragmatic Solutions**, enabling the next steps in the onboarding process.
* Sharing the access tokens of both users will occur only on a secured channel of Pragmatic's preference.
### 4. Pragmatic Implements inabit Remove Approver App
In order to automate signing transactions on behalf of the operator, Pragmatic needs to install inabit's Remote Approver App and pair the API Signer user.
Please refer to the full guide explaining the Docker's setup and configuration here:
> ### :construction: [Remote Approver App Setup](https://docs.inabit.com/api-reference/remote-approver-app/setup-and-configuration)
### 5. Pragmatic Sends Pairing Code to the Operator
Once the docker is up and running, the pairing process will commence as follows:
1. Docker issues a **Pairing Code** in the docker logs.
```bash
{
level: 'info',
message: 'Approver needs to be paired, starts a pairing process...',
metadata: { timestamp: '2024-02-21T08:54:16.071Z' },
timestamp: '2024-02-21T08:54:16.071Z'
}
{
level: 'info',
message: 'Getting a pairing token.',
metadata: { timestamp: '2024-02-21T08:54:16.075Z' },
timestamp: '2024-02-21T08:54:16.075Z'
}
{
level: 'info',
message: 'Getting a pairing code',
metadata: { timestamp: '2024-02-21T08:54:17.555Z' },
timestamp: '2024-02-21T08:54:17.555Z'
}
{
level: 'info',
message: 'Pairing code: c754ce6d209dcc1b6f2312903ef31f0ac297b63e5dead29a6b877ecad8c77ada',
metadata: { timestamp: '2024-02-21T08:54:17.560Z' },
timestamp: '2024-02-21T08:54:17.560Z'
}
```
1. Docker proceeds to send an approval request to the owner to authorize the approver app (just like any other user).
2. Pragmatic sends the **Pairing Code** to the operator via secured channel of choice.
3. Operator inserts code on the mobile app to complete the pairing process.
### 6. Pragmatic Creates a Master Wallet in Operator's inabit Account
Once device pairing is completed, Pragmatic proceeds to create a **Master Wallet** for the Operator through the inabit's API
#### What is a Master Wallet?
The Master Wallet serves as the **central aggregator** for all crypto transactions and funds flow. It is a secure, self-custody wallet fully accessible by the Operator.
**Supported Blockchains**
During wallet creation, Pragmatic selects the required **blockchains** (e.g., Ethereum, Tron, Polygon) that the Operator will support for their clients. Each blockchain comes with its own address and supports its respective tokens (e.g., USDT on Tron, ETH on Ethereum).
**How to Create a Master Wallet?**
The `CreateWalletWithInabit` mutation allows API admins to create a new inabit wallet (that is accessible in the platform's interface, unlike API wallets) with a designated address for a given asset & blockchain.
> Remember to authenticate to call our GraphQL API using an access token (bearer) with your **API** **Admin** credentials. (If you're not sure how, refer to [Authentication](https://docs.inabit.com/api-reference/develop-with-inabit-api/getting-started/authentication))
```
mutation CreateWalletWithInabit($data: WalletCreateWithInabitInput!) {
  createWalletWithInabit(data: $data) {
    id
    name
  }
}
```
#### **Headers**
| Name | Value |
| ------------- | ------------------ |
| Content-Type | `application/json` |
| Authorization | `Bearer ` |
#### **Body (**WalletCreateWithInabitInput object)
| Name | Type | Description |
| ------------------------------------------------ | ------ | -------------------------------- |
| name\* | string | Name of the wallet |
| organizationId\* | string | ID of the organization in inabit |
Example body:
```graphql
{
"data": {
"name": "My Inabit Wallet",
"organization": {
"id": "clu6oj0kg0004r4ub98guo82u"
}
}
}
```
#### Response
Return values:
| Name | Type | Description |
| ---- | ------ | ------------------- |
| id | String | Created Wallet ID |
| name | String | Created Wallet Name |
{% tabs %}
{% tab title="🟢 Success" %}
```graphql
{
"data": {
"createWalletWithInabit": {
"id": "clvw5p0oj000er47qhe3atv9d",
"name": "My Inabit Wallet",
}
}
}
```
{% endtab %}
{% tab title="🔴 Failure" %}
```graphql
{
"error": "Invalid request"
}
```
{% endtab %}
{% endtabs %}
In the mutation's response, you will receive the created API wallet ID including the associated blockchain address.
#### Try it out!
{% embed url="" %}
### 7. Pragmatic Creates & Configures Widgets
### Widget Creation
Pragmatic will create & edit new widgets via a dedicated endpoint that inabit will provide them upon integration kickoff.
### Widget Configuration
#### **Functionality Settings:**
Pragmatic customizes the inabit POS widget based on the Operator’s specific requirements.
inabit offers **robust, per-widget configuration options** that allow fine-tuning of how each widget behaves. Key parameters include:
* **Supported Coins** – Define which cryptocurrencies the widget will accept.
* **Deposit Amount** – This can either be:
* **Predefined**: The widget displays a specific amount to be deposited by the end-customer.
* **Flexible**: The widget does not enforce a specific deposit amount, allowing users to send any amount to the assigned address.\
In this mode, the deposit address remains the same for that customer or session, and **any funds received at that address will be credited** accordingly.
* **Sweeping Frequency** – Set how often received funds are automatically moved to the Master Wallet.
* **Expiration Time** – Configure the time limit for each payment request to remain valid.
* **Blockchain Confirmation** - Configure the required amount of blockchain confirmations per chain.
These and other advanced options allow for flexible and secure integration into any existing flow.
> 👉 For the full list of available settings and best practices, refer to:
>
> * [Creating Widgets Guide](https://docs.inabit.com/inabit-terminal/terminal-guide/creating-widgets)
> * [Advanced Widget Settings](https://docs.inabit.com/inabit-terminal/terminal-guide/creating-widgets/advanced-settings)
#### Customizing The Widget Interface/UX
* By default, you can change the following settings on the widget:
* **Widget Name**
* A unique name to identify your widget (e.g., *Basic Plan Payment*).
* **Description (Optional)**
* A short explanation of what this widget is used for.
* **Merchant Name (Optional)**
* Name of the merchant displayed to the end user (if applicable).
* In case you require additional changes to the styling of the widgets interface (such as adding logos, changing fonts, etc.), you can simply **overwrite** the CSS of the widget.
Note - You/the operator can also decide to let the end-user select an asset & blockchain of their choice yourself:
The operator also has a chance to look at the widget in a preview mode to see how it will look like:
In the example widget preview:
* Widget Name = "Payment"
* Description = "Transfer funds now"
* Merchant Name = (isn't visible to customer, can be left empty)
* Asset = USDT
* Blockchain/Network = Tron (TRC-20)
### 8. Pragmatic Installs Widgets on the Operator's Platform
#### Instructions for Widget Implementation
To implement the widget on the operator's site, please adhere to the following instructions.
**Step 1: Implement Server-Side Terminal Call**
Example:
```
curl --location https://api-prod.inabit.biz/api/v1/purchase
--header Content-Type: application/json
--Authorization: Bearer 3a162afed1d8501f47bdc3f63ea159e315d6da81794c92c57dfac9b0c5e51889
data-row-{
title: ,
subTitle: ,
siteName: ,
purchaseIdentifier: ,
fiatAmount: ,
fiatCurrency:
}
```
**API Key:**
Can be provided via the API/Terminal interface.
**Step 2: Add Script Tag to page Header**
Add a script tag to your page header.
Example:
```javascript
```
**Step 3: Call open.widget Function**
Call `openwidget` function with purchase id (deposit id), should open in popup After the customer clicks on the button (buy with crypto for example )
```markup
// purchaseId is the id from response of previous step, and openInNewWindow is a
boolean that determines if the widget should be opened in a new window or not.
window.openWidget(purchaseId, openInNewWindow);
```
{% hint style="info" %}
Need Help? Feel free to [reach out to us ](mailto:support@inabit.com)if you encounter any issues during the widget implementation process!
{% endhint %}
The operator can also retrieve the above information themselves by accessing the terminal through their inabit account by logging into our platform.
### Deposit Management (Webhooks) :bell:
#### How Will Pragmatic Stay Up-to-Date on Incoming Deposits?
In the **iGaming industry**, it's common practice to **lock funds once a deposit transaction is detected on-chain**, even before it has been fully confirmed. This provides a better user experience by showing a successful deposit immediately—while still protecting the operator by making the funds **non-withdrawable** until sufficient blockchain confirmations are received.
inabit's system fully supports this flow: once a transaction is detected, it updates the widget with a pending confirmation status, allowing the platform to reflect the deposit in the UI while ensuring risk mitigation through backend-level enforcement of fund availability only after confirmation.
To keep Pragmatic in sync, **inabit sends webhook callbacks** for each deposit event and any change in deposit status, enabling real-time tracking of user payments and status-based logic within Pragmatic’s environment.
**List of potential Deposit Statuses:**
* **`Initiated`** – The deposit request has been created, but no blockchain deposit address has been assigned yet.
* **`Allocated`** – A unique blockchain address has been successfully generated and linked to the deposit.
* **`Undercharge`** – The customer deposited **less** than the expected amount, but the deposit window is still active, allowing them to complete the payment.
* **`UnderchargeExpired`** – The customer deposited less than the required amount, **and the payment window has expired**, meaning the transaction cannot be completed.
* **`Confirming`** – The full amount has been received, and the system is now waiting for the required number of blockchain confirmations to mark the deposit as successful.
* **`Unconfirmed`** – A deposit has been detected on the blockchain **but has not yet been included in a block** (only relevant for UTXO-based networks such as Bitcoin).
* **`Overcharge`** – The customer deposited **more** than the required amount. The deposit will still be processed, and the system may handle the excess according to predefined rules (e.g., ignore, credit, or refund).
* **`Expired`** – The customer did not complete the payment within the allowed time window, and the transaction is no longer valid.
* **`Completed`** – The required number of blockchain confirmations has been received, and the deposit is finalized successfully.
```json
Get deposit by UUID for merchant
{{base_url}}/v1/merchant/purchase/{{purchaseId}}
{
"data": {
"id": "057590e2-002d-4c3b-b646-6a9fbcda89b0",
"title": "Payment Title X",
"subTitle": "The payment description XXX",
"siteName": "Merchant Site",
"asset": "TRX",
"blockchain": "tron",
"address": "TSRgRsSagJkeTza5Ei2bamDHp3sscbWhud",
"transactions": [
"302ae537cde6d88bafc5f84f8406ffab48f973bd31cce40de15b66d9adcfb00a"
],
"fiatAmount": 2.5,
"fiatCurrency": "USD",
"currentDate": "2025-05-02T10:52:02.871Z",
"confirmationAmount": 20,
"amount": 10.174252,
"plannedAmount": 10.174252,
"baseCurrency": "USD",
"baseCurrencyAmount": 2.499494,
"plannedBaseCurrencyAmount": 2.499979,
"creationDate": "2025-04-29T15:28:48.742Z",
"allocationDate": "2025-04-29T15:29:07.974Z",
"expirationDate": "2025-04-29T15:39:07.974Z",
"status": "Completed",
"acceptPartialPayment": true,
"widgetName": "MyFirstWidget9",
"sweepingStatus": "TBD",
"sweepingFee": "TBD",
"merchantName": "Merchant #1",
"redirectUrl": "https://dev-merchant.aybabtu.xyz/",
"widgetId": "8157eb9f-0ace-45ae-b8c9-7953637896cf",
"purchaseIdentifier": "customer@gmail.com"
}
}
}
```
### Operator Withdrawal Process
#### How Are Withdrawals Handled?
Withdrawals are processed **centrally from the master wallet**, which acts as the secure treasury account for each operator. This wallet receives funds via **automatic sweeps** from all the individual deposit wallets (API wallets) that are generated through inabit’s POS widgets.
Here's How It Works:
1. **Deposit Collection & Sweeping**\
Each time a user deposits via a POS widget, a unique blockchain address (API wallet) is created. Once a deposit is confirmed, **inabit automatically sweeps** the funds from these individual wallets to the operator’s [**master wallet**](#id-6.-pragmatic-creates-a-master-wallet-in-operators-inabit-account) at predefined intervals (e.g., hourly, daily).
{% hint style="info" %}
Refer to our documentation to learn more about "[Gas Fees](/inabit-terminal/terminal-guide/gas-features)" and "[Sweeping](/inabit-terminal/terminal-guide/gas-features/gas-sweeping)".
{% endhint %}
1. **Withdrawal Execution**\
Once the funds are consolidated in the master wallet, withdrawals can be initiated.\
Pragmatic or the operator can trigger a withdrawal using inabit’s APIs.\
\
**Creating a Withdrawal via API**
Initiate a mutation to create an assets transfer request to send for approval from the master wallet.
```graphql
mutation CreateWithdrawal($data: WithdrawalCreateInput!) {
createWithdrawal(data: $data) {
id
}
}
```
**Headers**
| Name | Value |
| ------------- | ------------------ |
| Content-Type | `application/json` |
| Authorization | `Bearer ` |
**Body (****WithdrawalCreateInput****) object**
| Name | Type | Description |
| ----------------------------------------------------- | ------- | ------------------------------------------------------------ |
| id\* | String | Master Wallet ID |
| id\* (financialAsset) | String | Asset ID |
| address\* | String | Destination Address (To) |
| amount\* | Integer | Transfer amount |
| id\* (blockchain) | String | Blockchain ID |
| note | String | Transaction Note |
| priority | String |
Transaction Priority
(Slow, medium, fast, etc.)
|
\
Example body:
```graphql
{
"data": {
"wallet": {
"id": "clol7o576002oaz011mmtnvru"
},
"financialAsset": {
"id": "clefn78gv011olc6rcwtt0wel"
},
"address": "0x7582f3483116105e0b7845ac1a0df5eb0c8cd062",
"amount": 5,
"blockchain": {
"id": "clefn78em00mslc6r3lzf3h5a"
},
"note": "",
"priority": "Medium"
}
}
```
### Response
Return values:
| Name | Type | Description |
| ---- | ------ | ------------- |
| id | String | Withdrawal ID |
2. **Real-Time Visibility**\
inabit provides real-time status updates on withdrawal requests, including initiation, signing, blockchain confirmation, and completion, allowing Pragmatic to reflect up-to-date information within its platform and back office.
{% hint style="info" %}
To find out how to subscribe to Withdrawal Webhooks, please visit our [Webhooks](/api-reference/remote-approver-app/webhooks) page.
{% endhint %}
3. **Security and Policy**\
All outgoing transactions undergo **approval logic** (via the Approver Docker and mobile app).\
Only authorized signers (e.g., the API Signer configured during onboarding) can approve withdrawals.
# FinchTrade x inabit - Integration Guide
Integrating Co-custodial WaaS solution for FinchTrade AG Use Case
### **Overview**
This guide details the end-to-end integration flow between **FinchTrade** and **inabit**, enabling a **co-custodial wallet-as-a-service (WaaS)** setup for FinchTrade’s corporate clients.
This entire procedure is a **one-time setup per corporate client**, establishing a permanent, auditable link between the client’s inabit account and FinchTrade’s integration environment.
***
### **Technical Architecture**
The co-custodial setup involves three main entities, as illustrated in the diagram:
1. **Customer Owner Account Onboarding**
* The client creates an inabit account and pairs their mobile approver app.
* This mobile device becomes the root of trust for all subsequent authorizations.
2. **API Admin User (FinchTrade)**
* Created by inabit under the client’s organization.
* Provides FinchTrade programmatic access to create wallets, view balances, execute withdrawal requests, and more.
* This user has no custody or signing authority; all actions require client approval or occur under predefined policies.
3. **Remote Approver App (Docker)**
* Deployed **on the client’s premises**, ensuring full control and operational independence.
* Handles signing and transaction approval automatically, based on rules defined and authorized by the client.
* The Docker is paired directly with the client’s (owner) mobile app using a pairing code upon docker pairing process (see reference [here](#step-3-deploy-remote-approver-app-docker)), creating a secure, closed approval loop.
***
### **Integration Flow**
#### **Step 1: Client Account Onboarding**
The client begins by creating an enterprise account on the inabit platform using FinchTrade’s dedicated onboarding link:
**URL:**\
`https://use.inabit.com/create_account?channel=finchtrade`
The client must select "Skip to Platform" button on the top right, unlocking the advanced custody, API, and approval features.
**Device Pairing (Mandatory)**\
At the end of registration, the client install inabit's mobile approvals application on their device and beings the pairing process to their inabit account.
#### Full steps:
***
#### **Step 2: API Admin User Creation**
Once the account is active, inabit generates a dedicated **API Admin User** for FinchTrade under the client’s organization.
**Process:**
1. inabit creates the FinchTrade API Admin user.
2. The client receives a **mobile approval request** to confirm the creation of the user.
3. The client approves it through their inabit mobile app.
After approval, FinchTrade receives an API login token that allows integration into the client’s account for executing queries and mutations.
> **Important:** FinchTrade’s API Admin user has **read and trigger capabilities only**.\
> It cannot approve or sign transactions, ensuring the client retains full control.
***
#### **Step 3: Deploy Remote Approver App (Docker)**
To automate transaction approvals while maintaining full custody, the client must deploy the **inabit Remote Approver App** within their own infrastructure.
**Installation**
* The Approver Docker is installed on the client’s secure server or private cloud.
* The Docker connects directly to inabit’s network through encrypted endpoints.
**Pairing Flow**
1. The Docker starts and generates a **pairing code**.
2. The client opens their **inabit mobile app** and enters this pairing code.
3. Once approved, the Docker is officially linked to the client’s account as an **approver**.
The pairing process ensures:
* Only the client can authorize the Docker to act as an approver.
* FinchTrade has **no access** to this pairing or signing flow.
**Recovery and Backup**
In case of server migration or disaster recovery, the client can deploy a new Docker and re-pair it using their mobile app, maintaining full continuity of control.
***
#### **Step 4: Connect FinchTrade Integration**
After the Approver Docker is paired, FinchTrade completes API integration using the Admin credentials.\
This connection allows FinchTrade to automate permissible functions under client-defined policies.
Examples of permitted actions:
* Request wallet balances and transaction history.
* Trigger transfer requests (pending client or Docker approval).
* Query active wallets, assets, and trading limits.
Example API call (through FinchTrade’s API Admin):
```graphql
query GetWallets {
wallets {
id
name
blockchain
balance {
asset
amount
}
}
}
```
This call is **read-only** and complies with the client’s API permission scope.
***
#### **Step 5: Final Authorization**
Once FinchTrade’s access is verified:
* The client validates all connected entities (mobile device, Docker, API Admin) through their inabit dashboard.
* The system becomes fully operational under a co-custodial structure.
> FinchTrade operates as a **non-mandatory approver**:\
> transactions can proceed even if FinchTrade is unavailable, ensuring client autonomy and uninterrupted control.
***
### **Security & Custody Model**
| Layer | Responsibility | Hosted By |
| -------------------------------- | -------------------------------------- | ---------- |
| **Mobile Approver App** | Primary cryptographic approval device | Client |
| **Remote Approver App (Docker)** | Automated on-premise signing agent | Client |
| **API Admin User** | Non-custodial, administrative API link | FinchTrade |
| **Account & Policy Management** | Wallet creation, permissions, recovery | Client |
Security Features:
* All approvals originate from the client’s mobile device.
* FinchTrade cannot initiate or finalize transfers without policy approval.
* Multi-factor control between Docker + mobile ensures tamper resistance.
* Audit logs record every event (pairing, login, signing, API access).
***
### **One-Time Setup Summary**
| Stage | Description | Approval |
| ----- | ------------------------------------------------------------------------------------ | -------------------------- |
| 1 | Client creates inabit account and pairs mobile app | Client only |
| 2 | inabit adds FinchTrade API Admin user and sends token after client approves creation | Client approval required |
| 3 | Client installs & pairs Approver Docker | Client only |
| 4 | FinchTrade connects via API | Client token authorization |
| 5 | Final confirmation & operational launch | Client approval |
Once complete, this setup remains persistent and does not require re-pairing unless the client intentionally resets their environment.
# Payouts.com x inabit - Integration Guide
Guide describing how inabit will be utilized by Payouts.com for its payouts flow
## Overview
This guide outlines the end-to-end integration flow between **Pragmatic Solutions** and **inabit**, enabling seamless crypto payment operations for gaming operators through a jointly managed setup.
The integration is designed to provide operators with a compliant, secure, and scalable infrastructure for managing crypto transactions and treasury operations using inabit's infrastructure, paired with Pragmatic's front-end gaming platform and back-office systems.
Operators onboard through inabit and gain access to a streamlined API-based system where **Pragmatic Solutions acts as the technical integrator**, managing API credentials, infrastructure components (like the inabit Approver Docker), and widget configurations on behalf of the operator.
#### Key Highlights of the Integration:
* **Dual API setup** under the operator’s inabit account to separate admin and signing roles.
* **Flexible deployment** of inabit’s Approver Docker by either Pragmatic or the operator.
* **Mobile app pairing flow** to securely authorize API access and infrastructure linkage.
* **Customizable widgets** set up and maintained by Pragmatic to reflect operator preferences (coins, sweep frequency, expiry, etc.).
* **Live data sync** via webhook and pull APIs for real-time balance updates and transaction visibility.
This integration ensures that the operator benefits from **full automation, visibility, and control**, while Pragmatic handles the complexity of configuration and ongoing updates, offering a plug-and-play experience for crypto enablement in gaming.
### API Introduction
Our API is based on **GraphQL**, allowing clients to query exactly the data they need with maximum flexibility and efficiency. This enables streamlined integration and reduces over-fetching or under-fetching of data.
{% hint style="info" %}
If you'd like to learn more, you're welcome to refer [here](/api-reference/introduction-to-graphql/what-is-graphql) for more information.
{% endhint %}
### Additional Reference
We highly advise taking a look at the following pages as you start developing:
* [API Login Access / Authentication](/api-reference/develop-with-inabit-api/getting-started/authentication)
* [Remote & Automatic Approvals (Docker Configuration)](broken://spaces/fUjQQn0pomEUaPpV3fnI/pages/ccXJuwRwg2gczKSBaHay)
* [Automate Signing Transactions](broken://spaces/fUjQQn0pomEUaPpV3fnI/pages/0VYX2RSRtyBlvXJfXQqb)
* [Supported Blockchains & Assets](/what-we-support/blockchains)
## Technical Architecture: Complete Money Flow
PICTURE HERE
### Money Flow Explained
#### 1. Operator Sends Fiat to Payouts.com
Payouts.com receives fiat from the operator.
#### 2. Payouts.com Sends Crypto to Operator's Wallet
Using inabit's API, Payouts.com initiates a transfer from its **Master Wallet** to the **operator's associated inabit crypto wallet**.
The Operator’s inabit wallet is used as an intermediate hop, this way funds can be routed through it for accounting purposes.
#### 3. Payouts are Sent to Customers
Payouts.com initiates payouts (withdrawals) from the operator's associated inabit wallet on behalf of the operator, to the end-customer's crypto wallet.
#### Now that the flow is clear, let's review the implementation process step by step! :sparkles:
#### 4. Rebalancing
Per need basis, Payouts.com can use inabit’s **Crypto Swap** feature to rebalance between USDT, USDC, BTC or any other cryptocurrencies within their operational organization.
## Step By Step: Implementation
### Step 1: Payouts.com onboards to inabit
The first step for this integration is for payouts.com to onboard to inabit:
* Please visit the onboarding URL and create an account here:\
* On the **Plan** **Selection** screen, select **Enterprise**.\
This ensures that the account is granted access to all advanced platform features and API capabilities required for the integration.
* Complete **Devices Pairing**:\
As the final onboarding step, the Operator must pair their mobile device with the inabit platform. This process is critical for enabling **self-custody**—meaning the Operator remains the sole custodian of their customers' funds.\
The paired device acts as a cryptographic key manager and approval layer, ensuring secure signing of all transactions and operations on the platform.
{% hint style="info" %}
[How to Perform Device Pairing](/guides/devices-pairing)
{% endhint %}
### Step 2: inabit Enables API Access
Upon payouts.com's onboarding to inabit, the process begins with registration and device pairing using the inabit mobile app.
Once the account owner is registered and paired:
* **inabit generates two API users** under the account:
* **API Signer**
* **API Admin**
The **Payouts.com Account Owner** user then receives an approval request on their **inabit mobile app** and must approve the newly created API users.
After the API users are approved:
* **inabit securely shares the API credentials with Payouts.com**, enabling the next steps in the onboarding process. *(through a secured channel of choice like Slack/Telegram/etc.)*
Now Payouts.com can authenticate to inabit's GraphQL API and generate access tokens!
### Step 3: Implement Approvals Docker App
In order to automate signing transactions, Payouts.com needs to install inabit's Remote Approver App and pair the API Signer user.
Please refer to the full guide explaining the Docker's setup and configuration here:
> ### [Remote Approver App Setup](https://docs.inabit.com/api-reference/remote-approver-app/setup-and-configuration)
Once the docker is up and running, the pairing process will commence as follows:
1. The docker issues a Pairing Code in the docker logs.
```bash
{
level: 'info',
message: 'Approver needs to be paired, starts a pairing process...',
metadata: { timestamp: '2024-02-21T08:54:16.071Z' },
timestamp: '2024-02-21T08:54:16.071Z'
}
{
level: 'info',
message: 'Getting a pairing token.',
metadata: { timestamp: '2024-02-21T08:54:16.075Z' },
timestamp: '2024-02-21T08:54:16.075Z'
}
{
level: 'info',
message: 'Getting a pairing code',
metadata: { timestamp: '2024-02-21T08:54:17.555Z' },
timestamp: '2024-02-21T08:54:17.555Z'
}
{
level: 'info',
message: 'Pairing code: c754ce6d209dcc1b6f2312903ef31f0ac297b63e5dead29a6b877ecad8c77ada',
metadata: { timestamp: '2024-02-21T08:54:17.560Z' },
timestamp: '2024-02-21T08:54:17.560Z'
}
```
2. The docker proceeds to send an approval request to the owner to authorize the approver app (just like any other user).
3. Payouts.com will then send the **Pairing Code** from the docker logs to the account owner through a secure channel of choice.
4. Owner **inserts the pairing code on their inabit mobile app** to complete the pairing process.\

Once all the above is done, the pairing is complete. :heavy\_check\_mark:
To complete the pairing process:
* The account owner **enters a pairing code** into their inabit mobile app that is received from inabit (via direct communication).
Now that pairing is done:
* **Payouts.com opens a Master Wallet** with the required blockchains.\
(This is an inabit wallet used as a central aggregator for the crypto funds received)
### Step 4: Payouts.com Creates a Master Wallet
In this step, Payouts.com proceeds to create an inabit wallet under the name "Master Wallet".
**What is a Master Wallet?**
The Master Wallet serves as the **central aggregator** for all crypto transactions and funds flow. It is a secure, self-custody wallet fully accessible through the interface.
**Supported Blockchains**
During wallet creation, Payouts.com selects the required **blockchains** (e.g., Ethereum, Tron, Polygon). Each blockchain comes with its own address and supports its respective tokens (e.g., USDT on Tron, ETH on Ethereum).
**How to Create a Master Wallet?**
Creating one can be done via the interface or API, which ever preferred.
**For UI**, Head over to the "Wallets page:
* Click on "Add New" button.
* Select "inabit Wallet".
* Name the wallet "Master Wallet"
* Select the supported blockchains required from the list shown.
* Wallet Created!
**For API**, use the `CreateWalletWithInabit` mutation allows API admins to create a new inabit wallet (that is accessible in the platform's interface, unlike API wallets) with a designated address for a given asset & blockchain.
> Remember to authenticate to call our GraphQL API using an access token (bearer) with your **API** **Admin** credentials. (If you're not sure how, refer to [Authentication](https://docs.inabit.com/api-reference/develop-with-inabit-api/getting-started/authentication))
mutation CreateWalletWithInabit($data: WalletCreateWithInabitInput!) {
createWalletWithInabit(data: $data) {
id
name
}
}
**Headers**
| Name | Value |
| ------------- | ------------------ |
| Content-Type | `application/json` |
| Authorization | `Bearer ` |
#### **Body (**WalletCreateWithInabitInput object)
| Name | Type | Description |
| ------------------------------------------------ | ------ | -------------------------------- |
| name\* | string | Name of the wallet |
| organizationId\* | string | ID of the organization in inabit |
Example body:
```graphql
{
"data": {
"name": "Master Wallet",
"organization": {
"id": "clu6oj0kg0004r4ub98guo82j"
}
}
}
```
#### Response
Return values:
| Name | Type | Description |
| ---- | ------ | ------------------- |
| id | String | Created Wallet ID |
| name | String | Created Wallet Name |
{% tabs %}
{% tab title="🟢 Success" %}
```graphql
{
"data": {
"createWalletWithInabit": {
"id": "clvw5p0oj000er47qhe3atv9d",
"name": "My Inabit Wallet",
}
}
}
```
{% endtab %}
{% tab title="🔴 Failure - Invalid Request" %}
```graphql
{
"error": "Invalid request"
}
```
{% endtab %}
{% endtabs %}
In the mutation's response, you will receive the created API wallet ID including the associated blockchain address.
#### Try it out!
{% embed url="" %}
### Step 5: Payouts.com Sends Crypto to The Master Wallet
In this step, Payouts.com funds the Master Wallet with an initial crypto amount (in the relevant blockchains that are required), to be able to fund operator's inabit wallets.
{% hint style="info" %}
This is a one time deposit to the master wallet to allow the wallet to become operational, before onramping occurs.
{% endhint %}
### Step 6: Payouts.com Transfers Crypto from Master Wallet to Operator's Wallet
asdasdsad
### Step 7: Payouts are Sent to Customers
Payouts.com initiates a payout (withdrawal) from the operator's associated inabit wallet on behalf of the operator, to the end-customer's crypto wallet.
Payouts.com can trigger a withdrawal using inabit’s APIs.\
\
**Creating a Withdrawal via API**
Initiate a mutation to create an assets transfer request to send for approval from the operator's inabit wallet.
```graphql
mutation CreateWithdrawal($data: WithdrawalCreateInput!) {
createWithdrawal(data: $data) {
id
}
}
```
**Headers**
| Name | Value |
| ------------- | ------------------ |
| Content-Type | `application/json` |
| Authorization | `Bearer ` |
| | |
**Body (****WithdrawalCreateInput****) object**
| Name | Type | Description |
| ----------------------------------------------------- | ------- | ------------------------------------------------------------ |
| id\* | String | Master Wallet ID |
| id\* (financialAsset) | String | Asset ID |
| address\* | String | Destination Address (To) |
| amount\* | Integer | Transfer amount |
| id\* (blockchain) | String | Blockchain ID |
| note | String | Transaction Note |
| priority | String |
Transaction Priority
(Slow, medium, fast, etc.)
|
\
Example body:
```graphql
{
"data": {
"wallet": {
"id": "clol7o576002oaz011mmtnvru"
},
"financialAsset": {
"id": "clefn78gv011olc6rcwtt0wel"
},
"address": "0x7582f3483116105e0b7845ac1a0df5eb0c8cd062",
"amount": 5,
"blockchain": {
"id": "clefn78em00mslc6r3lzf3h5a"
},
"note": "",
"priority": "Medium"
}
}
```
### Response
Return values:
| Name | Type | Description |
| ---- | ------ | ------------- |
| id | String | Withdrawal ID |
### Step 7: Rebalancing
asdasd
{% tabs %}
{% tab title="🟢 Success" %}
```graphql
{
"data": {
"createSwap": {
"id": "clph3mik5000t8f01qqr0ol74",
"amount": 0.0051,
"fee": 0.0014,
}
}
}
```
{% endtab %}
{% tab title="🔴 Failure - Invalid Request" %}
```graphql
{
"error": "Invalid request"
}
```
{% endtab %}
{% tab title="Failure - Assets Pair not Supported" %}
```graphql
{
"errors": [
{
"code": "OPERATION_FAILED",
"message": "No InabitWalletSupportedPair found",
"path": [
"createInabitWalletSwap"
],
"extensions": {
"code": "OPERATION_FAILED",
"message": "No InabitWalletSupportedPair found"
}
}
],
"data": null
}
```
{% endtab %}
{% endtabs %}
### Deposit Management (Webhooks) :bell:
#### How Will Pragmatic Stay Up-to-Date on Incoming Deposits?
In the **iGaming industry**, it's common practice to **lock funds once a deposit transaction is detected on-chain**, even before it has been fully confirmed. This provides a better user experience by showing a successful deposit immediately—while still protecting the operator by making the funds **non-withdrawable** until sufficient blockchain confirmations are received.
inabit's system fully supports this flow: once a transaction is detected, it updates the widget with a pending confirmation status, allowing the platform to reflect the deposit in the UI while ensuring risk mitigation through backend-level enforcement of fund availability only after confirmation.
To keep Pragmatic in sync, **inabit sends webhook callbacks** for each deposit event and any change in deposit status, enabling real-time tracking of user payments and status-based logic within Pragmatic’s environment.
**List of potential Deposit Statuses:**
* **`Initiated`** – The deposit request has been created, but no blockchain deposit address has been assigned yet.
* **`Allocated`** – A unique blockchain address has been successfully generated and linked to the deposit.
* **`Undercharge`** – The customer deposited **less** than the expected amount, but the deposit window is still active, allowing them to complete the payment.
* **`UnderchargeExpired`** – The customer deposited less than the required amount, **and the payment window has expired**, meaning the transaction cannot be completed.
* **`Confirming`** – The full amount has been received, and the system is now waiting for the required number of blockchain confirmations to mark the deposit as successful.
* **`Unconfirmed`** – A deposit has been detected on the blockchain **but has not yet been included in a block** (only relevant for UTXO-based networks such as Bitcoin).
* **`Overcharge`** – The customer deposited **more** than the required amount. The deposit will still be processed, and the system may handle the excess according to predefined rules (e.g., ignore, credit, or refund).
* **`Expired`** – The customer did not complete the payment within the allowed time window, and the transaction is no longer valid.
* **`Completed`** – The required number of blockchain confirmations has been received, and the deposit is finalized successfully.
```json
```
# Assets & Tokens
Which assets & tokens inabit currently supports
inabit supports multiple assets
{% hint style="success" %}
It is important to note that all assets and tokens within standards we support such as ERC-20 (or equivalent, e.g. BEP-20 or TRC-20) are supported by our wallets.
{% endhint %}
The table below provides the native assets (Blockchain assets) that we supports (that aren't tokens).
As for tokens, inabit will support all tokens within the blockchains and standards that it currently supports. See supported blockchains list [here](/what-we-support/blockchains).
Table Columns:
* **Financial Asset** - the name of the digital asset
* **Blockchain Code** - the blockchain on which the asset exists
### Supported Native Assets
Financial Asset
Blockchain Code
BTC
bitcoin
ETH
ethereum
TRX
tron
BNB
binance-smart-chain
SOL
solana
XRP
XRP
MATIC
polygon
BCH
bitcoin-cash
LTC
litecoin
# Blockchains
Which blockchains & protocols inabit currently supports
inabit supports major blockchain protocols (mainnet) and nearly limitless digital assets in its system. This page gives an overview of all of the blockchains we support.
### Supported functions
Not all blockchains function identically, so we support different features depending on the technical constraints of each blockchain. In the table below, you can compare which broad feature sets are supported on which blockchains.
{% hint style="info" %}
The table does **NOT** include **ALL** supported features on each blockchain. It is simply an overview the general supports in standards and basic blockchain compatibility.
{% endhint %}
{% hint style="warning" %}
**The list below is relevant only for inabit native wallets.**
If you connected an exchange, all of its blockchains and assets are automatically supported in inabit.
{% endhint %}
| Blockchain | Support |
| ------------------------------------------------------------------------------------------------------------------------------------------------------------------------------------------------------------------------------------------------------------------------------------------ | ------------------------------------------- |
| Bitcoin | ✓ (Acceleration using CPFP) |
| Ethereum | ✓ (ERC-20 + ERC-1155) |
| Binance Smart Chain | ✓ |
| Polygon | ✓ |
| Solana | ✓ |
| Tron | ✓ (TRC-20 + TRC-10) |
| XRPL (Ripple) | ✓ |
| Bitcoin Cash | ✓ |
| Litecoin | ✓ |
| Ton | Coming soon |
# Exchanges
Which exchange connections inabit currently supports
## Overview
inabit exchange connectivity enables you to connect exchange main accounts, allowing the following functionalities:
* **Funding exchange wallets:** Deposit, withdraw and rebalance between your connected accounts.
* **Monitor wallet balances:** Monitor assets, balances, and transactions for your connected accounts.
* **Send funds anywhere:** Transfer to any other wallet / address (whitelisted/non-whitelisted).
{% hint style="info" %}
Transfers from exchanges to some destination addresses may require additional configuration in the exchange API settings/management.
{% endhint %}
All the exchanges connected to your inabit organization appear in the wallets page and are apart of your organization balance once connected.
Assets held on the exchange are included and shown in your wallet balance.
### Exchange Account/Wallet Types
#### Main accounts
The primary account serves as the default gateway on the exchange platform. It acts as the central hub for inabit and other exchanges, exclusively facilitating deposits and withdrawals.
Depending on the exchange, you may need to whitelist destinations on the exchange to be able to withdraw to wallets and/or other destinations.
#### Sub-accounts
{% hint style="danger" %}
This feature is currently not supported in inabit.
{% endhint %}
Sub-accounts in exchanges refer to separate accounts created within a single user account. These accounts are often used to organize and manage different trading strategies, portfolios, or assets independently.
#### Trading accounts
{% hint style="danger" %}
This feature is currently not supported in inabit.
{% endhint %}
Trading accounts in exchanges are the primary accounts created by users to engage in buying, selling, and exchanging cryptocurrencies or other financial assets. They serve as the main interface for conducting trading activities on the exchange platform.
### Supported Exchanges
Exchange
Name
Binance
✓
Kucoin
✓
Kraken
✓
OKX
Coming soon
Bybit
Coming soon
Gemini
Coming soon
Crypto.com
Coming soon
Coinbase
Coming soon
# Binance
Binance Exchange Integration with inabit
{% hint style="warning" %}
We **don't** currently offer support for **Binance** **US** exchange accounts. This connection is specific to Binance accounts exclusively.
{% endhint %}
## Connecting your Binance wallet
### Binance Configuration:
* Refer to the [Binance.com API Documentation](https://www.binance.com/en/support/faq/how-to-download-and-set-up-binance-code-api-af014f44f45845debf79b4cf81333a25) to learn how to generate a Binance API key.
* You can also generate an API key directly from Binance UI under the account settings section: "API Management".
* When creating a key we recommend naming the API key - "inabit", so there won't be any confusion with other future/existing keys.
* After you confirm the validity of your new API key, keep a record copy of both the API Key and Secret Key. You will need them when adding this exchange to your organization.
* Make sure you've enabled the following API restrictions when generating the keys:
* **Reading**
* **Withdrawals**
* **Spot & Margin Trading** (if you intend to swap assets directly from inabit in this wallet)
* Under the IP restrictions access, please select **Restrict access to trusted IPs only**, discard the 0.0.0.0 IP address, and add the following IP:
```
35.233.10.83
```
{% hint style="info" %}
1. This IP address belongs to inabit and by whitelisting it in the exchange API, you enable access for inabit services to operate on your behalf.
2. This IP address **must** be whitelisted otherwise, the connectivity to inabit will fail.
{% endhint %}
### inabit Configuration:
* Within the inabit platform, go to the wallets page and click on\
"**Add new**".
* Select the option "**Exchange** **Wallet**" and choose the "**Binance**" option.
* Fill in the following details:
* **Wallet name**
* **API key** (the one saved from Binance)
* **Secret key** (the one saved from Binance)
* Click on "**Connect** **Exchange**".
If all credentials are okay and the wallet name is valid, the connection should be successful and you can start managing the binance wallet in your organization!
# Kucoin
Kucoin Exchange Integration with inabit
## Connecting your Kucoin wallet
### Kucoin Configuration:
* Refer to the [KuCoin.com API Documentation](https://www.kucoin.com/support/360015102174-How-to-Create-an-API) to learn how to generate an API key.
* You can also generate an API key directly from Kucoin UI under the account settings section: "API Management".\

* When creating a key we recommend naming the API key - "inabit", so there won't be any confusion with other future/existing keys.
* After you confirm the validity of your new API key, keep a record copy of both the API Key and Secret Key. You will need them when adding this exchange to your organization.
* Make sure you've enabled the following API restrictions when generating the keys:
* **General**
* **Spot Trading**
* **Transfer**
* Under the IP Restriction section, click on "Yes" and add the following IP to the list, as follows:
```
35.233.10.83
```
{% hint style="info" %}
1. This IP address belongs to inabit and by whitelisting it in the exchange API, you enable access for inabit services to operate on your behalf.
2. This IP address **must** be whitelisted otherwise, the connectivity to inabit will fail.
{% endhint %}
### inabit Configuration:
* Within the inabit platform, go to the wallets page and click on\
"**Add new**".
* Select the option "**Exchange** **Wallet**" and choose the "**Kucoin**" option.
* Fill in the following details:
* **Wallet name**
* **API key** (the one saved from Kucoin)
* **Secret key** (the one saved from Kucoin)
* **Passphrase**
* Also known as "Trading Password"
* (A required 6 digit password that you've set for Kucoin API)
* Click on "**Connect** **Exchange**".
If all credentials are okay and the wallet name is valid, the connection should be successful and you can start managing the Kucoin wallet in your organization!
# Kraken
Kraken Exchange Integration with inabit
{% hint style="info" %}
Direct transfers to third parties from Kraken are disabled by default. In order to transfer funds from your kraken exchange wallet directly to a countryparty, you must manually save each destination address in Kraken's UI first.
{% endhint %}
## Connecting Your Kraken Wallet
### Kraken Configuration:
* Refer to the [Kraken.com API Documentation](https://support.kraken.com/hc/en-us/articles/360000919966-How-to-create-an-API-key) to learn how to generate an API key.
* When creating a key we recommend naming the API key - "inabit", so there won't be any confusion with other future/existing keys.
* After you confirm the validity of your new API key, keep a record copy of both the API Key and Secret Key. You will need them when adding this exchange to your organization.
* Make sure you've enabled the following API restrictions when generating the keys:
* **Query Funds**
* **Deposit Funds**
* **Withdraw Funds**
* Under the IP restrictions access, please select **Restrict access to trusted IPs only**, discard the IP address, and add the following IP:
```
35.233.10.83
```
{% hint style="info" %}
1. This IP address belongs to inabit and by whitelisting it in the exchange API, you enable access for inabit services to operate on your behalf.
2. This IP address **must** be whitelisted otherwise, the connectivity to inabit will fail.
{% endhint %}
### inabit Configuration:
* Within the inabit platform, go to the wallets page and click on\
"**Add new**".
* Select the option "**Exchange** **Wallet**" and choose the "**Kraken**" option.
* Fill in the following details:
* **Wallet name**
* **API key** (the one saved from Kraken)
* **Secret key** (the one saved from Kraken)
* Click on "**Connect** **Exchange**".
If all credentials are okay and the wallet name is valid, the connection should be successful and you can start managing the Kraken wallet in your organization!
***
## Enabling transfers from your Kraken wallet
Before whitelisting a inabit address on Kraken, lets understand what are Kraken Descriptions and why are they crucial for transferring through Kraken connected wallets.
### What are Kraken Descriptions?
**Kraken** **descriptions** are essentially **tags** that are generated automatically by inabit per deposit address in the platform. This tag is later used by Kraken to whitelist an address that users wish to send funds to. Within the money transfer UI, users will be able to transfer to any address (unnecessarily whitelisted) via their Kraken wallet.
While kraken doesn’t allow users to send funds to non-whitelisted addresses, in order to allow such option in inabit, inabit overcomes this by generating a description per every saved address under a contact in inabit.
Now that we understand that in order to transfer we must save destination addresses within a contact in inabit, verify that the following are also completed:
* Your Kraken wallet is fully connected to your inabit organization.
* Your Kraken wallet has funds and was KYC/KYB verified.
Follow the instructions below to whitelist in Kraken.
If you are still having trouble, contact ****.
### Whitelisting addresses in Kraken
* Click on "**Withdraw**" funds.
* Cick on "**Add new withdrawal address**"\
* Add the following details:
* **Address Description**
* This is where you copy the Kraken description generated for the saved address in inabit.
* You can copy the Kraken description in inabit from within the contacts page.\
View the saved address in the page and click on the 3 dots icon:
* Click on the "**Kraken** **Description**" option.
* Copy the Kraken description displayed on your screen.
* **Address** (according to the designated blockchain)
* Click on "**Add Withdrawal Address**"\

* You will be required to confirm the action via email.\
Once the confirmation is received, the address is familiar to Kraken and is saved in your exchange account.
That's it! inabit now recognizes the whitelisted address in Kraken and you're able to transfer funds to the saved destination address through inabit's UI/API.
{% hint style="success" %}
You will also be able to see the generated Kraken description of a saved address when you select the destination address for the transfer in the Transfer UI.
{% endhint %}
# Changelog
Keep track on what's new/changed in inabit 📝
## [New Version Release - 2.9.0 ](https://use.inabit.com/)
### Release Notes:
* **Web3 - WalletConnect support:**
* Users can fully perform a connection to any wallet supported by walletconnet to inabit's platform.
* We've released the ability to perform a full disaster recovery in inabit.
### [Version 2.8.1 Patch - Merged to Main](https://use.inabit.com/) :tools:
* **Fixed**:
* Changed the previous Ethereum base-fee calculation in order to significantly lower the probability of Ethereum transactions failures
## [New Version Release - 2.8.0](https://use.inabit.com/) :tada:
### Release Notes:
* Bitcoin Transactions Acceleration
* Increased support of different countries & currencies for off-ramp.
* Additional security updates in the mobile approvals app.
* **New API Features:**
* Generation of dedicated API wallets via API.
* Ability to sign transactions directly through API (API Signer).
* Visual representation of API wallets in the platform's UI.
### [Added "Exchanges" Section to Documentation](/what-we-support/exchanges)
Added by **Itamar Korkos**\
4.1.2024
### [Added "API Infrastructure" Section to Documentation](broken://pages/tZP512vBBTeYfgAsxyWV)
Added by **Itamar Korkos**\
4.1.2024
# Introduction
Read our documentation and get up to speed on how to access our API capabilities.
Dive into the specifics of each API endpoint by checking out our complete documentation.
## Accessing our API
Refer to the page below for getting your access token to serve as your credentials for when you call queries and mutations through our graphql endpoint.
{% content-ref url="/pages/yGcNLF6nqjepcTpKqBXn" %}
[Authentication](/api-reference/introduction-to-graphql/authentication)
{% endcontent-ref %}
## Dictionary
Everything related to our system's infrastructure and what the API is built upon, please refer to the page below:
{% content-ref url="/pages/gP6tg361m6oGW6X2dNB2" %}
[Broken mention](broken://pages/gP6tg361m6oGW6X2dNB2)
{% endcontent-ref %}
# What is GraphQL?
[GraphQL](https://graphql.org/) is a query language for APIs that provides a powerful and flexible way for clients to request exactly the data they need from a server. Unlike traditional REST APIs that return predefined data structures, GraphQL allows you to specify the specific fields you want within a resource, eliminating the need for over-fetching or under-fetching of data. This approach leads to more efficient data transfer and reduces complexity on both the client and server sides.
GraphQL revolutionizes API interactions by letting you request exactly the data you need. Forget fetching everything and sifting through irrelevant details. Write precise queries specifying only the desired fields within a resource, and GraphQL delivers just that. This targeted approach streamlines data exchange, boosts performance, and simplifies development – like ordering a custom pizza, not the whole menu.
The key takeaway for GraphQL can be summarized as **ask for what you need** and **get exactly that .**
For more information about GraphQL visit
# GraphQL Schema
Navigating inabit Data: A Look at the GraphQL Schema
At the heart of any GraphQL API lies the schema, a technical blueprint that serves as your guide to interacting with the data. Imagine a complex database – the schema acts as its detailed map, outlining the available data structures and their relationships.
This schema serves several key purposes for developers:
1. **Understanding Data Structure:** It meticulously defines the data types (like users, products, or posts) available within the API. Each type has its own set of properties (fields), essentially representing the specific attributes you can access. This transparency allows you to pinpoint the exact data you need for your application.
2. **Crafting Precise Queries:** With a clear understanding of the data structure, you can construct targeted queries to retrieve specific information. Forget fetching everything and sifting through irrelevant details. Instead, you can write queries that request only the desired fields within a particular data type, optimizing data transfer and improving application performance.
3. **Executing Mutations (Optional):** Beyond data retrieval, some GraphQL APIs allow for data manipulation through mutations. The schema plays a crucial role here as well, outlining the types and their connections. By understanding these relationships, you can craft mutations to create new data entries, update existing information, or even delete objects within the API (if supported).
This introduction to the GraphQL schema equips you with the foundational knowledge to effectively interact with the API. In the following sections, we'll delve deeper into crafting queries and mutations (if applicable), allowing you to unlock the full potential of this powerful data access method.
**Here's a great example of how to utilize a graphQL based API:**
{% content-ref url="/pages/oaSalKqsdIUXiGkeTVdW" %}
[Example Using GraphQL](/api-reference/introduction-to-graphql/what-is-graphql/example-using-graphql)
{% endcontent-ref %}
# Example Using GraphQL
### Toy Store API with GraphQL: A Hands-on Example
This example showcases a basic GraphQL API for a toy store, demonstrating the schema, queries, and mutations.
#### Schema:
```graphql
type Toy {
id: ID!
name: String!
price: Float!
category: String!
inStock: Boolean!
}
type Query {
toys(category: String): [Toy!]!
toy(id: ID!): Toy
}
type Mutation {
createToy(name: String!, price: Float!, category: String!): Toy!
}
```
#### Explanation:
* **Types:**
* `Toy`: Represents a toy object with properties like `id`, `name`, `price`, `category`, and `inStock`.
* `Query`: Defines available data retrieval operations.
* `Mutation`: Defines data manipulation operations (optional, not all APIs have mutations).
* **Query:**
* `toys(category: String)`: Retrieves a list of toys based on an optional category filter.
* `toy(id: ID!)`: Fetches a specific toy by its ID.
* **Mutation:**
* `createToy(name: String!, price: Float!, category: String!)`: Creates a new toy with provided details.
**Query Example (Get all toys):**
```graphql
query {
toys
}
```
#### Response:
```graphql
{
"data": {
"toys": [
{
"id": "1",
"name": "Stuffed Bear",
"price": 19.99,
"category": "Plushies",
"inStock": true
},
{
"id": "2",
"name": "Remote Control Car",
"price": 49.99,
"category": "Vehicles",
"inStock": false
}
]
}
}
```
**Query Example (Get a toy by ID):**
```graphql
query getToy($id: ID!) {
toy(id: $id) {
id
name
price
}
}
```
**Variables:**
```graphql
{
"id": "1"
}
```
**Response:**
```graphql
{
"data": {
"toy": {
"id": "1",
"name": "Stuffed Bear",
"price": 19.99
}
}
}
```
**Mutation Example (Create a new toy):**
```graphql
mutation createToy($name: String!, $price: Float!, $category: String!) {
createToy(name: $name, price: $price, category: $category) {
id
name
price
category
}
}
```
#### Variables:
```graphql
{
"name": "Building Blocks",
"price": 24.99,
"category": "Construction"
}
```
#### Response:
```graphql
{
"data": {
"createToy": {
"id": "3", // Generated by the server
"name": "Building Blocks",
"price": 24.99,
"category": "Construction"
}
}
}
```
This example demonstrates the fundamental concepts of using a GraphQL API. By understanding the schema, you can craft queries to retrieve specific data and potentially use mutations to interact with the data (if supported).
# Authentication
Authenticating to the GraphQL API
### The Root Endpoint
REST APIs has numerous endpoints; the GraphQL API has a **single** endpoint:
```
https://api.inabit.com/graphql
```
The endpoint remains constant no matter what operation you perform.
Because GraphQL operations consist of multiline JSON, we recommend using the [Apollo Explorer](https://studio.apollographql.com/sandbox/explorer) to make GraphQL calls.
You can also use `curl` or any other HTTP-speaking library.
In REST, HTTP verbs determine the operation performed.\
In GraphQL, you'll provide a **JSON-encoded body** whether you're performing a query or a mutation, so the HTTP verb is `POST`. The exception is an introspection query, which is a simple `GET` to the endpoint.
To query GraphQL in a `curl` command, make a `POST` request with a JSON payload. The payload must contain a string called `query`:
```
curl -H "Authorization: bearer TOKEN" -X POST -d " \
{ \
\"query\": \"query { viewer { login }}\" \
} \
" https://api.github.com/graphql
```
{% hint style="info" %}
**Note**: The string value of `"query"` must escape newline characters or the schema will not parse it correctly. For the `POST` body, use outer double quotes and escaped inner double quotes.
{% endhint %}
# Queries
Learn what are queries in GraphQL and how they can be used
### About Queries
Every GraphQL schema has a root type for both queries and mutations. The query type defines GraphQL operations that retrieve data from the server.
For more information, see "[Forming calls with GraphQL](#performing-queries-in-graphql)" below.
### Performing Queries in GraphQL
GraphQL queries return only the data you specify. To form a query, you must specify [fields within fields](https://docs.github.com/en/graphql/guides/introduction-to-graphql#field) (also known as *nested subfields*) until you return only [scalars](https://docs.github.com/en/graphql/reference/scalars).
Queries are structured like this:
```graphql
query {
JSON-OBJECT-TO-RETURN
}
```
For an actual example, see "[Example Query](/api-reference/introduction-to-graphql/queries/example-query)".
# Example Query
A breakdown of an example GraphQL query in inabit
### GraphQL Query: Retrieve Transaction Details
In GraphQL, queries are used to fetch data from the server. This example demonstrates how to retrieve detailed information about a transaction.
Let's walk through a more complex query and put this information in context.
#### Operation Name:
The operation is named `Transaction`.
#### Query:
```graphql
query Transaction($where: TransactionWhereUniqueInput!) {
transaction: transaction(where: $where) {
id
transactionType
createdAt
createdBy {
fullName
firstName
lastName
id
profileFile {
id
}
}
txId
contactCryptoAccount {
address
name
contact {
name
}
}
kyt
wallet {
id
name
externalId
organization {
id
}
organizationExchange {
exchange {
code
id
}
id
}
}
financialAsset {
id
code
name
precision
}
blockchain {
id
name
code
contractType
networkScannerUrl
}
amount
rateEUR
rateUSD
status {
category
status
exchangeStatuses {
status
}
transactionSubStatuses {
subStatus
}
}
fee
note
swapAssetTo {
code
precision
}
swapToAmount
metaData {
value
transactionMetaDataField {
id
name
}
}
}
}
```
#### Variables:
```graphql
{
"where": {
"id": "clk10q8he002kk660o1ed8ud4"
}
}
```
#### Explanation:
This query retrieves detailed information about a transaction identified by its unique ID (`$where`). Here's a breakdown of the fields being requested:
* **`id`**: The unique identifier of the transaction.
* **`transactionType`**: The type of the transaction.
* **`createdAt`**: The timestamp indicating when the transaction was created.
* **`createdBy`**: Information about the user who created the transaction, including their full name, first name, last name, user ID, and profile file ID.
* **`txId`**: The transaction ID.
* **`contactCryptoAccount`**: Details about the contact's crypto account, including the address, name, and contact's name.
* **`kyt`**: KYT (Know Your Transaction) status.
* **`wallet`**: Information about the wallet associated with the transaction, including its ID, name, external ID, associated organization ID, and exchange details.
* **`financialAsset`**: Details about the financial asset involved in the transaction, such as its ID, code, name, and precision.
* **`blockchain`**: Information about the blockchain associated with the transaction, including its ID, name, code, contract type, and network scanner URL.
* **`amount`**: The amount involved in the transaction.
* **`rateEUR`** and **`rateUSD`**: Exchange rates for EUR and USD.
* **`status`**: The status of the transaction, including its category, status, exchange statuses, and transaction sub-statuses.
* **`fee`**: The fee associated with the transaction.
* **`note`**: Any additional notes or comments about the transaction.
* **`swapAssetTo`**: Details about the asset swapped to, including its code and precision.
* **`swapToAmount`**: The amount swapped to.
* **`metaData`**: Additional metadata associated with the transaction, including its value and metadata field details.
#### Response:
Upon successful execution, the response contains detailed information about the requested transaction.
# Mutations
Learn what are mutations in GraphQL and how they can be used
### About Mutations
In GraphQL, mutations are operations that modify data on the server. The mutation type in the schema defines GraphQL operations that create, update, or delete data.
For more information on mutations, refer to the "Forming Calls with GraphQL" section below.
### Performing Mutations in GraphQL
Unlike queries, mutations are used to change data on the server. Similar to queries, mutations specify the data you want to operate on, but they also include the data you want to modify or create.
**Mutations are structured like this:**
```graphql
mutation {
MUTATION-NAME(INPUT-OBJECT) {
RETURNED-FIELDS
}
}
```
For an actual example, see "[Example Mutation](/api-reference/introduction-to-graphql/mutations/example-mutation)".
To interact with your GraphQL API and perform mutations, you need to follow a structured format. Here's how you can form mutation calls:
1. **Start with the `mutation` keyword**: This indicates that you're performing a mutation operation.
2. **Provide the mutation name**: Specify the name of the mutation you want to execute.
3. **Pass input data**: If the mutation requires input, provide it as an input object within the mutation call.
4. **Define returned fields**: Specify the fields you want to retrieve as part of the mutation response.
# Example Mutation
A breakdown of an example GraphQL mutation in inabit
### GraphQL Mutation: Create Withdrawal
Mutations in GraphQL are operations used to modify data on the server. This example demonstrates how to create a withdrawal request.
#### Operation Name:
The operation is named `CreateWithdrawal`.
#### Operations:
**1. Query to Retrieve Necessary Information:**
```graphql
query GetWalletAndBlockchainID {
wallet(id: "clol7o576002oaz011mmtnvru") {
id
}
financialAsset(id: "clefn78gv011olc6rcwtt0wel") {
id
}
blockchain(id: "clefn78em00mslc6r3lzf3h5a") {
id
}
}
```
This query fetches the IDs of the wallet, financial asset, and blockchain associated with the withdrawal. These IDs are required for creating the withdrawal request.
**2. Mutation to Create Withdrawal:**
```graphql
mutation CreateWithdrawal($data: WithdrawalCreateInput!, $jwtToken: String!) {
createWithdrawal(data: $data, jwtToken: $jwtToken) {
id
}
}
```
#### Variables:
```graphql
{
"data": {
"wallet": {
"id": "clol7o576002oaz011mmtnvru"
},
"financialAsset": {
"id": "clefn78gv011olc6rcwtt0wel"
},
"address": "0x7582f3483116105e0b7845ac1a0df5eb0c8cd062",
"amount": 5,
"blockchain": {
"id": "clefn78em00mslc6r3lzf3h5a"
},
"note": "",
"priority": "Medium"
},
"jwtToken": "***[accessToken from login response]***"
}
```
#### Explanation:
The process begins with a query to retrieve the IDs of the wallet, financial asset, and blockchain related to the withdrawal. These IDs are then passed as variables along with other necessary details (such as withdrawal amount, destination address, and priority level) to the mutation `CreateWithdrawal`. The mutation creates the withdrawal request using the provided data and the authorization token (`jwtToken`).
#### Response:
Upon successful execution of the mutation, the response contains the ID of the created withdrawal request.
# Variables
Learn what are variables in GraphQL and how they can be used
## Working with Variables in GraphQL
In GraphQL, variables provide a way to parameterize queries and mutations. They enable clients to pass dynamic values to queries at runtime, making your API more flexible and efficient. This section will guide you through the concept of variables, how to use them effectively, and provide examples of their usage.
### What are Variables?
Variables in GraphQL allow you to inject dynamic values into your queries and mutations. Instead of hardcoding values directly into your requests, you can define variables separately and pass them in when executing the operation. This makes your queries more reusable and adaptable to different scenarios.
### How to Use Variables
#### 1. Define Variables in Your Query or Mutation
In your GraphQL operation (query or mutation), define variables using the `$` symbol followed by the variable name and its type. For example:
```graphql
graphqlCopy codequery GetPost($postId: ID!) {
post(id: $postId) {
title
body
}
}
```
#### 2. Pass Variables during Execution
When executing the operation, provide values for the variables defined in step 1. This can be done either through client libraries or directly when sending requests. For example:
```json
jsonCopy code{
"query": "GetPost($postId: ID!) { post(id: $postId) { title body } }",
"variables": { "postId": "123" }
}
```
### Examples of Usage
#### Example 1: Query with Variables
Suppose you want to fetch a post by its ID. Instead of hardcoding the ID in the query, you can use a variable:
```graphql
graphqlCopy codequery GetPost($postId: ID!) {
post(id: $postId) {
title
body
}
}
```
#### Example 2: Mutation with Variables
For a mutation that updates a user's profile, you can utilize variables to pass the new profile data dynamically:
```graphql
graphqlCopy codemutation UpdateProfile($userId: ID!, $input: ProfileInput!) {
updateProfile(userId: $userId, input: $input) {
success
message
}
}
```
### Best Practices
* Always define variables with their types to ensure type safety.
* Use variables for values that may change, such as user inputs or query parameters.
* Keep variable names descriptive to enhance readability and maintainability of your code.
By leveraging variables in your GraphQL operations, you can create more dynamic and reusable queries and mutations, improving the flexibility and efficiency of your API.
# Fields
Learn what are fields in GraphQL and how they are used.
## Fields in GraphQL
In GraphQL, fields are the fundamental unit of data retrieval. They represent the properties or attributes of a GraphQL type. Understanding how fields work is crucial for effectively querying data in GraphQL.
### Syntax
Fields are defined within GraphQL queries to specify the exact data you want to retrieve. They follow a simple syntax:
```graphql
{
fieldName
}
```
Here, `fieldName` represents the name of the field you want to retrieve. It could be a property of an object type, a scalar value, or even a nested object.
### Resolving Fields
Each field in a GraphQL query corresponds to a resolver function on the server side. These resolver functions are responsible for fetching the data for their corresponding fields. Resolvers are executed in a hierarchical manner, starting from the root fields and traversing down through nested fields.
### Nested Fields
One of the powerful features of GraphQL is its ability to retrieve nested fields within a single query. This allows you to fetch complex, hierarchical data structures in a single round trip to the server. For example:
```graphql
{
user {
name
email
posts {
title
content
}
}
}
```
In this query, `user` is a field that returns an object type with nested fields `name`, `email`, and `posts`, which in turn have their own nested fields.
### Aliasing Fields
GraphQL allows you to alias fields in a query to customize the shape of the response. This is particularly useful when you need to retrieve multiple fields with the same name or when you want to improve readability. Here's an example:
```graphql
{
adminUser: user(id: "123") {
fullName: name
emailAddress: email
}
}
```
In this query, `adminUser` is an alias for the `user` field, and `fullName` and `emailAddress` are aliases for the `name` and `email` fields respectively.
### Fragments
Fragments in GraphQL allow you to define reusable sets of fields, which can be included in multiple queries. This helps in reducing redundancy and maintaining a cleaner codebase. Here's how you can use fragments:
```graphql
fragment UserInfo on User {
name
email
}
{
user(id: "123") {
...UserInfo
}
}
```
In this example, `UserInfo` is a fragment that defines the fields `name` and `email`. It is then included in the `user` query.
### Directives
GraphQL directives provide a way to conditionally include or exclude fields based on certain criteria. The `@include` and `@skip` directives are commonly used for this purpose. Here's an example:
```graphql
{
user(id: "123") {
name
email
posts @include(if: $includePosts) {
title
content
}
}
}
```
In this query, the `posts` field will only be included if the `$includePosts` variable is set to `true`.
## Summary
Fields are the building blocks of GraphQL queries, allowing you to precisely specify the data you want to retrieve. With support for nested fields, aliases, fragments, and directives, GraphQL provides powerful tools for querying and shaping data efficiently.
# Getting Started
Let's get you up and running!
## Quickstart Guide
The inabit GraphQL API allows you to interact programmatically with inabit's platform, for a variety of use cases:
* Manage your inabit account, organizations & users.
* Manage wallets (both inabit & external wallets).
* Automate transaction flows.
And many other use cases you might think of that can help your business automate its workflow.
{% hint style="info" %}
**Important:** Our API is based on [GraphQL](https://graphql.org/).
API calls require a valid `Access Token` for authorizing requests. Before using the API, please make sure that you have a valid token. See below instructions on how you can get it.
The `Access Token` must be part of HTTP's `Authorization` header in every call.
:warning:Without a valid `Access Token` API calls will be denied.
{% endhint %}
## Get your access token
Receive a JWT access token for your inabit account's API Admin user by contacting our support team at .
## Make your first request
To make your first request, send an authenticated request using the access token. Remember to authorize using the token across all of your future queries and mutations.
{% hint style="info" %}
**Important:** Access tokens are valid for 15 hours and will expire afterwards, if you're using an existing token that might've been expired, you'll be unauthorized to call queries and mutations and will need to retrieve a new token from us.
{% endhint %}
{% content-ref url="/pages/X0iUk7M41qljvTxMV7cj" %}
[Broken mention](broken://pages/X0iUk7M41qljvTxMV7cj)
{% endcontent-ref %}
# Authentication
How to retrieve a JWT access token to perform queries and mutations in our GraphQL API
## Accessing inabit API
In order to access our API capabilities and authenticate queries and mutations,\
you must create an **API** **Admin**.
Note - You can also decide to create an **API** **Viewer**. Doing so you will only allow you to receive API capabilities of a **Viewer**.
#### About API User Roles
Feel free to visit our user roles explanation page in the documentation to learn more about the API roles in the inabit platform, as well as the rest of the roles existing in inabit.
{% content-ref url="/pages/qgQzY6UXNYmN0LJz6HdP" %}
[Broken mention](broken://pages/qgQzY6UXNYmN0LJz6HdP)
{% endcontent-ref %}
### How to create an API Admin?
* Contact inabit's support at [support@inabit.com](https://app.gitbook.com/o/PWFAcegFUYDUVL2Rge1b/s/dzwIwuSG3JXyzSwstYiN/) to retrieve a JWT access token for you with admin permissions.
* The token has access to all relevant mutations and queries in our schema.
{% hint style="info" %}
**Import to remember:** Access tokens are valid for 15 hours once they're created.\
if you're using an existing token that might've been expired, you'll be unauthorized to call queries and mutations and will need to retrieve a new token again.
{% endhint %}
### **Headers**
These are the headers you insert when you authenticate to our GraphQL API root endpoint.\
You will **always** have to pass an authorization Bearer (token) for access to our queries mutations and webhooks (subscriptions) service.
| Name | Value |
| ------------- | ------------------ |
| Content-Type | `application/json` |
| Authorization | `Bearer ` |
### Retrieving Login Token
Once you've contacted inabit's support and we've created the necessary API users per your request, we'll go ahead and create an API login token for your account.
> The token will be shared with you/your team across a secured channel with inabit.
This login token serves as the bearer/authorization token to call for an access token to our GraphQL API schema that you will use to authorize queries and mutations.
{% hint style="warning" %}
**Login tokens** are valid for **30** **days** and should be refreshed by your end ahead of time before expiration.
{% endhint %}
### Retrieving Access Token
Once you managed to retrieve a login token, you will use it to query an access token that for security reasons, will be valid for 15 minutes - to use in your queries and mutations of the API.
{% hint style="warning" %}
**Access** **tokens** are valid for **15** **minutes** and should be refreshed by your end ahead of time before expiration.
{% endhint %}
#### How To Query an Access Token
```graphql
query Query {
getApiUserAccessToken
}
```
#### Response:
{% tabs %}
{% tab title="🟢 Success" %}
```javascript
{
"data": {
"getApiUserAccessToken": "ey......"
}
}
```
{% endtab %}
{% endtabs %}
### Refreshing Existing Login Token
Before reaching the 30 day expiration time of your API user's login token, you'll need to use the following query to refresh/update the existing token.
You will then use the new login token given in the response in order to generate new access tokens and the previous token will be expired.
#### Refresh Login Token Query
```graphql
query Query {
refreshApiUserLoginToken
}
```
In the variables/body of this query, you will need to insert the current existing login token as the authorization/bearer for the query.
#### Response:
{% tabs %}
{% tab title="🟢 Success" %}
```javascript
{
"data": {
"refreshApiUserLoginToken": "ey......"
}
}
```
{% endtab %}
{% endtabs %}
# inabit Postman Collection
Easily access our GraphQL API using a premade Postman collection made for your comfort
## Access Our GraphQL API Via Postman
Used to REST? Feeling more comfortable using [**Postman**](https://www.postman.com/)? No problem! Our team created a custom postman collection which includes all of the API queries & mutations listed in our [API Reference](broken://pages/X0iUk7M41qljvTxMV7cj).
{% file src="/files/nMvYgDQYVQDeQZlApAJn" %}
### How To Use?
Simply download the `JSON` file and import it to the Postman application in your desktop.\
There should be an "Import" () button next to the collections tab on the top left hand side in the application.
# Organizations
# Organization Info
Retrieve data on your organizations, per organization ID.
## Fetch Organization Data
Retrieving the user's organization info is done through querying the user's information. One can query details inside the organization.
```graphql
query User($where: UserWhereUniqueInput!) {
user(where: $where) {
fullName
organizations {
[id]
[name]
[city]
[email]
[industry]
[isIndividual]
[phone]
[street]
[phoneCountry]
[timezone]
[transferRequestOrders]
[unit]
[wallets]
[zipCode]
}
}
}
```
### Headers
| Name | Value |
| ------------- | ------------------ |
| Content-Type | `application/json` |
| Authorization | `Bearer ` |
### **Body (**UserWhereUniqueInput object)
| Name | Type | Description |
| ------------------------------------ | ------ | -------------------------------- |
| id\* | string | ID of the organization in inabit |
Example body:
```graphql
{
"where": {
"id": "userId123"
}
}
```
### Response
Returned values:
| Name | Type | Description |
| --------------------- | -------------------- | -------------------------------------- |
| id | string | Organization ID |
| name | string | Organization name |
| city | string | Organization address (city) |
| email | string | Organization POC email |
| industry | string | Organization industry |
| isIndividual | boolean | Flag wether organization or individual |
| phone | string | Organization phone number |
| phoneCountry | string | Organization country |
| street | string | Organization address (street) |
| transferRequestOrders | TransferRequestOrder | Transfer Request Orders |
| timeZone | TimeZone | Time zone for organization |
| unit | string | Unit |
| wallet | Wallet | Organization wallets |
| zipCode | string | Organization address (zip code) |
{% tabs %}
{% tab title="🟢 Success" %}
```graphql
{
"data": {
"user": {
"organizations": [
{
"id": "clilpvru98723678mwie82oihn9",
"name": "Crypto Org 1",
"city": "New York"
}
]
}
}
}
```
{% endtab %}
{% tab title="🔴 Failure" %}
```graphql
{
"error": "Invalid request"
}
```
{% endtab %}
{% endtabs %}
In the example response above, we queried the `id` , `name` and `city` of the organization.
### Try it out!
{% embed url="" fullWidth="false" %}
# Organization ID
Retrieve data on your organizations, per organization ID.
## Fetch User's Organizations ID
Retrieving the user's organization info is done through querying the user's information. One can query details inside the organization.
{% hint style="info" %}
Note that you can fetch more than just the organization ID, all depending on what you're filling in the query.
{% endhint %}
```graphql
query User($where: UserWhereUniqueInput!) {
user(where: $where) {
organizations {
id
name
}
}
}
```
### **Headers**
| Name | Value |
| ------------- | ------------------ |
| Content-Type | `application/json` |
| Authorization | `Bearer ` |
### **Body (**UserWhereUniqueInput object)
| Name | Type | Description |
| ------------------------------------ | ------ | --------------------------------------------------------------------------------------------------------- |
| id\* | string |
|
[Example body:](#user-content-fn-1)[^1]
```graphql
{
"where": {
"id": "organizationId123"
}
}
```
### **Response**
Returned values:
| Name | Type | Description |
| --------- | ------ | --------------- |
| firstName | string | User first name |
| lastName | string | User last name |
| roles | JSON | Array of roles |
{% tabs %}
{% tab title="🟢 200" %}
```json
{
"data": {
"organization": {
"agents": [
{
"firstName": "Ahmad",
"lastName": "Carter",
"roles": [
"viewer"
]
},
{
"firstName": "Oda",
"lastName": "Pfeffer",
"roles": [
"signer"
]
},
{
"firstName": "Fredy",
"lastName": "Lesch",
"roles": [
"admin"
]
},
{
"firstName": "Earnest",
"lastName": "Blick",
"roles": [
"owner"
]
},
]
}
}
}
```
{% endtab %}
{% tab title="🔴 400" %}
```json
```
{% endtab %}
{% endtabs %}
### Try it out!
{% embed url="" %}
[^1]:
# Organization Contacts
Retrieve all contacts in an organization, per organization ID.
## Fetch Organization Contacts
By performing this query, you can retreive any/all organization's contacts. (per organization ID)
```graphql
query Organization($where: OrganizationWhereUniqueInput!) {
organization(where: $where) {
contacts {
id
fullName
email
phone
}
}
}
```
### **Headers**
| Name | Value |
| ------------- | ------------------ |
| Content-Type | `application/json` |
| Authorization | `Bearer ` |
### **Body (**OrganizationWhereUniqueInput object)
| Name | Type | Description |
| ------------------------------------ | ------ | --------------- |
| id\* | string | Organization ID |
Example body:
```json
{
"where": {
"id": "orgId123"
}
}
```
### **Response**
Returned values:
| Name | Type | Description |
| -------- | ------ | ----------------- |
| id | string | Contact ID |
| fullName | string | Contact full name |
| email | string | Contact email |
| phone | string | Contract phone |
{% tabs %}
{% tab title="🟢 Success" %}
```json
{
"data": {
"organization": {
"contacts": [
{
"id": "cljzumgy0000gk603zl8u9xx1",
"name": "Georgia Hermann"
},
{
"id": "cljzumh0n0019k603fzeaperq",
"name": "Eugene Labadie"
},
{
"id": "cljzumh2i0029k6039m3nmqvz",
"name": "Wesley Hermann"
},
{
"id": "cljzumh3i002rk603cho1skcx",
"name": "Erma Dach MD"
}
]
}
}
}
```
{% endtab %}
{% tab title="🔴 Failure" %}
```json
```
{% endtab %}
{% endtabs %}
### Try it out!
{% embed url="" %}
# Organization Transactions
Retrieve all transactions in an organization, per organization ID.
## Fetch Organization Transactions
Retrieve all transactions in a specific organization, according to an organization ID, Wallet ID and specific asset (ID).
```graphql
query Transaction($where: TransactionWhereUniqueInput!) {
transaction(where: $where) {
id
amount
blockchain {
name
code
}
createdAt
createdBy {
fullName
}
fee
note
status {
status
}
wallet {
name
id
}
financialAsset {
code
}
isAccelerated
priority
rateUSD
rateEUR
kyt
}
}
```
### **Headers**
| Name | Value |
| ------------- | ------------------ |
| Content-Type | `application/json` |
| Authorization | `Bearer ` |
### **Body (**TransactionWhereUniqueInput object)
| Name | Type | Description |
| ------------------------------------ | ------ | -------------- |
| id\* | string | Transaction ID |
Example body:
```json
{
"where": {
"id": "clllyfhdj00w9btqke47wsesf"
}
}
```
### Response
Return values:
| Name | Type | Description |
| --------------------- | ------- | -------------------------------------------------------------------------------------------------------------- |
| id | String | Transaction ID |
| amount | Integer | Transaction Amount |
| name (blockchain) | String | Blockchain Name |
| id (blockchain) | String | Blockchain ID |
| createdAt | String | Creation Time of Transaction |
| fullName (createdBy) | String | Full Name of the User Created the Transaction |
| fee | Integer | Fee Amount |
| note | String | Tranasaction Note (can be empty) |
| status | String | Status |
| name (wallet) | String | Wallet Name |
| id (wallet) | String | Wallet ID |
| code (financialAsset) | String | FinancialAsset Code (i.e - "ETH" / "BTC") |
| isAccelerated | Boolean | Flag that indicates wether the transaction is [accelerated](broken://pages/neN17H73chywYEFbnRrb). (true/false) |
| priority | String |
Transaction Priority (Slow, Medium, Fast, etc.)
|
| rateUSD | Integer | Asset Rate at the time of the transaction (in USD) |
| rateEUR | Integer | Asset Rate at the time of the Transaction (in Euro) |
| kyt | String |
|
{% tabs %}
{% tab title="🟢 Success" %}
```json
{
"data": {
"transaction": {
"id": "clllyfhdj00w9btqke47wsesf",
"amount": 941.93,
"blockchain": {
"name": "Ethereum",
"code": "ETH"
},
"createdAt": "2023-08-22T06:58:14.071Z",
"createdBy": null,
"fee": 1.36,
"note": "Voluptas nihil dolorem qui explicabo libero earum.",
"status": {
"status": "Pending"
},
"wallet": {
"name": "Organization Wallet 4",
"id": "clllyfexn00h0btqkyed7tgqg"
},
"financialAsset": {
"code": "ETH"
},
"isAccelerated": false,
"priority": "Fast",
"rateUSD": 3640.44,
"rateEUR": 3351.94,
"kyt": 4
}
}
```
{% endtab %}
{% tab title="🔴 Failure" %}
```json
{
"errors": [
{
"message": "Unauthorized",
"extensions": {
"code": "UNAUTHENTICATED",
"response": {
"statusCode": 401,
"message": "Unauthorized"
}
}
}
],
"data": {
"transaction": null
}
}
```
{% endtab %}
{% endtabs %}
### Try it out!
{% embed url="" %}
# Wallets
# Wallets Info
Retrieve data on your organization wallets
## Fetch Organization Wallets
Retrieve organization's wallets information in an inabit account, according to an organization ID variable in the query's body.
query Wallets($where: WalletWhereInput) {
  wallets(where: $where) {
    id
    name
    balanceUSD
    balanceEUR
    walletCryptoAccounts {
      name
      balance
      financialAsset {
        code
      }
      blockchain {
        code
      }
    }
  }
}
### **Headers**
| Name | Value |
| ------------- | ------------------ |
| Content-Type | `application/json` |
| Authorization | `Bearer ` |
### **Body (**WalletWhereInput object)
| Name | Type | Description |
| ------------------------------------ | ------ | --------------- |
| id\* | string | Organization ID |
Example body:
```json
{
"where": {
"organization": {
"id": "cljzumgxa0009k603wl8foc6z"
}
}
}
```
**How do I retrieve my organization ID?**
In order to retrieve an organization's identifier, you'll need to call your user details first, to understand which organization is related to them.
```graphql
query User($where: UserWhereUniqueInput!) {
user(where: $where) {
fullName
organizations {
name
id
}
}
}
```
### Response
Return values:
| Name | Type | Description |
| ------------------------------ | ------- | ------------------------------------------------------------ |
| id | String | Wallet ID |
| name | Integer | Wallet Name |
| balanceUSD | String | Balance in USD |
| balanceEUR | String | Balance in Euro |
| balance (walletCryptoAccounts) | Integer | Balance (of a wallet's asset - per asset) ("crypto account") |
| code (financialAsset) | String | Financial Asset Code |
| code (blockchain) | String | Blockchain Code |
{% tabs %}
{% tab title="🟢 Success" %}
```json
{
"data": {
"wallets": [
{
"id": "clllyfdl8007jbtqksgcgx1wy",
"name": "Wallet 1",
"balanceUSD": 0,
"balanceEUR": 0,
"walletCryptoAccounts": []
},
{
"id": "clnleemkg0000780172yr8115",
"name": "Wallet 2",
"balanceUSD": 0,
"balanceEUR": 0,
"walletCryptoAccounts": []
},
{
"id": "cln1qt5p400005b012sohm0sx",
"name": "Wallet 3",
"balanceUSD": 0,
"balanceEUR": 0,
"walletCryptoAccounts": []
},
{
"id": "cln1p10nm00006b016ow1abpj",
"name": "Wallet 4",
"balanceUSD": 305.41,
"balanceEUR": 301.96,
"walletCryptoAccounts": [
{
"balance": 0.05591,
"financialAsset": {
"code": "ETH"
},
"blockchain": {
"code": "ethereum"
}
}
]
}
```
{% endtab %}
{% tab title="🔴 Failure" %}
```json
{
"errors": [
{
"message": "Unauthorized",
"extensions": {
"code": "UNAUTHENTICATED",
"response": {
"statusCode": 401,
"message": "Unauthorized"
}
}
}
],
"data": {
"transaction": null
}
}
```
{% endtab %}
{% endtabs %}
**How do I retrieve my organization ID?**
In order to retrieve an organization's identifier, you'll need to call your user details first, to understand which organization is related to them.
```graphql
query User($where: UserWhereUniqueInput!) {
user(where: $where) {
fullName
organizations {
name
id
}
}
}
```
### Try it out!
{% embed url="" %}
# Create inabit Wallet
Create an inabit wallet in your organization
## Generate an inabit Wallet
The CreateWalletWithInabit mutation allows API admins to create a new inabit wallet (that is accessible in the platform's interface, unlike API wallets) with a designated address for a given asset & blockchain.
> Remember to authenticate to call our GraphQL API using an access token (bearer) with your **API** **Admin** credentials. (If you're not sure how, refer to [Authentication](/api-reference/develop-with-inabit-api/getting-started/authentication))
>
> Don't have an API Admin user yet? contact us at to create one!
```graphql
mutation CreateWalletWithInabit($data: WalletCreateWithInabitInput!) {
createWalletWithInabit(data: $data) {
id
name
}
}
```
### **Headers**
| Name | Value |
| ------------- | ------------------ |
| Content-Type | `application/json` |
| Authorization | `Bearer ` |
### **Body (**WalletCreateWithInabitInput object)
| Name | Type | Description |
| ------------------------------------------------ | ------ | -------------------------------- |
| name\* | string | Name of the wallet |
| organizationId\* | string | ID of the organization in inabit |
Example body:
```graphql
{
"data": {
"name": "My Inabit Wallet",
"organization": {
"id": "clu6oj0kg0004r4ub98guo82u"
}
}
}
```
### Response
Return values:
| Name | Type | Description |
| ---- | ------ | ------------------- |
| id | String | Created Wallet ID |
| name | String | Created Wallet Name |
{% tabs %}
{% tab title="🟢 Success" %}
```graphql
{
"data": {
"createWalletWithInabit": {
"id": "clvw5p0oj000er47qhe3atv9d",
"name": "My Inabit Wallet",
}
}
}
```
{% endtab %}
{% tab title="🔴 Failure" %}
```graphql
{
"error": "Invalid request"
}
```
{% endtab %}
{% endtabs %}
In the mutation's response, you will receive the created API wallet ID including the associated blockchain address.
{% hint style="info" %}
Generating API wallet is different than this mutation of creating a regular inabit wallet. API wallets generation are wallets created that are blockchain & address specific, as well as aren't accessible via the platform's interface.
Unlike API wallets, inabit wallets created with this mutation can be accessed through the interface as well as have multiple blockchains and addresses generated.
Visit the [API Wallets Generation](/api-reference/remote-approver-app/api-wallets-generation) section to learn more.
{% endhint %}
### Try it out!
{% embed url="" %}
# Edit Wallet Name
Edit your wallet name (supported on all wallet types)
## Edit a Wallet's Name
Edit a specific wallet's name in your organization according to a specific wallet ID.\
Please note that a wallet name can take up to 32 characters maximum.
```graphql
mutation UpdateWallet($where: WalletWhereUniqueInput!, $data: WalletUpdateInput!) {
updateWallet(where: $where, data: $data) {
id
name
}
}
```
### **Headers**
| Name | Value |
| ------------- | ------------------ |
| Content-Type | `application/json` |
| Authorization | `Bearer ` |
### **Body (**WalletWhereUniqueInput object) + (WalletUpdateInput object)
| Name | Type | Description |
| -------------------------------------------- | ------ | ----------------- |
| walletId\* | String | Wallet ID |
| walletName\* | String | Wallet's New name |
Example body:
```json
{
"where": {
"id": "clllyfdk6006ybtqkwk840uei"
},
"data": {
"name": "New Wallet Name"
}
}
```
### Response
Return values:
| Name | Type | Description |
| ---- | ------ | ------------------- |
| id | String | Wallet ID |
| name | String | Updated Wallet Name |
{% tabs %}
{% tab title="🟢 Success" %}
```json
{
"data": {
"updateWallet": {
"id": "clllyfdk6006ybtqkwk840uei",
"name": "New Wallet Name"
}
}
}
```
{% endtab %}
{% tab title="🔴 Failure" %}
{% endtab %}
{% endtabs %}
{% hint style="info" %}
Using this endpoint users can edit any wallet's name within their organization wallets.
{% endhint %}
**How do I retrieve my wallet ID?**
In order to retrieve an organization's wallet ID, you'll need to call your organization wallets query first, to fetch the wallet's ID. The query below accepts a **WalletWhereInput** of an `organizationId`, and retrieves the wallet's ID and name in the response.
```graphql
query Wallets($where: WalletWhereInput) {
wallets(where: $where) {
id
name
}
}
```
### Try it out!
{% embed url="" %}
# Generate Deposit Address
Adding a new coin/asset to a wallet (Generates a new wallet blockchain deposit address)
## Adding a New Coin to a Wallet
The `AddCoinAddress` query allows API users to add a new coin into their API wallet/s. This action will generate a new blockchain address in the wallet.
> Remember to authenticate to call our GraphQL API using an access token (bearer) with your **API** **Admin** credentials. (If you're not sure how, refer to [Authentication](/api-reference/develop-with-inabit-api/getting-started/authentication))
>
> Don't have an API Admin user yet? contact us at to create one!
```graphql
query AddCoinAddress($where: WalletDepositAddressWhereInput!) {
addCoinAddress(where: $where) {
address
}
}
```
### **Headers**
| Name | Value |
| ------------- | ------------------ |
| Content-Type | `application/json` |
| Authorization | `Bearer ` |
### **Body (**WalletDepositAddressWhereInput object)
| Name | Type | Description |
| -------------------------------------------------- | ------ | --------------------------------------------------------- |
| walletId\* | string | ID of the wallet |
| financialAssetId\* | string | ID of the financial asset in inabit (can be token/native) |
| blockchainId\* | string | ID of the blockchain in inabit |
Example body:
```graphql
{
"where": {
"walletId": "clvm13aa70003phy2n5j7ece9",
"assetId": "clefn78h5012plc6rxbmofnop",
"blockchainId": "clefn78cl00i3lc6rih442mx9"
}
}
```
### Response
Return values:
| Name | Type | Description |
| ------- | ------ | ------------------ |
| address | String | API Wallet Address |
{% tabs %}
{% tab title="🟢 Success" %}
```graphql
{
"data": {
"addCoinAddress": {
"address": "0xca832a87caf09dcecdbe4d3bda46d67da53b69f5",
}
}
}
```
{% endtab %}
{% tab title="🔴 Failure" %}
```graphql
{
"error": "Invalid request"
}
```
{% endtab %}
{% endtabs %}
In the query's response, you will receive the created API wallet address for the asset & blockchain given in the body.
{% hint style="info" %}
**Reminder** - You can't add multiple blockchains under the same API wallet.\
**One** inabit API wallet = **one** address
{% endhint %}
### Try it out!
{% embed url="" %}
# Fetch Deposit Address
Fetching an existing coin/asset blockchain address within a wallet
## Get an Existing Wallet Deposit Address
The `GetOrCreateDepositAddress` query allows API users to fetch an existing blockchain address for an asset & blockchain in their wallet. If there isn't one, the query will return an error and you will need to use [Generate Deposit Address](/api-reference/develop-with-inabit-api/wallets/generate-deposit-address) query beforehand to add a coin first.
> Do note that currently, this query is called `GetOrCreateDepositAddress` while in fact this query cannot create/generate a new blockchain deposit address for a wallet. This confusion will be fixed and deprecated in future versions of the API.
```graphql
query GetOrCreateDepositAddress($where: WalletDepositAddressWhereInput!) {
getOrCreateDepositAddress(where: $where) {
address
}
}
```
### **Headers**
| Name | Value |
| ------------- | ------------------ |
| Content-Type | `application/json` |
| Authorization | `Bearer ` |
### **Body (**WalletDepositAddressWhereInput object)
| Name | Type | Description |
| -------------------------------------------------- | ------ | --------------------------------------------------------- |
| walletId\* | string | ID of the wallet |
| financialAssetId\* | string | ID of the financial asset in inabit (can be token/native) |
| blockchainId\* | string | ID of the blockchain in inabit |
Example body:
```graphql
{
"where": {
"walletId": "clmq35x0400009k01v5ptn7d5",
"assetId": "clefn78h5012plc6rxbmofnop",
"blockchainId": "clefn78cl00i3lc6rih442mx9"
}
}
```
### Response
Return values:
| Name | Type | Description |
| ------- | ------ | ------------------ |
| address | String | API Wallet Address |
{% tabs %}
{% tab title="🟢 Success" %}
```graphql
{
"data": {
"getOrCreateDepositAddress": {
"address": "0x429de487cF185eFBBEb3158D2FbC1C003462018c",
}
}
}
```
{% endtab %}
{% tab title="🔴 Failure" %}
```graphql
{
"error": "Invalid request"
}
```
{% endtab %}
{% endtabs %}
In the query's response, you will receive the created API wallet address for the wallet, asset & blockchain IDs given in the body.
### Try it out!
{% embed url="" %}
# Save Address to Whitelist
Fetching an existing coin/asset blockchain address within a wallet
## Adding/Saving an Address to The Whitelist
The `CreateContactCryptoAccount` mutation allows API users to save an un-recognized address to the contact's whitelist. This action essentially means that you can name an address while labeling it to an existing contact in the organization.
The contact must exist first, in order to create a new contact, follow the steps in the [Create New Contact](/api-reference/develop-with-inabit-api/contacts/create-new-contact) page..
```graphql
mutation CreateContactCryptoAccount($data: ContactCryptoAccountCreateInput!) {
createContactCryptoAccount(data: $data) {
address
name
contact {
id
name
}
id
}
}
```
### **Headers**
| Name | Value |
| ------------- | ------------------ |
| Content-Type | `application/json` |
| Authorization | `Bearer ` |
### **Body (**ContactCryptoAccountCreateInput object)
| Name | Type | Description |
| --------------------------------------------- | ------ | ----------------------- |
| address\* | string | Address to be saved |
| contactName\* | string | Existing contact's name |
| name\* | string | Address name |
| organizationId | string | Organization ID |
Example body:
```json
{
"data": {
"address": "0x39be337b9c1e91182d9c2c0e63233e9f2db4d9dc",
"contactName": "Example Tests",
"name": "Test address",
"organizationId": "clllyfclz0007btqk0iigw1n1"
}
}
```
### Response
Return values:
| Name | Type | Description |
| ------- | ------ | ------------------ |
| address | String | API Wallet Address |
{% tabs %}
{% tab title="🟢 Success" %}
```graphql
{
"data": {
"createContactCryptoAccount": {
"address": "0x39be337b9c1e91182d9c2c0e63233e9f2db4d9dd",
"name": "Test address name",
"contact": {
"id": "clvmgp4h1002j88014aw1k6uf",
"name": "Test Contact"
},
"id": "clvmgp4h1002h8801lx7oyycg"
}
}
}
```
{% endtab %}
{% tab title="🔴 Failure" %}
```graphql
{
"error": "Invalid request"
}
```
{% endtab %}
{% endtabs %}
In the query's response, you will receive the created API wallet address for the wallet, asset & blockchain IDs given in the body.
### Try it out!
{% embed url="" %}
# Archive / Unarchive Wallet
Decide if you wish to archive / unarchive a specific wallet in your organization.
## Archive / Unarchive a Wallet
Using this endpoint, users can choose to archive or unarchive a specific wallet in their organization, according to a wallet ID.
{% hint style="info" %}
Note that this mutation is supported across all wallet types. *(inabit, exchanges, web3)*
{% endhint %}
```graphql
mutation UpdateWallet($where: WalletWhereUniqueInput!, $data: WalletUpdateInput!) {
updateWallet(where: $where, data: $data) {
id
isArchived
}
}
```
### **Headers**
| Name | Value |
| ------------- | ------------------ |
| Content-Type | `application/json` |
| Authorization | `Bearer ` |
### **Body (**WalletWhereUniqueInput object) + (WalletUpdateInput object)
| Name | Type | Description |
| -------------------------------------------- | ------- | ---------------------- |
| Id\* | String | Wallet ID |
| isArchived\* | Boolean | Archived or not (flag) |
Example body:
```json
{
"where": {
"id": "clllyfdk6006ybtqkwk840uei"
},
"data": {
"isArchived": true
}
}
```
### Response
Return values:
| Name | Type | Description |
| -------------------------------------------- | ------- | ---------------------- |
| Id\* | String | Wallet ID |
| isArchived\* | Boolean | Archived or not (flag) |
{% tabs %}
{% tab title="🟢 Success" %}
```javascript
{
"data": {
"updateWallet": {
"id": "clpgvhulg000f6s0171foixj6",
"isArchived": true, // false for unArchived
}
}
}
```
{% endtab %}
{% tab title="🔴 Failure" %}
{% endtab %}
{% endtabs %}
**How do I retrieve my wallet ID?**
In order to retrieve an organization's wallet ID, you'll need to call your organization wallets query first, to fetch the wallet's ID. The query below accepts a **WalletWhereInput** of an `organizationId`, and retrieves the wallet's ID and name in the response.
```graphql
query Wallets($where: WalletWhereInput) {
wallets(where: $where) {
id
name
}
}
```
### Try it out!
{% embed url="" %}
# Disconnect Exchange Wallet
Disconnect a specific exchange wallet in your organization.
## Disconnect an Exchange Wallet
Mutation to disconnect a connected exchange wallet from an organization according to the exchange wallet's ID.
{% hint style="info" %}
Note that this mutation can only occur on a wallet marked as "Exchange wallet" in its type.
{% endhint %}
```graphql
mutation DisconnectWallet($walletId: String!) {
disconnectWallet(walletId: $walletId) {
success
}
}
```
### **Headers**
| Name | Value |
| ------------- | ------------------ |
| Content-Type | `application/json` |
| Authorization | `Bearer ` |
### **Body (**walletId object)
| Name | Type | Description |
| ------------------------------------ | ------ | ----------- |
| id\* | String | Wallet ID |
Example body:
```json
{
"walletId": "clpgvhulg000f6s0171foixj6"
}
```
### Response
Return values:
| Name | Type | Description |
| ------- | ------- | ----------------------------------------------------- |
| success | Boolean | Returns true if disconnect was successful, else false |
{% tabs %}
{% tab title="🟢 Success" %}
```json
{
"data": {
"disconnectWallet": {
"success": true,
}
}
}
```
{% endtab %}
{% tab title="🔴 Failure" %}
{% endtab %}
{% endtabs %}
**How do I retrieve my wallet ID?**
In order to retrieve an organization's wallet ID, you'll need to call your organization wallets query first, to fetch the wallet's ID. The query below accepts a **WalletWhereInput** of an `organizationId`, and retrieves the wallet's ID and name in the response.
```graphql
query Wallets($where: WalletWhereInput) {
wallets(where: $where) {
id
name
}
}
```
### Try it out!
{% embed url="" %}
# Contacts
# Contact Info
Fetch a specific contact's information in an inabit organization.
## Fetch all of a Contact's Information
Fetch a specific contact's data in an inabit organization, according to the contact's ID.
Using this endpoint users can search specific contacts using their ID (the call must be per contact ID).
The response contains the contact’s information including: contact name, ID, address, blockchain, blockchain code and more.
```graphql
query Contact($where: ContactWhereUniqueInput!) {
contact(where: $where) {
id
contactCryptoAccounts {
address
blockchainProtocol {
code
}
lastTransferRequestDate
name
}
name
}
}
```
### **Headers**
| Name | Value |
| ------------- | ------------------ |
| Content-Type | `application/json` |
| Authorization | `Bearer ` |
### Body (ContactWhereUniqueInput object)
| Name | Type | Description |
| ------------------------------------ | ------ | ----------- |
| id\* | String | Contact ID |
Example body:
```json
{
"where": {
"id": "cljzumgy0000gk603zl8u9xx2"
}
}
```
### Response
Return values:
| Name | Type | Description |
| ------------------------------- | -------- | --------------------------------------------------- |
| id | String | Contact ID |
| address (contactCryptoAccounts) | String | Blockchain Address (per contactCryptoAccount given) |
| code (blockchainProtocol) | String | Blockchain Code |
| lastTransferRequestDate | Datetime | Last Transfer Request Date |
| name (contactCryptoAccounts) | String | Name (of the contact's contactCryptoAccount) |
| name | String | Contact Name |
{% tabs %}
{% tab title="🟢 Success" %}
```javascript
{
"data": {
"contact": {
"id": "cljzumgy0000gk603zl8u9xx1",
"contactCryptoAccounts": [
{
"address": "0xbd78e1bdd7fca39ac7a4c8cdeb89fc2bfcc57a0a",
"blockchainProtocol": {
"code": "account"
},
"lastTransferRequestDate": null,
"name": "Credit Card Account"
}
],
"name": "Georgia Hermann"
}
}
}
```
{% endtab %}
{% tab title="🔴 Failure" %}
{% endtab %}
{% endtabs %}
### Try it out!
{% embed url="" %}
# Create New Contact
Create a new contact in your organization.
## Create a New Contact
Fetch a specific contact's data in an inabit organization, according to the contact's ID.
Using this endpoint users can create a new contact in their organization and associate crypto addresses to it.
```graphql
mutation CreateContact($data: ContactCreateInput!) {
createContact(data: $data) {
id
name
firstName
lastName
email
shouldNotifyTx
phone
contactCategory {
name
}
contactCryptoAccounts {
name
address
}
}
}
}
```
### **Headers**
| Name | Value |
| ------------- | ------------------ |
| Content-Type | `application/json` |
| Authorization | `Bearer ` |
### Body (ContactCreateInput object)
| Name | Type | Description |
| ------------------------------------------------------- | ------- | ------------------------------------------------------------------------------------------------------------------------------------------------------------- |
| oraganizationId\* | String | Organization ID |
| contactName\* | String | Contact Name |
| firstName | String | Contact's First Name |
| lastName | String | Contact's Last Name |
| email | String | Contact Email |
| shouldNotifyTx | Boolean |
If true, send emails to this contact
for every transaction associated
with the contact's addresses
("walletCryptoAccounts")
|
| phone | String | Phone Number |
| contactCategory name | String | Category name from "Categories" |
| contactCryptoAccounts\* | String | Name + address per wallet |
Example body:
```json
{
"data": {
"organization": {
"id": "cloh4qk1e0002dn01v9u2rfvc"
},
"name": "George Johnson Limited",
"firstName": "George",
"lastName": "Johnson",
"email": "contactemail@example.com",
"shouldNotifyTx": true,
"phone": "588080080",
},
"contactCategory": {
"name": "FinancialServices"
},
"contactCryptoAccounts": {
"create": [
{
"name": "Contact address TRON",
"address": "TBNVRZWdb3ofKeEjucKMCdnnRUbmbdmL8H"
},
{
"name": "Contact address ETH",
"address": "0xeee9db769958a4b75b5b771f7d196569258e114b"
}
]
}
}
}
```
### Response
Return values:
| Name | Type | Description |
| ------------------------------- | ------ | ------------------------------------------- |
| id | String | Contact ID |
| name | String | Contact Name |
| id (contactCryptoAccounts) | String | ID of the created contactCryptoAccount |
| name (contactCryptoAccounts) | String | Name of the created contactCryptoAccount |
| address (contactCryptoAccounts) | String | Address of the created contactCryptoAccount |
{% tabs %}
{% tab title="🟢 Success" %}
```javascript
{
"data": {
"createContact": {
"id": "clph5roj900138f01ngzdkzdm",
"name": "George Johnson Limited",
"contactCryptoAccounts": [
{
"id": "clph5roj900148f010tomaef4",
"name": "Contact address TRON",
"address": "TBNVRZWdb3ofKeEjucKMCdnnRUbmbdmL8H",
},
{
"id": "clph5roj900158f01ssdlpu7e",
"name": "Contact address ETH",
"address": "0xeee9db769958a4b75b5b771f7d196569258e114b",
}
],
}
}
}
```
{% endtab %}
{% tab title="🔴 Failure" %}
{% endtab %}
{% endtabs %}
**How do I retrieve my organization ID?**
In order to retrieve an organization's identifier, you'll need to call your user details first, to understand which organization is related to them.
```graphql
query User($where: UserWhereUniqueInput!) {
user(where: $where) {
fullName
organizations {
name
id
}
}
}
```
### Try it out!
{% embed url="" %}
# Update Contact
Update a specific contact's details
## Update Existing Contact Details
Fetch a specific contact's data in an inabit organization, according to the contact's ID.
By this endpoint, users can update an existing contact details in their organization.
```graphql
mutation UpdateContact($data: ContactUpdateInput!, $where: ContactWhereUniqueInput!) {
updateContact(data: $data, where: $where) {
id
name
contactCategory {
id
name
}
firstName
lastName
fullName
email
shouldNotifyTx
phone
phoneCountry {
id
phoneCode
}
}
}
```
### **Headers**
| Name | Value |
| ------------- | ------------------ |
| Content-Type | `application/json` |
| Authorization | `Bearer ` |
### Body (ContactUpdateInput) object + (ContactWhereUniqueInput) object
| Name | Type | Description |
| ------------------------------------ | ------ | -------------------- |
| id\* | String | Organization ID |
| id\* | String | Contact ID |
| name | String | Contact Name |
| contactCategoryID | String | Contact's First Name |
Example body:
```json
{
"data": {
"organization": {
"id": "cloh4qk1e0002dn01v9u2rfvh"
},
"name": "NEW Asher QA",
"contactCategory": {
"id": "cllurziwt006xgqjllg9x5grm"
}
},
"where": {
"id": "clph5roj900138f01ngzdkzdm"
}
}
```
### Response
Return values:
| Name | Type | Description |
| ------------------------ | ------ | ------------------------------------------------------------------------------------------------------------------------------------------------------------- |
| id | String | Organization ID |
| name | String | Contact ID |
| id (contactCategoryID) | String | Contact Name |
| name (contactCategoryID) | String | Contact's First Name |
| firstName | String | Contact First Name |
| lastName | String | Contact Last Name |
| fullName | String | Contact Full Name |
| email | String | Contact Email |
| shouldNotifyTx | String |
If true, send emails to this contact
for every transaction associated
with the contact's addresses
("walletCryptoAccounts")
|
| phone | String | Phone Number |
| id (phoneCountry) | String | ID of the phoneCountry |
| phoneCode (phoneCountry) | String | Phone Code of the phoneCountry |
{% tabs %}
{% tab title="🟢 Success" %}
```javascript
{
"data": {
"updateContact": {
"id": "clph5roj900138f01ngzdkzdm",
"name": "NEW Asher QA",
"contactCategory": {
"id": "cllurziwt006xgqjllg9x5grm",
"name": "Marketing",
},
"firstName": "Asher",
"lastName": "Indursky",
"fullName": "Asher Indursky",
"email": "asher@example.com",
"shouldNotifyTx": true,
"phone": "588080080",
"phoneCountry": {
"id": "cli023gmw005vlczi6pl7ck0w",
"phoneCode": "+972",
},
}
}
}
```
{% endtab %}
{% tab title="🔴 Failure" %}
{% endtab %}
{% endtabs %}
**How do I retrieve my organization ID?**
In order to retrieve an organization's identifier, you'll need to call your user details first, to understand which organization is related to them.
```graphql
query User($where: UserWhereUniqueInput!) {
user(where: $where) {
fullName
organizations {
name
id
}
}
}
```
### Try it out!
{% embed url="" %}
# Transactions
# Transaction Info
Retrieve data on your organization's transactions
## Fetch Transaction Data
Fetch a specific contact's data in an inabit organization, according to the contact's ID.
Using this endpoint users can request information on a specific transaction by its transaction ID in their inabit account.
```graphql
query Transaction($where: TransactionWhereUniqueInput!) {
transaction(where: $where) {
id
amount
blockchain {
name
code
}
createdAt
createdBy {
fullName
}
fee
note
status {
status
}
wallet {
name
id
}
financialAsset {
code
}
isAccelerated
priority
rateUSD
rateEUR
kyt
}
}
```
### **Headers**
| Name | Value |
| ------------- | ------------------ |
| Content-Type | `application/json` |
| Authorization | `Bearer ` |
### Body (TransactionWhereUniqueInput) object
| Name | Type | Description |
| ------------------------------------ | ------ | -------------- |
| id\* | String | Transaction ID |
Example body:
```graphql
{
"where": {
"id": "clllyfhdj00w9btqke47wsesx"
}
}
```
### Response
Return values:
| Name | Type | Description |
| --------------------- | -------- | -------------------------------------------------------------------------------------------------------------- |
| id | String | Transaction ID |
| amount | String | Transaction Amount (in cryptocurrency) |
| name (blockchain) | String | Blockchain Name |
| code (blockchain) | String | Blockchain Code |
| createdAt | Datetime | Creation Time |
| fullName (createdBy) | String | Full Name of Initiator |
| fee | Integer | Transaction Fee |
| note | String | Transaction Note |
| status | String | Transaction Status |
| name (wallet) | String | Wallet Name |
| id (wallet) | String | Wallet ID |
| code (financialAsset) | String | FinancialAsset Code (i.e - "ETH" / "BTC") |
| isAccelerated | Boolean | Flag that indicates wether the transaction is [accelerated](broken://pages/neN17H73chywYEFbnRrb). (true/false) |
| priority | String |
Transaction Priority (Slow, Medium, Fast, etc.)
|
| rateUSD | Integer | Asset Rate at the time of the Transaction (in USD) |
| rateEUR | Integer | Asset Rate at the time of the Transaction (in Euro) |
| kyt | String |
|
{% tabs %}
{% tab title="🟢 Success" %}
```javascript
{
"data": {
"transaction": {
"id": "clk10q8he002kk660o1ed8ud4",
"transactionType": "Withdrawal",
"createdAt": "2023-07-13T10:39:42.963Z",
"createdBy": {
"fullName": "admin admin",
"firstName": "admin",
"lastName": "admin",
"id": "cljzumg980000k603eaitu5sq",
"profileFile": null
},
"txId": null,
"contactCryptoAccount": {
"address": "0xcce6de61f9abdb6b43effee5dd603bb7c6ee3fc6",
"name": "Binance Smart Chain d97e1c12",
"contact": {
"name": "Wesley Hermann"
}
},
"kyt": 6,
"wallet": {
"id": "cljzumgyb000ik603z04lxgyk",
"name": "REAL WALLET Wallet",
"externalId": "6422985cfa2a9b000726588b",
"organization": {
"id": "cljzumgxa0009k603wl8foc6x"
},
"organizationExchange": null
},
"financialAsset": {
"id": "clefn78h5012plc6rxbmofnop",
"code": "ETH",
"name": "Ethereum",
"precision": 8
},
"blockchain": {
"id": "clefn78cl00i3lc6rih442mx9",
"name": "Ethereum",
"code": "ethereum",
"contractType": "ERC20",
"networkScannerUrl": "https://etherscan.io/tx/"
},
"amount": 0.5,
"rateEUR": null,
"rateUSD": null,
"status": {
"category": "InProgress",
"status": "Processing",
"exchangeStatuses": [],
"transactionSubStatuses": [
{
"subStatus": "WaitingExecution"
},
{
"subStatus": "InExecution"
}
]
},
"fee": null,
"note": "",
"swapAssetTo": null,
"swapToAmount": null,
"metaData": [
{
"value": "0.5",
"transactionMetaDataField": {
"id": "zb88n54ipqwjspo1wyw35nf5",
"name": "requestedAmount"
}
}
]
}
}
}
```
{% endtab %}
{% tab title="🔴 Failure" %}
{% endtab %}
{% endtabs %}
**How do I retrieve my transaction ID?**
In order to retrieve a transaction's identifier, you'll need to query all of an organization's transactions first, and fetch the specific transaction ID.
```graphql
query Transactions($where: TransactionWhereInput) {
transactions(where: $where) {
id
}
}
```
Example body:
```graphql
{
"where": {
"wallet": {
"organization": {
"id": ""
}
}
}
}
```
### Try it out!
{% embed url="" %}
# Create Transfer Request
Create a money transfer request from a specific wallet.
## Create a Withdrawal
Initiate a mutation to create an assets transfer request to send for approval from one of your organization's wallets.
{% hint style="success" %}
Important Note - Naming convention for this process is slightly different than what's presented in our interface.\
In our platform "withdrawals" are described as "Money Transfers" while in our API, the mutation is called `createWithdrawal.`
{% endhint %}
```graphql
mutation CreateWithdrawal($data: WithdrawalCreateInput!) {
createWithdrawal(data: $data) {
id
}
}
```
### **Headers**
| Name | Value |
| ------------- | ------------------ |
| Content-Type | `application/json` |
| Authorization | `Bearer ` |
### Body (WithdrawalCreateInput) object
| Name | Type | Description |
| ----------------------------------------------------- | ------- | ------------------------------------------------------------ |
| id\* | String | Wallet ID |
| id\* (financialAsset) | String | Asset ID |
| address\* | String | Destination Address (To) |
| amount\* | Integer | Transfer amount |
| id\* (blockchain) | String | Blockchain ID |
| note | String | Transaction Note |
| priority | String |
Transaction Priority
(Slow, medium, fast, etc.)
|
Example body:
```graphql
{
"data": {
"wallet": {
"id": "clol7o576002oaz011mmtnvru"
},
"financialAsset": {
"id": "clefn78gv011olc6rcwtt0wel"
},
"address": "0x7582f3483116105e0b7845ac1a0df5eb0c8cd062",
"amount": 5,
"blockchain": {
"id": "clefn78em00mslc6r3lzf3h5a"
},
"note": "",
"priority": "Medium"
}
}
```
### Response
Return values:
| Name | Type | Description |
| ---- | ------ | ------------- |
| id | String | Withdrawal ID |
{% tabs %}
{% tab title="🟢 Success" %}
```javascript
{
"data": {
"createWithdrawal": {
"id": "clpgvrjb700136g01lr3o0tgu",
}
}
}
```
{% endtab %}
{% tab title="🔴 Failure" %}
```javascript
{
}
```
{% endtab %}
{% endtabs %}
### Try it out!
{% embed url="" %}
# Create Batch Sweeping
Create a batch transfer request from multiple wallets to sweep funds
## Create a Batch Transfer
Initiate a mutation to create an assets batch transfer request to sweep asset funds from multiple source wallets to a destination wallet address within your inabit organization.
{% hint style="warning" %}
Please note that this feature is permitted **only** for **inabit** **wallets**.
{% endhint %}
```graphql
mutation SweepWallets($data: SweepTransactionInput!) {
sweepWallets(data: $data) {
transactionId
}
}
```
### **Headers**
| Name | Value |
| ------------- | ------------------ |
| Content-Type | `application/json` |
| Authorization | `Bearer ` |
### Body (SweepTransactionInput) object
| Name | Type | Description |
| -------------------------------------------------------- | ------ | ----------------- |
| id\* (destinationWallet) | String | Wallet ID |
| id\* (blockchain) | String | Blockchain ID |
| id\* (financialAsset) | String | Asset ID |
| id\* (Organization) | String | Organization ID |
| id\* (sourceWalletIds) | String | Source Wallet IDs |
Example body:
```graphql
{
"data": {
"destinationWalletId": "master-wallet",
"blockchain": {
"id": "clefn78h5012plc6rxbmofnop"
},
"financialAsset": {
"id": "cmaa9a52t24s28n018pz2zle4"
},
"organization": {
"id": "org-98765"
},
"sourceWalletIDs": ["wallet-001", "wallet-002"]
}
}
}
```
### Response
Return values:
| Name | Type | Description |
| ------------- | ------ | ----------------- |
| transactionId | String | Batch Transfer ID |
{% tabs %}
{% tab title="🟢 Success" %}
```javascript
{
"data": {
"sweepWallets": {
"transactionId": "tx-46a89bcf-33d3-4a88-90de-59c5f201b9ab"
}
}
}
```
{% endtab %}
{% tab title="🔴 Failure" %}
```javascript
{
}
```
{% endtab %}
{% endtabs %}
### Try it out!
{% embed url="" %}
# Create Off Ramp Request
Create a swap request from a specific wallet.
## Create an Off-Ramp Transfer
Initiate a mutation to create off ramp transaction request for approval, from one of your organization's inabit wallets.
{% hint style="warning" %}
Please note that this feature is permitted **only** for **inabit** **wallets**.
{% endhint %}
```graphql
mutation CreateOfframpTransaction($data: OfframpCreateInput!) {
createOfframpTransaction(data: $data) {
id
status {
status
}
subStatus {
subStatus
}
}
}
```
### **Headers**
| Name | Value |
| ------------- | ------------------ |
| Content-Type | `application/json` |
| Authorization | `Bearer ` |
### Body (OfframpCreateInput) object
| Name | Type | Description |
| -------------------------------------------------- | ------- | --------------------------------------- |
| amount\* | Integer | Transfer Amount (of the financialAsset) |
| walletId\* | String | Wallet's ID |
| financialAssetId\* | String | Financial Asset ID |
| blockchainId\* | String | Blockchain ID |
| note | String | Transaction Note (optional) |
Example body:
```graphql
{
"data": {
"amount": 15000,
"wallet": {
"id": "clp5bm4f1002icg01d526dgw9" # inabit wallet iD
}
"financialAsset": {
"id": "clefn78h5012plc6rxbmofnop" # USDT Asset
},
"blockchain": {
"id": "clefn78gv011olc6rcwtt0wel" # Ethereum network
},
"note": "Transfer to my bank account" # Optional note of the transaction
}
}
```
### Response
Return values:
| Name | Type | Description |
| --------- | ------ | ----------------------- |
| id | String | Off Ramp Transaction ID |
| status | String | Transaction Status |
| subStatus | String | Transaction Sub Status |
{% tabs %}
{% tab title="🟢 Success" %}
```graphql
{
"data": {
"CreateOfframpTransaction": {
"id": "clph3mik5000t8f01qqr0ol71",
"status": "Processing",
"subStatus": "Fiat Processing" # crypto was sent, fiat transfer is being processed
}
}
}
```
{% endtab %}
{% tab title="🔴 Failure" %}
{% endtab %}
{% endtabs %}
### Try it out!
{% embed url="" %}
# Create inabit Wallet Swap
Create a swap request from a specific wallet.
## Create a Swap in an inabit Wallet
Initiate a mutation to create an assets swap request for approval, from one of your organization's inabit wallets:
{% hint style="warning" %}
Please note that this mutation is applicable **only** for **inabit** **wallets**.
{% endhint %}
```graphql
mutation CreateInabitWalletSwap($data: InabitWalletSwapCreateInput!) {
createInabitWalletSwap(data: $data) {
id
amount
fee
orderType
}
}
```
### **Headers**
| Name | Value |
| ------------- | ------------------ |
| Content-Type | `application/json` |
| Authorization | `Bearer ` |
### Body (WithdrawalCreateInput) object
| Name | Type | Description |
| ------------------------------------------------ | ------- | ------------------------- |
| amount\* | Integer | Swap Amount |
| financialAsset\* | String | ID of Swapped From Asset |
| swapAssetTo\* | String | ID of Swapped To Asset |
| walletId\* | String | inabit Wallet ID |
| note | String | Internal Note on the Swap |
| isAccelerated | boolean | Always keep as null |
Example body:
```graphql
{
"data": {
"amount": 0.0051,
"blockchain": {
"id": "" // FILL WITH CORRECT ID
},
"financialAsset": {
"id": "clefn78h5012plc6rxbmofnop"
},
"note": null,
"swapToBlockchain": {
"id": "" // FILL WITH CORRECT ID
},
"swapAssetTo": {
"id": "clefn78gv011olc6rcwtt0wel"
},
"wallet": {
"id": "clp5bm4f1002icg01d526dgw9"
},
"isAccelerated": null,
}
}
```
### Response
Return values:
| Name | Type | Description |
| ------ | ------- | ------------------------------------------------ |
| id | String | Swap ID |
| amount | Integer | Swap Amount |
| fee | Integer | Fee Amount (in Native Asset of the "From Asset") |
{% tabs %}
{% tab title="🟢 Success" %}
```javascript
{
"data": {
"createSwap": {
"id": "clph3mik5000t8f01qqr0ol74",
"amount": 0.0051,
"fee": 0.0014,
}
}
}
```
{% endtab %}
{% tab title="🔴 Assets Pair Not Supported" %}
```json
{
"errors": [
{
"code": "OPERATION_FAILED",
"message": "No InabitWalletSupportedPair found",
"path": [
"createInabitWalletSwap"
],
"extensions": {
"code": "OPERATION_FAILED",
"message": "No InabitWalletSupportedPair found"
}
}
],
"data": null
}
```
{% endtab %}
{% endtabs %}
### Try it out!
{% embed url="" %}
# Create Exchange Swap
Create a swap request from a specific wallet.
## Create a Swap Through an Exchange Wallet
Initiate a mutation to create an assets swap request for approval, from one of your organization's exchange wallets
{% hint style="warning" %}
Please note that all is applicable **only** for **exchange** **wallet** swaps.
{% endhint %}
```graphql
mutation CreateSwap($data: SwapCreateInput!) {
createSwap(data: $data) {
id
amount
fee
orderType
}
}
```
### **Headers**
| Name | Value |
| ------------- | ------------------ |
| Content-Type | `application/json` |
| Authorization | `Bearer ` |
### Body (WithdrawalCreateInput) object
| Name | Type | Description |
| ------------------------------------------------ | ------- | --------------- |
| amount\* | Integer | Swap Amount |
| financialAsset\* | String | Coin to swap |
| swapAssetTo\* | String | Coin to swap to |
| walletId\* | String | Wallet ID |
Example body:
```graphql
{
"data": {
"amount": 0.0051,
"financialAsset": {
"id": "clefn78h5012plc6rxbmofnop"
},
"swapAssetTo": {
"id": "clefn78gv011olc6rcwtt0wel"
},
"wallet": {
"id": "clp5bm4f1002icg01d526dgw9"
}
}
}
```
### Response
Return values:
| Name | Type | Description |
| --------- | ------- | -------------------------------------------------------- |
| id | String | Swap ID |
| amount | Integer | Swap Amount |
| fee | Integer | Fee Amount |
| orderType | String | Type of the order (Market/Limit) (will always be market) |
{% tabs %}
{% tab title="🟢 Success" %}
```javascript
{
"data": {
"createSwap": {
"id": "clph3mik5000t8f01qqr0ol74",
"amount": 0.0051,
"fee": null,
"orderType": "Market"
}
}
}
```
{% endtab %}
{% tab title="🔴 Failure" %}
{% endtab %}
{% endtabs %}
### Try it out!
{% embed url="" %}
# Edit Transaction Note
Edit an existing transaction's note.
## Editing a Transaction Note
Initiate a mutation to edit an existing transaction note according to a Transaction ID.
Existing notes that are empty/`null` can also be edited and changed.
```graphql
mutation UpdateTransaction($data: TransactionUpdateInput!, $where: TransactionWhereUniqueInput!) {
updateTransaction(data: $data, where: $where) {
id
}
}
```
### **Headers**
| Name | Value |
| ------------- | ------------------ |
| Content-Type | `application/json` |
| Authorization | `Bearer ` |
### Body (TransactionUpdateInput) object + (TransactionWhereUniqueInput) object
| Name | Type | Description |
| -------------------------------------- | ------ | -------------------- |
| note\* | String | New transaction note |
| Id\* | String | Transaction ID |
Example body:
```graphql
{
"data": {
"note": "made by api Admin"
},
"where": {
"id": "clpgvrjb700136g01lr3o0tgv"
}
}
```
### Response
Return values:
| Name | Type | Description |
| ---- | ------ | ---------------------- |
| id | String | Updated Transaction ID |
{% tabs %}
{% tab title="🟢 Success" %}
```javascript
{
"data": {
"updateTransaction": {
"id": "clpgvrjb700136g01lr3o0tgv",
}
}
}
```
{% endtab %}
{% tab title="🔴 Failure" %}
{% endtab %}
{% endtabs %}
### Try it out!
{% embed url="" %}
# Utilities
# Fetch Financial Asset
Create a new contact in your organization.
## Get Financial Asset Details
In order to call mutations such as money transfers and swaps, you will need to fetch the financial asset ID of a specific asset. The way to get a specific asset/multiple asset IDs, use the following query:
In the query variables (body), you insert the code of the asset you wish to fetch.\
See the example body below for reference.
```graphql
query FinancialAssets($where: FinancialAssetWhereInput) {
financialAssets(where: $where) {
code
id
}
}
```
### **Headers**
| Name | Value |
| ------------- | ------------------ |
| Content-Type | `application/json` |
| Authorization | `Bearer ` |
### Body (FinancialAssetWhereInput object)
| Name | Type | Description |
| ---- | ------ | ------------------------------------------------------ |
| code | String |
Asset Code (i.e. - USDT / ETH / BTC / MATIC)
|
Example body:
```json
{
"where": {
"code": {
"equals": "USDT"
}
}
}
```
### Response
Return values:
| Name | Type | Description |
| ---- | ------ | ----------- |
| code | String | Asset Code |
| id | String | Asset ID |
{% tabs %}
{% tab title="🟢 Success" %}
```javascript
{
"data": {
"financialAssets": [
{
"code": "USDT",
"id": "clefn78gv011olc6rcwtt0wel"
}
]
}
}
```
{% endtab %}
{% tab title="🔴 Failure" %}
{% endtab %}
{% endtabs %}
### Try it out!
{% embed url="" %}
# Fetch Blockchains
Update a specific contact's details
## Get Blockchain Details
In order to call mutations such as money transfers and swaps, you will need to fetch the specific blockchain ID you wish to operate in. In order to get a specific blockchain/multiple blockchain IDs, use the following query:
In the query variables (body), you insert the blockchain name (or code depending on your preference) of the blockchain you wish to fetch. See the example body below for reference.
```graphql
query Blockchains($where: BlockchainWhereInput) {
blockchains(where: $where) {
id
name
code
}
}
```
### **Headers**
| Name | Value |
| ------------- | ------------------ |
| Content-Type | `application/json` |
| Authorization | `Bearer ` |
### Body (BlockchainWhereInput) object
One of/both:
| Name | Type | Description |
| ---- | ------ | --------------- |
| name | String | Blockchain Name |
| code | String | Blockchain Code |
Example body:
```json
{
"where": {
"name": {
"equals": "Bitcoin"
}
}
}
```
### Response
Return values:
| Name | Type | Description |
| ------------------------------------ | ------ | --------------- |
| id\* | String | Blockchain ID |
| name | String | Blockchain Name |
| code | String | Blockchain Code |
{% tabs %}
{% tab title="🟢 Success" %}
```javascript
{
"data": {
"blockchains": [
{
"id": "clefn78cb00h9lc6rdemx563g",
"name": "Bitcoin",
"code": "bitcoin"
}
]
}
}
```
{% endtab %}
{% tab title="🔴 Failure" %}
{% endtab %}
{% endtabs %}
### Try it out!
{% embed url="" %}
# Setup & Configuration
```
/$$ /$$ /$$ /$$
|__/ | $$ |__/ | $$
/$$ /$$$$$$$ /$$$$$$ | $$$$$$$ /$$ /$$$$$$
| $$| $$__ $$ |____ $$| $$__ $$| $$|_ $$_/
| $$| $$ \ $$ /$$$$$$$| $$ \ $$| $$ | $$
| $$| $$ | $$ /$$__ $$| $$ | $$| $$ | $$ /$$
| $$| $$ | $$| $$$$$$$| $$$$$$$/| $$ | $$$$//$$
|__/|__/ |__/ \_______/|_______/ |__/ \___/ |__/
```
Production-ready CLI for configuring and running the Inabit Remote Approver with Docker and nginx.
Current version: v0.1.3
## What you get
* Guided setup wizard (validates token, configures URL/ports, generates nginx.conf)
* Automatic nginx and Docker Compose configuration
* HTTPS support with auto-detected certificates (PEM or CRT/KEY)
* Health checks and smart troubleshooting
* One-command cleanup and uninstall
## Install (production)
Clone the release repository on your remote instance and run the installer:
{% code title="Install (production)" %}
```bash
# Clone the release bundle (contains installer + docker-compose.yml)
git clone https://your-release-repo-url.git approver-cli
cd approver-cli
# Install as current user (no sudo needed)
bash inabit-cli-installation-v1.0.sh
# Or system-wide (requires sudo)
# sudo bash inabit-cli-installation-v1.0.sh
```
{% endcode %}
After installation, the global command `inabit` is available.
## Quick start
{% code title="Quick start" %}
```bash
# Run the guided setup
inabit setup
# Check status / logs
inabit status
inabit logs
# Manage services
inabit restart
inabit stop
inabit start
# Cleanup everything created by setup (keeps Docker images)
inabit cleanup
# Uninstall the CLI and remove the global "inabit" command
inabit uninstall
# For system-wide installs, use: sudo inabit uninstall
```
{% endcode %}
## Setup flow (overview)
{% stepper %}
{% step %}
### Start setup
Begin the guided setup by running `inabit setup`.
{% endstep %}
{% step %}
### Validate login token → obtain access token
The wizard validates the provided token and obtains an access token.
{% endstep %}
{% step %}
### Configure service port
Choose the approver service port (default 3020).
{% endstep %}
{% step %}
### Choose network approach
Select either Domain or IP + Port.
* Domain:
* Choose 80 (HTTP) or 443 (HTTPS)
* Generate nginx.conf
* Auto-update docker-compose ports
* Detect SSL files in ./ssl (PEM or CRT/KEY)
* IP + Port:
* Generate nginx.conf and map chosen port
{% endstep %}
{% step %}
### Validate external URL (health check)
The setup performs health checks to validate the external URL.
{% endstep %}
{% step %}
### Create directories and configuration
Setup creates required directories and configuration files.
{% endstep %}
{% step %}
### Start nginx → start approver
The wizard starts nginx first, then starts the approver service.
{% endstep %}
{% step %}
### Verify accessibility
The wizard verifies accessibility (accepts some transient errors like 403/502/503 during initialization).
{% endstep %}
{% step %}
### Show pairing code and instructions
Finally, the setup displays the pairing code and next-step instructions.
{% endstep %}
{% endstepper %}
Notes:
* During setup, HTTP 403 from curl can be normal if Cloudflare blocks non-browser requests; browsers should work.
* The wizard treats 403/502/503 as acceptable during early startup while the approver initializes.
## Nginx in production (what the wizard configures)
* Domain
* Port 80 (HTTP): `server { listen 80; }` that proxies to `approver:${APPROVER_PORT}`
* Port 443 (HTTPS):
* `listen 80;` redirects HTTP to HTTPS
* `listen 443 ssl; http2 on;` uses detected cert/key under `/etc/nginx/ssl/`
* Docker Compose ports exposed automatically: `80:80` and `443:443`
* IP + Port
* Single `server { listen ; }` with proxy to `approver:${APPROVER_PORT}`
* Compose port exposed automatically: `:`
Supported certificate pairs to place in local `ssl/`:
* `cert.pem` + `key.pem`
* `cert.crt` + `key.key`
* `server.crt` + `server.key`
* `domain.crt` + `domain.key`
## Project structure (for reference)
{% code title="Project structure" %}
```
release/
├── inabit-cli-installation-v1.0.sh # Installer
├── docker-compose.yml # Docker services configuration
└── README.md
```
{% endcode %}
## Prerequisites
* Docker
* Docker Compose
* Bash shell
## Troubleshooting
Use the CLI to inspect status, logs, and perform restarts or cleanup:
{% code title="Troubleshooting commands" %}
```bash
# Status / Logs
inabit status
inabit logs
# Restart / Cleanup
inabit restart
inabit cleanup
```
{% endcode %}
## License
This project is part of the Inabit Remote Approver service.
# API Wallets Generation
Create inabit API wallets in your organization
## Create an inabit API Wallet
The CreateApiWalletAddress mutation allows API admins to create a new inabit API wallet with a designated address for a given asset & blockchain.
> Remember to authenticate to call our graphQL API using an access token (bearer) with your **API** **Admin** credentials. (If you're not sure how, refer to [Authentication](/api-reference/develop-with-inabit-api/getting-started/authentication))
>
> Don't have an API Admin user yet? contact us at to create one!
### **CreateApiWalletAddress Mutation:**
```graphql
mutation CreateApiWalletAddress($data: ApiWalletCreateAddressInput!) {
createApiWalletAddress(data: $data) {
address
walletId
}
}
```
### **Body (**ApiWalletCreateAddressInput object)
| Name | Type | Description |
| -------------------------------------------------- | ------ | --------------------------------------------------------- |
| blockchainId\* | string | ID of the blockchain in inabit |
| financialAssetId\* | string | ID of the financial asset in inabit (can be token/native) |
| organizationId\* | string | ID of the organization in inabit |
Example body:
```graphql
{
"data": {
"blockchainId": "clefn78cl00i3lc6rih442mx9",
"financialAssetId": "clefn78h5012plc6rxbmofnop",
"organizationId": "clsu8bel7000dlciyfdfbmwcw"
}
}
```
### Response
{% tabs %}
{% tab title="🟢 Success" %}
```graphql
{
"data": {
"createApiWalletAddress": {
"address": "0xcc918e16bc528bf58fc250f56898c7d917d33de2",
"walletId": "cluicfnpb000066015d3narbc"
}
}
}
```
{% endtab %}
{% tab title="🔴 Failure" %}
```graphql
{
"error": "Invalid request"
}
```
{% endtab %}
{% endtabs %}
In the mutation's response, you will receive the created api wallet ID including the associated blockchain address.
{% hint style="info" %}
Generating a new API wallet will generate a different ID and address.
You can't add multiple blockchains under the same API wallet.\
**One** inabit API wallet = **one** address
{% endhint %}
# Webhooks
Retrieve notifications through webhooks on transaction events and status changes
## About Our Webhooks 📣
Receive notifications/alerts on every new transaction or transaction status change in any of your inabit organizations within your account, as well as fee updates for a transaction.
There are two endpoints you can use with our Webhooks:
* [Create Subscription](#create-subscription) - registering to the subscription service
* [Delete Subscription](#delete-subscription) - deleting an existing subscription
{% hint style="info" %}
Webhook endpoints are accessible only to the following user roles:\
**Owner**, **Admin**, **API Admin**
{% endhint %}
{% hint style="warning" %}
Our webhook service is currently limited to 1 subscription per organization.
{% endhint %}
* Events Handled:
* **New Transaction Event**
* **Transaction Status Updates** (Incl. txn fee updates)
* Supported transaction types:
* **Received** (Deposits)
* **Sent** (Withdrawals)
For further information regarding transaction types (events), refer to the [Notification Types ](/api-reference/remote-approver-app/webhooks/notification-types)subpage.
## Create Subscription
In order to create a subscription on our GraphQL API, you'll need to call the following **mutation**:
```graphql
mutation CreateSubscription($data: SubscriptionCreateInput!) {
createSubscription(data: $data) {
id,
token
}
}
```
### Headers
| Name | Value |
| ------------- | ------------------ |
| Content-Type | `application/json` |
| Authorization | `Bearer ` |
### **Body (**SubscriptionCreateInput object)
| Name | Type | Description |
| ------------------------------------- | ------ | --------------------------------------------------------- |
| id\* | string | ID of the organization in inabit |
| url\* | string | URL for the webhook service to send notifications towards |
Example body:
```graphql
{
"data": {
"organization": {
"id": "clu1dzpny0007vjto1gxhl5my" # inabit organization Id
},
"url": "https://studio.apollographql.com", # Webhook for subscriber
}
}
```
### Response
{% tabs %}
{% tab title="🟢 Success" %}
```graphql
{
"data": {
"createSubscription": {
"id": "clugv892y0000vjhga8ugol38", # Created subscription Id
"token": "sub_c028ef8d-b8b9-49c0-b5a9-f7451884b834" # Unique generated token recognized by inabit
}
}
}
```
{% endtab %}
{% tab title="🔴 Error: Subscriptions Limit" %}
```graphql
{
"errors": [
{
"message": "INTERNAL_SERVER_ERROR",
"locations": [
{
"line": 2,
"column": 3
}
],
"path": [
"createSubscription"
],
"extensions": {
"code": "INTERNAL_SERVER_ERROR",
"message": "There's already an active subscription for this organization. (organization: clu1dzpny0007vjto1gxhl5my)",
"exception": {
"message": "INTERNAL_SERVER_ERROR",
"stacktrace": [
"Error: There's already an active subscription for this organization. (organization: clu1dzpny0007vjto1gxhl5my)",
" at SubscriptionResolver.createSubscription (C:\\Users\\Ori Botan\\Documents\\inabit\\inabit\\server\\src\\subscription\\subscription.resolver.ts:81:13)"
]
}
}
}
],
"data": null
}
```
{% endtab %}
{% tab title="🔴 Error: Internal Server Error" %}
```graphql
{
"errors": [
{
"message": "INTERNAL_SERVER_ERROR",
"locations": [
{
"line": 2,
"column": 3
}
],
"path": [
"createSubscription"
],
"extensions": {
"code": "INTERNAL_SERVER_ERROR",
"message": "Create subscription failed (organization: clu1dzpny0007vjto1gxhl5my)",
"exception": {
"message": "INTERNAL_SERVER_ERROR",
"stacktrace": [
"Error: Create subscription failed (organization: clu1dzpny0007vjto1gxhl5my)",
" at SubscriptionResolver.createSubscription (C:\\Users\\Ori Botan\\Documents\\inabit\\inabit\\server\\src\\subscription\\subscription.resolver.ts:81:13)"
]
}
}
}
],
"data": null
}
```
{% endtab %}
{% endtabs %}
In the mutation's response, the following is retrieved:
**ID** - The ID of the subscription that was created.
**Token** - A unique token generated by inabit.
* The token will be the identifying the webhook resource for the subscriber set as a header: 'authorization' : (i.e. - `sub_c028ef8d-b8b9-49c0-b5a9-f7451884b834`)
{% hint style="success" %}
Remember - You can always query data and fetch all of an organization's subscriptions in case its hard to keep track, see query below.
{% endhint %}
```graphql
query Subscriptions($where: SubscriptionWhereInput) {
subscriptions(where: $where) {
id
token
}
}
```
#### **Body (**SubscriptionWhereInput object)
| Name | Type | Description |
| ------------------------------------ | ------ | -------------------------------- |
| id\* | string | ID of the organization in inabit |
## Delete Subscription
In order to delete a subscription, the following **mutation** needs to be used:
```graphql
mutation DeleteSubscription($where: SubscriptionWhereUniqueInput!) {
deleteSubscription(where: $where) {
id
}
}
```
### Headers
| Name | Value |
| ------------- | ------------------ |
| Content-Type | `application/json` |
| Authorization | `Bearer ` |
### **Body (**SubscriptionWhereUniqueInput object)
| Name | Type | Description |
| ------------------------------------ | ------ | --------------- |
| id\* | string | Subscription ID |
Example body:
```graphql
body:
{
"where": {
"id": "clu5bxctk0003vje4n4pqfdya" # Subscription Id
}
}
```
### Response
{% tabs %}
{% tab title="🟢 Success" %}
```graphql
{
"data": {
"deleteSubscription": {
"id": "clugwvbm70007vj4w74gxch3u"
}
}
}
```
{% endtab %}
{% tab title="🔴 Error: Internal Server Error" %}
```graphql
{
"errors": [
{
"message": "INTERNAL_SERVER_ERROR",
"locations": [
{
"line": 2,
"column": 3
}
],
"path": [
"deletesubscription"
],
"extensions": {
"code": "INTERNAL_SERVER_ERROR",
"message": "Delete subscription failed (organization: clu1dzpny0007vjto1gxhl5my)",
"exception": {
"message": "INTERNAL_SERVER_ERROR",
"stacktrace": [
"Error: Delete subscription failed (organization: clu1dzpny0007vjto1gxhl5my)",
" at SubscriptionResolver.deleteSubscription (C:\\Users\\Ori Botan\\Documents\\inabit\\inabit\\server\\src\\subscription\\subscription.resolver.ts:81:13)"
]
}
}
}
],
"data": null
}
```
{% endtab %}
{% endtabs %}
# Notification Types
Explore which notifications you can receive from our subscriptions
Notifications from Inabit's webhook service provide real-time updates on transaction events and status changes, ensuring that you stay informed about crucial activities within your organization. Below are the different types of notifications you can expect to receive:
1. **New Transaction Event**:
* **Date and Time**: Timestamp indicating when the transaction occurred.
* **Transaction Type**: Whether it's a deposit (received) or a withdrawal (sent).
* **Transaction ID**: Unique identifier for the transaction.
* **Transaction Status**: Current status of the transaction.
* **Wallet ID**: Identifier for the wallet associated with the transaction.
* **Wallet Name**: Name of the wallet involved in the transaction.
* **Address Name**: Name of the address involved in the transaction.
* **Coin/Asset Symbol**: Symbol representing the cryptocurrency involved.
* **Blockchain**: Name of the blockchain associated with the transaction.
* **Cryptocurrency Amount**: Amount of cryptocurrency transacted.
* **Fee in Cryptocurrency**: Transaction fee in cryptocurrency.
* **Fee (in Organization's Base Currency)**: Transaction fee converted to the organization's base currency.
* **Amount (in Organization's Base Currency)**: Transaction amount converted to the organization's base currency.
* **Transaction Hash**: Unique hash identifying the transaction.
* **Source Address (From)**: Address from which the cryptocurrency was sent.
* **Destination Address (To)**: Address to which the cryptocurrency was sent.
2. **Transaction Status Updates** (Including Transaction Fee Updates):
* Similar details as the new transaction event, with updates on the transaction status and associated fees + transaction hash (if completed).
These notifications empower you to track and manage transactions effectively, enabling timely decision-making and ensuring transparency and security within your crypto service.
{% hint style="info" %}
Remember, you can [subscribe to notifications](/api-reference/remote-approver-app/webhooks#create-subscription) through Inabit's GraphQL API, and manage your subscriptions conveniently to tailor notifications to your specific needs.
{% endhint %}
### New Transaction Event
Withdrawal Example:
```json
{
"createTime": "2024-04-01T12:21:00.205Z",
"transactionType": "Withdrawal",
"transactionId": "clugx5j1p000pvj4wgog8amvc",
"transactionStatus": "PendingApproval",
"walletId": "clu1dzpw00015vjto6gxeld8w",
"walletName": "My inabit Wallet",
"addressName": "inabit Wallet Ethereum",
"coin": "ETH",
"blockchain": "Ethereum",
"amount": 0.00034,
"baseCurrencyAmount": 0.5951873640866312,
"fee": null,
"baseCurrencyFee": null,
"transactionHash": null,
"sourceAddress": "0xd92a0778ee3f6c35c79407e1611d0dd5543b631f",
"destinationAddress": "0xaf79d75c836aa10195ce358fc592fbbc2b0c62cc"
}
```
Deposit Example:
```json
{
"createTime": "2025-03-11T17:59:44.861Z",
"transactionType": "Deposit",
"transactionId": "cm84sq6zh004ddr01yr8g0r39",
"transactionStatus": "Confirming",
"walletId": "cm84shdsx04g0ch01l40x905d",
"walletName": "LTC API Wallet ee69fb32-3025-4",
"addressName": "LTC LTC Wallet Crypto Account",
"walletCryptoAccountId": "cm84shemf04gech015elwptjy",
"coin": "LTC",
"blockchain": "Litecoin",
"amount": 0.50198254,
"baseCurrencyAmount": null,
"fee": 0,
"baseCurrencyFee": null,
"transactionHash": "019339708b4ec4a6ee283b19d3522465f463e12f9ea634b5f36a9e7402df85dd",
"sourceAddress": "ltc1qe55jghmyygaradusguc3zn50l2cal3sckdapw2",
"destinationAddress": "ltc1qqq2rj0jpdthjau793selr9qf8ft4ucsv28e6gd"
}
```
### Transaction Status Updates
This notification is received for every transaction status change.
Here are the possible changes you can receive notifications on:
* Status changed to **Processing**:
* Once you approve a transaction, its status should change to this.
* Status changed to **Broadcasting**:
* The transaction entered the mempool and is being broadcasted to the blockchain.
* Status changed to **Confirming**:
* The transaction entered the mempool and is awaiting sufficient confirmations amount to be completed. (This status is only applicable for incoming deposit transactions)
* Status changed to **Completed**:
* The transaction was completed in the blockchain.
* In this notification you'll also receive additional data that includes:
* The transaction fees breakdown.
* The transaction's hash.
* Status changed to **Failed**:
* Transaction failures can occur in the blockchain during broadcasting process or before that, in the processing phase in case any issue occured. (For example - insufficient gas fees to broadcast the transaction)
* Status changed to **Rejected**:
* If the approver/s rejected the transaction in the mobile app, the status will be turned "Rejected".
* Status changed to **Expired**:
* Transactions have a 5 hour window to be approved/rejected.
* In case the time limit was reached, the transaction is expired and its status changes to "Expired".
#### Example Notification
Status changes to **Broadcasting**:
```json
{
"createTime": "2024-04-01T12:21:00.205Z",
"transactionType": "Withdrawal",
"transactionId": "clugx5j1p000pvj4wgog8amvc",
"transactionStatus": "Broadcasting",
"walletId": "clu1dzpw00015vjto6gxeld8w",
"walletName": "My inabit Wallet",
"addressName": "inabit Wallet Ethereum",
"coin": "ETH",
"blockchain": "Ethereum",
"amount": 0.00034,
"baseCurrencyAmount": 0.5951873640866312,
"fee": null,
"baseCurrencyFee": null,
"transactionHash": null,
"sourceAddress": "0xd92a0778ee3f6c35c79407e1611d0dd5543b631f",
"destinationAddress": "0xaf79d75c836aa10195ce358fc592fbbc2b0c62cc"
}
```
#### Example Notification
Status changes to **Completed**:
```json
{
"createTime": "2024-04-01T12:21:00.205Z",
"transactionType": "Withdrawal",
"transactionId": "clugx5j1p000pvj4wgog8amvc",
"transactionStatus": "Completed",
"walletId": "clu1dzpw00015vjto6gxeld8w",
"walletName": "My inabit Wallet",
"addressName": "inabit Wallet Ethereum",
"coin": "ETH",
"blockchain": "Ethereum",
"amount": 0.00034,
"baseCurrencyAmount": 0.5951873640866312,
"fee": 0.0013,
"baseCurrencyFee": 4.38,
"transactionHash": "0x6a5599d82e56ea89a218f76162cb28c29e28e3e85923ef6dd4cdba8aeec87149",
"sourceAddress": "0xd92a0778ee3f6c35c79407e1611d0dd5543b631f",
"destinationAddress": "0xaf79d75c836aa10195ce358fc592fbbc2b0c62cc"
}
```
Once you receive updates on completion of transactions (status changes to completed), the fees are also updated and are given in the notification data (no longer `null`):
* Notice the fees are given in both the crypto native currency (in the example above - ethereum) but also in the base currency, which is the base currency of the organization (EUR/USD).
* `fee`
* `baseCurrencyFee`
* You will also receive the `transactionHash` of the completed transaction in this notification.
# Assets & Tokens
Which assets & tokens inabit currently supports
inabit supports multiple assets
{% hint style="success" %}
It is important to note that all assets and tokens within standards we support such as ERC-20 (or equivalent, e.g. BEP-20 or TRC-20) are supported by our wallets.
{% endhint %}
The table below provides the native assets (Blockchain assets) that we supports (that aren't tokens).
As for tokens, inabit will support all tokens within the blockchains and standards that it currently supports. See supported blockchains list [here](/api-reference/what-we-support/blockchains).
Table Columns:
* **Financial Asset** - the name of the digital asset
* **Blockchain Code** - the blockchain on which the asset exists
### Supported Native Assets
Financial Asset
Blockchain Code
BTC
bitcoin
ETH
ethereum
TRX
tron
BNB
binance-smart-chain
SOL
solana
XRP
XRP
MATIC
polygon
# Blockchains
Which blockchains & protocols inabit currently supports
inabit supports major blockchain protocols (mainnet) and nearly limitless digital assets in its system. This page gives an overview of all of the blockchains we support.
### Supported functions
Not all blockchains function identically, so we support different features depending on the technical constraints of each blockchain. In the table below, you can compare which broad feature sets are supported on which blockchains.
{% hint style="info" %}
The table does **NOT** include **ALL** supported features on each blockchain. It is simply an overview the general supports in standards and basic blockchain compatibility.
{% endhint %}
{% hint style="warning" %}
**The list below is relevant only for inabit native wallets.**
If you connected an exchange, all of its blockchains and assets are automatically supported in inabit.
{% endhint %}
| Blockchain | Support |
| ---------------------------------------------------------------------------------------------------------------------------------------------------------------------- | ------------------------------------------- |
| Bitcoin | ✓ (Acceleration using CPFP) |
| Ethereum | ✓ (ERC-20 + ERC-1155) |
| Binance Smart Chain | ✓ |
| Polygon | ✓ |
| Solana | ✓ |
| Tron | ✓ (TRC-20 + TRC-10) |
| XRP (Ripple) | ✓ |
| Bitcoin Cash | Coming soon |
| Litecoin | Coming soon |
# Exchanges
Which exchange connections inabit currently supports
## Overview
inabit exchange connectivity enables you to connect exchange main accounts, allowing the following functionalities:
* **Funding exchange wallets:** Deposit, withdraw and rebalance between your connected accounts.
* **Monitor wallet balances:** Monitor assets, balances, and transactions for your connected accounts.
* **Send funds anywhere:** Transfer to any other wallet / address (whitelisted/non-whitelisted).
{% hint style="info" %}
Transfers from exchanges to some destination addresses may require additional configuration in the exchange API settings/management.
{% endhint %}
All the exchanges connected to your inabit organization appear in the wallets page and are apart of your organization balance once connected.
Assets held on the exchange are included and shown in your wallet balance.
### Exchange Account/Wallet Types
#### Main accounts
The primary account serves as the default gateway on the exchange platform. It acts as the central hub for inabit and other exchanges, exclusively facilitating deposits and withdrawals.
Depending on the exchange, you may need to whitelist destinations on the exchange to be able to withdraw to wallets and/or other destinations.
#### Sub-accounts
{% hint style="danger" %}
This feature is currently not supported in inabit.
{% endhint %}
Sub-accounts in exchanges refer to separate accounts created within a single user account. These accounts are often used to organize and manage different trading strategies, portfolios, or assets independently.
#### Trading accounts
{% hint style="danger" %}
This feature is currently not supported in inabit.
{% endhint %}
Trading accounts in exchanges are the primary accounts created by users to engage in buying, selling, and exchanging cryptocurrencies or other financial assets. They serve as the main interface for conducting trading activities on the exchange platform.
### Supported Exchanges
Exchange
Name
Binance
✓
Kucoin
✓
Kraken
Coming soon
OKX
Coming soon
Bybit
Coming soon
Gemini
Coming soon
Crypto.com
Coming soon
Coinbase
Coming soon
# Binance
Binance Exchange Integration with inabit
{% hint style="warning" %}
We **don't** currently offer support for **Binance** **US** exchange accounts. This connection is specific to Binance accounts exclusively.
{% endhint %}
## Connecting your Binance wallet
### Binance Configuration:
* Refer to the [Binance.com API Documentation](https://www.binance.com/en/support/faq/how-to-download-and-set-up-binance-code-api-af014f44f45845debf79b4cf81333a25) to learn how to generate a Binance API key.
* You can also generate an API key directly from Binance UI under the account settings section: "API Management".
* When creating a key we recommend naming the API key - "inabit", so there won't be any confusion with other future/existing keys.
* After you confirm the validity of your new API key, keep a record copy of both the API Key and Secret Key. You will need them when adding this exchange to your organization.
* Make sure you've enabled the following API restrictions when generating the keys:
* **Reading**
* **Withdrawals**
* **Spot & Margin Trading** (if you intend to swap assets directly from inabit in this wallet)
* Under the IP restrictions access, please select **Restrict access to trusted IPs only**, discard the 0.0.0.0 IP address, and add the following IP:
```
35.233.10.83
```
{% hint style="info" %}
1. This IP address belongs to inabit and by whitelisting it in the exchange API, you enable access for inabit services to operate on your behalf.
2. This IP address **must** be whitelisted otherwise, the connectivity to inabit will fail.
{% endhint %}
### inabit Configuration:
* Within the inabit platform, go to the wallets page and click on\
"**Add new**".
* Select the option "**Exchange** **Wallet**" and choose the "**Binance**" option.
* Fill in the following details:
* **Wallet name**
* **API key** (the one saved from Binance)
* **Secret key** (the one saved from Binance)
* Click on "**Connect** **Exchange**".
If all credentials are okay and the wallet name is valid, the connection should be successful and you can start managing the binance wallet in your organization!
# Kucoin
Kucoin Exchange Integration with inabit
## Connecting your Kucoin wallet
### Kucoin Configuration:
* Refer to the [KuCoin.com API Documentation](https://www.kucoin.com/support/360015102174-How-to-Create-an-API) to learn how to generate an API key.
* You can also generate an API key directly from Kucoin UI under the account settings section: "API Management".\

* When creating a key we recommend naming the API key - "inabit", so there won't be any confusion with other future/existing keys.
* After you confirm the validity of your new API key, keep a record copy of both the API Key and Secret Key. You will need them when adding this exchange to your organization.
* Make sure you've enabled the following API restrictions when generating the keys:
* **General**
* **Spot Trading**
* **Transfer**
* Under the IP Restriction section, click on "Yes" and add the following IP to the list, as follows:
```
35.233.10.83
```
{% hint style="info" %}
1. This IP address belongs to inabit and by whitelisting it in the exchange API, you enable access for inabit services to operate on your behalf.
2. This IP address **must** be whitelisted otherwise, the connectivity to inabit will fail.
{% endhint %}
### inabit Configuration:
* Within the inabit platform, go to the wallets page and click on\
"**Add new**".
* Select the option "**Exchange** **Wallet**" and choose the "**Kucoin**" option.
* Fill in the following details:
* **Wallet name**
* **API key** (the one saved from Kucoin)
* **Secret key** (the one saved from Kucoin)
* **Passphrase**
* Also known as "Trading Password"
* (A required 6 digit password that you've set for Kucoin API)
* Click on "**Connect** **Exchange**".
If all credentials are okay and the wallet name is valid, the connection should be successful and you can start managing the Kucoin wallet in your organization!
# Kraken
Kraken Exchange Integration with inabit
{% hint style="info" %}
Direct transfers to third parties from Kraken are disabled by default. In order to transfer funds from your kraken exchange wallet directly to a countryparty, you must manually save each destination address in Kraken's UI first.
{% endhint %}
## Connecting Your Kraken Wallet
### Kraken Configuration:
* Refer to the [Kraken.com API Documentation](https://support.kraken.com/hc/en-us/articles/360000919966-How-to-create-an-API-key) to learn how to generate an API key.
* When creating a key we recommend naming the API key - "inabit", so there won't be any confusion with other future/existing keys.
* After you confirm the validity of your new API key, keep a record copy of both the API Key and Secret Key. You will need them when adding this exchange to your organization.
* Make sure you've enabled the following API restrictions when generating the keys:
* **Query Funds**
* **Deposit Funds**
* **Withdraw Funds**
* Under the IP restrictions access, please select **Restrict access to trusted IPs only**, discard the IP address, and add the following IP:
```
35.233.10.83
```
{% hint style="info" %}
1. This IP address belongs to inabit and by whitelisting it in the exchange API, you enable access for inabit services to operate on your behalf.
2. This IP address **must** be whitelisted otherwise, the connectivity to inabit will fail.
{% endhint %}
### inabit Configuration:
* Within the inabit platform, go to the wallets page and click on\
"**Add new**".
* Select the option "**Exchange** **Wallet**" and choose the "**Kraken**" option.
* Fill in the following details:
* **Wallet name**
* **API key** (the one saved from Kraken)
* **Secret key** (the one saved from Kraken)
* Click on "**Connect** **Exchange**".
If all credentials are okay and the wallet name is valid, the connection should be successful and you can start managing the Kraken wallet in your organization!
***
## Enabling transfers from your Kraken wallet
Before whitelisting a inabit address on Kraken, lets understand what are Kraken Descriptions and why are they crucial for transferring through Kraken connected wallets.
### What are Kraken Descriptions?
**Kraken** **descriptions** are essentially **tags** that are generated automatically by inabit per deposit address in the platform. This tag is later used by Kraken to whitelist an address that users wish to send funds to. Within the money transfer UI, users will be able to transfer to any address (unnecessarily whitelisted) via their Kraken wallet.
While kraken doesn’t allow users to send funds to non-whitelisted addresses, in order to allow such option in inabit, inabit overcomes this by generating a description per every saved address under a contact in inabit.
Now that we understand that in order to transfer we must save destination addresses within a contact in inabit, verify that the following are also completed:
* Your Kraken wallet is fully connected to your inabit organization.
* Your Kraken wallet has funds and was KYC/KYB verified.
Follow the instructions below to whitelist in Kraken.
If you are still having trouble, contact ****.
### Whitelisting addresses in Kraken
* Click on "**Withdraw**" funds.
* Cick on "**Add new withdrawal address**"\
* Add the following details:
* **Address Description**
* This is where you copy the Kraken description generated for the saved address in inabit.
* You can copy the Kraken description in inabit from within the contacts page.\
View the saved address in the page and click on the 3 dots icon:
* Click on the "**Kraken** **Description**" option.
* Copy the Kraken description displayed on your screen.
* **Address** (according to the designated blockchain)
* Click on "**Add Withdrawal Address**"\

* You will be required to confirm the action via email.\
Once the confirmation is received, the address is familiar to Kraken and is saved in your exchange account.
That's it! inabit now recognizes the whitelisted address in Kraken and you're able to transfer funds to the saved destination address through inabit's UI/API.
{% hint style="success" %}
You will also be able to see the generated Kraken description of a saved address when you select the destination address for the transfer in the Transfer UI.
{% endhint %}
# Changelog
Keep track on what's new/changed in inabit 📝
## [New Version Release - 2.11.0 ](https://use.inabit.com/):tada:
### Release Notes:
* **inabit. x Changelly** - Added the ability to swap in inabit wallets.
* **Transaction Confirmations to transactions**:
* Ability to define required confirmations before transactions are counted as completed and affecting your wallets & organization balance.
* Added new status: "Confirming" for transactions.
* **Track incoming & outgoing funds with ease**:
* inabit now displays indicators for incoming and outgoing pending balances on both wallets and assets, affected by pending transactions.
* **Effortless navigation between assets & wallets**:
* Revampled the way to move between assets & wallets in the platform.
## [New Version Release - 2.9.0 ](https://use.inabit.com/):tada:
### Release Notes:
* **Web3 - WalletConnect support:**
* Users can fully perform a connection to any wallet supported by walletconnet to inabit's platform.
* We've released the ability to perform a full disaster recovery in inabit.
### [Version 2.8.1 Patch - Merged to Main](https://use.inabit.com/) :tools:
* **Fixed**:
* Changed the previous Ethereum base-fee calculation in order to significantly lower the probability of Ethereum transactions failures
## [New Version Release - 2.8.0](https://use.inabit.com/) :tada:
### Release Notes:
* Bitcoin Transactions Acceleration
* Increased support of different countries & currencies for off-ramp.
* Additional security updates in the mobile approvals app.
* **New API Features:**
* Generation of dedicated API wallets via API.
* Ability to sign transactions directly through API (API Signer).
* Visual representation of API wallets in the platform's UI.
### [Added "Exchanges" Section to Documentation](/api-reference/what-we-support/exchanges)
Added by **Itamar Korkos**\
4.1.2024
### [Added "API Infrastructure" Section to Documentation](/api-reference/remote-approver-app/setup-and-configuration)
Added by **Itamar Korkos**\
4.1.2024
# Overview
Read our documentation and get up to speed on how to access our API capabilities.
## Introduction
The **inabit Terminal** is your command center for managing digital assets, processing payments, and automating Web3 operations - all in one secure, intuitive interface.
Whether you're embedding crypto widgets into your platform, automating fund flows, or fueling cross-chain transactions, this documentation will guide you through everything you need to know to get started and scale confidently.
### What Is Our Terminal?
Inabit Terminal is a crypto payment gateway that allows platforms, merchants, and service providers to accept cryptocurrency directly from their users in a secure, compliant, and customizable way.
It provides an all-in-one infrastructure for generating deposit addresses, tracking blockchain payments, and settling transactions in crypto or fiat, without needing to manage wallets, private keys, or custom smart contracts.
Think of Inabit Terminal as your crypto-native checkout engine, fully managed and easy to integrate via API or UI.
### Who Is It For?
* Payment Service Providers (PSPs) – who want to offer crypto payments to their merchants.
* Merchants and eCommerce stores – accepting crypto as part of checkout (POS or online).
* Platforms and SaaS products – embedding crypto flows inside digital apps.
* White-label/Embedded Finance Providers – offering crypto to their downstream clients (Terminal-as-a-Service).
### What Can You Do With Our Terminal?
* Generate on-chain deposit addresses (Purchase or Customer Address types)
* Monitor incoming payments in real time
* Receive webhook callbacks when payment is complete
* Accept a wide range of crypto assets across supported blockchains
* Settle in crypto or convert to fiat
* Define widget settings like confirmations, expiration, and reuse
* Use either UI (no code) or GraphQL API (developer-first)
### How It Works (High-Level Flow)
1. Enable Terminal for your organization (via support)
2. Create a widget (via the Inabit Dashboard or API)
3. Display the widget to your customer - a QR code + address will be generated
4. Customer pays in crypto
5. Inabit monitors the blockchain
6. You receive a webhook (or poll API) once confirmed
7. You fulfill the order or service, and optionally settle to fiat
You can manage the entire flow through the Inabit Dashboard - no code required.
### Types of Widgets
Inabit Terminal supports two widget types, depending on your payment model:
| Widget Type | Use Case | Reuse Address? | Expiration? | Best For |
| ---------------- | -------------------------------- | -------------- | ----------- | ------------------------------- |
| Purchase Address | One-time purchases or invoices | Optional | Yes | eCommerce, donation, QR-POS |
| Customer Address | Persistent user/account deposits | Yes | Optional | Wallet top-ups, recurring users |
{% hint style="info" %}
[Read more about widget types →](/inabit-terminal/terminal-guide/widget-types)
{% endhint %}
### Environments
| Environment | Description | Real Blockchain? |
| ----------------------------------------------------- | ------------------------------------ | ------------------- |
| :diamonds-4: `Mainnet` | Used for live production payments | Yes (real funds) |
| :vial-virus: `Sandbox` | Used for testing with testnet assets | Yes (testnet coins) |
The Sandbox environment allows you to run full end-to-end tests using real blockchain behavior, without any financial risk.
{% hint style="info" %}
Having trouble collecting assets on testnet? When testing through our APIs, inabit can provide you with testnet assets including tokens to get going with your tests! All you need to do is request tokens through our support team at: or through an existing dedicated integration channel.
{% endhint %}
### Why Should You Use Our Terminal?
| Benefit | Description |
| ------------------------------ | --------------------------------------------------------------------- |
| ✅ Simple Integration | Use low-code UI or API; no smart contracts or wallet setup required |
| ✅ Self-Custody by Default | You control your wallets and funds |
| ✅ Fully Customizable | Define confirmations, expiration, gas logic, etc. |
| ✅ Real-Time Visibility | Webhooks and dashboard give full payment transparency |
| ✅ Multi-Org, Multi-Chain Ready | Easily support different merchants and chains with one infrastructure |
| ✅ Built-in Compliance Tools | Governance settings and reporting help meet regulatory needs |
### Taking The Next Steps
> [Get Started with Terminal](/inabit-terminal/how-to-get-started/enable-terminal)
> [Understand Widget Types](/inabit-terminal/terminal-guide/widget-types)
> [View Use Cases](/inabit-terminal/use-cases/payment-service-providers)
> [Explore API Reference](/inabit-terminal/api-reference/prerequisites)
> [Read FAQ](/inabit-terminal/how-to-get-started/support-and-faq)
# Payment Orchestrators
Guide describing how the Orchestrator integrates with inabit’s APIs..
### Overview
This guide describes the end-to-end integration with **inabit** to enable seamless crypto-payment flows and secure treasury operations. The integration provides a compliant, scalable, and self-custodial setup using inabit’s infrastructure.
### API Introduction
Our APIs combine GraphQL (core inabit platform) and REST APIs (inabit Terminal), allowing clients to query exactly the data they need with maximum flexibility and efficiency. This hybrid approach enables streamlined integration with both wallet infrastructure and payment flows.
#### APIs & Auth at a glance
* **Platform API (GraphQL):** wallets, governance, withdrawals, org objects.\
Auth: `Authorization: Bearer `
* **Terminal API (REST):** Terminal resources (widgets, purchases, customer addresses, deposits).\
Auth: `Authorization: Bearer ` **or** `Authorization: Bearer ` depending on scope.
#### Which key do I use, and when?
| Action | Use this key | Why / Scope | Provided when | Header Example |
| ---------------------------------------------------------------------------------------------- | ------------------------------------ | ----------------------------------------------------------- | ------------------------------------------------------------------------------------------ | --------------------------------------------------- |
| Create/list UI wallets create withdrawals,view wallets, open new wallet, add coins | API Admin (GraphQL) | Platform-level ops & governance | At account opening — provided by inabit Support | Authorization: Bearer \ |
| Org-wide Terminal reads (e.g., get all widgets, get all customers), org-scoped deposit lookups | Terminal Organization API Key (REST) | Organization-level Terminal access across widgets/customers | When Terminal is enabled — provided by inabit Support | Authorization: Bearer \ |
| Single-widget reads (e.g., get widget details, purchase and deposit statuses) | Terminal Widget API Key (REST) | Per-widget access; safer for widget-scoped services | During widget setup — shown on the widget implementation instructions page in the platform | Authorization: Bearer \ |
### Additional Reference
We highly advise taking a look at the following pages as you start developing:
* API Login Access / Authentication
* Remote & Automatic Approvals (Docker Configuration)
* Automate Signing Transactions
* Supported Blockchains & Assets
### Technical Architecture: Merchant Onboarding
(Architecture diagram)
***
### Merchant Onboarding Flow Explained
When a new merchant is onboarded to inabit, the process begins with registration and [device pairing](https://docs.inabit.com/guides/devices-pairing) using the inabit mobile app.
Once the merchant is registered and paired:
* inabit automatically generates two [API users](https://docs.inabit.com/guides/user-roles-in-inabit) under the merchant’s account:
* API Signer (used by the Orchestrator/merchant)
* API Admin (used by the Orchestrator)
The merchant owner then receives an approval request on their inabit mobile app and must approve the newly created API users.
After the API users are approved:
* inabit securely shares the API credentials with the Orchestrator, enabling the next steps in the onboarding process.
* Next, the Orchestrator or the merchant installs the inabit Approver Docker and pairs the API Signer.
Note: The merchant can choose to host the Docker either on their own servers or let the Orchestrator manage it.
To complete the pairing process:
* The merchant enters a pairing code into their inabit mobile app that is received from the Orchestrator (via direct communication).
* Now that pairing is done:
* The Orchestrator opens a Master Wallet with the required blockchains (an inabit wallet used as a central aggregator for the merchant).
* The Orchestrator then proceeds to configure the inabit POS widget(s) based on the merchant’s requirements, including:
* Supported coins
* Sweeping frequency
* Expiration time
* And more.
After configuration, inabit supplies the implementation guide, and the Orchestrator integrates the widget into the merchant’s platform using the provided code, script or via API.
Now that the flow is clear, let's review the implementation process step by step! ✨
***
### 1. Merchant Onboards to inabit
The merchant begins by creating an account on the inabit platform.
**Step-by-Step:**
1. As a merchant, visit the onboarding URL:\
]
2. On the Plan Selection screen, select Enterprise. This ensures the merchant is granted access to advanced platform features and API capabilities required for the Wallet-as-a-Service integration.
3. Complete Device Pairing: As the final onboarding step, the merchant must pair their mobile device with the inabit platform. This process is critical for enabling self-custody-meaning the merchant remains the sole custodian of their customers' funds.
The paired device acts as a cryptographic key manager and approval layer, ensuring secure signing of all transactions and operations on the platform.
[(See: How to Perform Device Pairing)](https://docs.inabit.com/guides/devices-pairing)
***
### 2. inabit Enables API Access
inabit allows access to its API for the Orchestrator by generating 2 API users under the merchant's account:
1. **API Signer**\
Created for the sole purpose of serving as the "Approver" to sign transactions using inabit's Approvals Docker.
2. **API Admin**\
Serves as the API key/access user for inabit's API endpoints.
{% hint style="info" %}
Note that the merchant owner will need to approve the creation of these users on their inabit mobile app.
{% endhint %}
Learn more about API User Roles in a [dedicated guide](https://docs.inabit.com/guides/user-roles-in-inabit).
***
### 3. inabit Sends Access Tokens to the Orchestrator
After the API users are approved:
* inabit shares the API credentials with the Orchestrator, enabling the next steps in the onboarding process.
* Sharing the access tokens of both users will occur only on a secured channel of the Orchestrator's preference.
***
### **4. Orchestrator Implements inabit Remote Approver App**
The Remote Approver App (Approver Docker) enables policy-based, automated approvals for API wallets only (it does not apply to UI wallets).
#### Deployment options
* **Self-hosted (recommended default):** One-time Docker setup via the inabit CLI on your own infrastructure.
* **inabit-hosted (managed):** inabit can host and operate the Remote Approver App for you
When to choose which?
* Choose **self-hosted** if you require full infrastructure control or have strict internal hosting policies.\
\
[Setup & configuration guide ](https://docs.inabit.com/api-reference/remote-approver-app/setup-and-configuration)
* Choose **inabit-hosted** to reduce ops overhead; in this managed mode, API wallets can transfer funds only to internal wallets within your organization, and you still retain self-custody via your approval policies and paired identities.
In order to automate signing transactions on behalf of the merchant, the [inabit Remote Approver](/inabit-terminal/api-reference/prerequisites/remote-approver) App needs to be installed and the **API Signer user is paired**.\
Please refer to the full guide explaining the Docker setup and configuration in Remote Approver App Setup.
> #### [Clone inabit's CLI Github Repository](https://github.com/In-a-bit/inabit-cli)
***
### 5. Orchestrator/Merchant Sends Pairing Code to the Merchant owner
Once the Docker is up and running, the pairing process will commence as follows:
1. Docker issues a Pairing Code in the Docker logs (example log output shown in the original guide).
2. Docker proceeds to send an approval request to the owner to authorize the approver app (just like any other user).
3. The Orchestrator/merchant sends the Pairing Code to the merchant owner via a secured channel of choice.
4. The merchant’s owner inserts the code in the mobile app to complete the pairing process.
***
### 6. Orchestrator Creates a Master Wallet in the Merchant's inabit Account
Once device pairing is completed, the Orchestrator proceeds to create a Master Wallet for the merchant through inabit's API.
#### What is a Master Wallet?
The Master Wallet serves as the central aggregator for all crypto transactions and funds flow. It is a secure, self-custody wallet fully accessible by the merchant.
#### Supported Blockchains
During wallet creation, the Orchestrator selects the required blockchains (e.g., Ethereum, Tron, Polygon) that the merchant will support for their clients. Each blockchain comes with its own address and supports its respective tokens (e.g., USDT on Tron, ETH on Ethereum).
#### How to Create a Master Wallet?
The `CreateWalletWithInabit` mutation allows API admins to create a new inabit wallet (that is accessible in the platform's interface, unlike API wallets) with a designated address for a given asset & blockchain.
Remember to authenticate to call our GraphQL API using an access token (bearer) with your API Admin credentials.
Example Mutation:
```graphql
mutation CreateWalletWithInabit($data: WalletCreateWithInabitInput!) {
createWalletWithInabit(data: $data) {
id
name
}
}
```
**Headers**
* Content-Type: application/json
* Authorization: Bearer \
**Body (WalletCreateWithInabitInput object)**
* name (string, required) – Name of the wallet
* organizationId (string, required) – ID of the organization in inabit
Example body:
```graphql
{
"data": {
"name": "My Inabit Wallet",
"organization": {
"id": "clu6oj0kg0xxxxxb98guo82u"
}
}
}
```
Response (Success example):
```graphql
{
"data": {
"createWalletWithInabit": {
"id": "clvw5pxxxxxxx7qhe3atv9d",
"name": "My Inabit Wallet"
}
}
}
```
* In the mutation's response, you will receive the created wallet ID including the associated blockchain address.
You can also try this mutation via Apollo Studio.
* For recommended best-practice wallet structures, [see here](https://docs.inabit.com/inabit-terminal/best-practices/wallet-structures):
***
### 7. Orchestrator Enables Terminal Access
To enable inabit Terminal, contact inabit Support. As part of activation:
1. Provide a generic webhook URL to serve as the organization-level default for events.
2. inabit will activate Terminal and return an Organization API Key for communicating with the inabit Terminal API at the org scope.
After activation, proceed with widget creation and deployment. You can also schedule an enablement call from the Terminal page in the interface. ([Reference](https://docs.inabit.com/inabit-terminal/how-to-get-started/enable-terminal))
**Note on API keys**
* **Organization API Key** (issued during enablement): used to pull organization-level information, e.g., get all widgets, get all customers, etc.
* **Widget API Key** (issued when you create a widget): used to pull widget-level information and interact with that specific widget (e.g., get widget details, purchase status, address-token status).
### 8. Orchestrator Creates & Configures Widgets
#### Widget Creation
The Orchestrator will create and edit new widgets via a dedicated endpoint that inabit will provide them upon integration kickoff or from the terminal UI.
#### Widget Configuration
**Choosing the Right Widget Type:**
The Orchestrator selects and configures the widget per merchant use case. We support two types: Purchase Address and Customer Address.”
| Example use case | Widget type to use | Why |
| ----------------------------------------------------------------------------------------------------------------- | ------------------ | ----------------------------------------------------------------------------------------- |
| One-time payment per transaction (e.g., single bet, fixed-price checkout, specific game session) | Purchase Address | Creates a time-boxed, amount-bound address per purchase with clear success/expiry states. |
| Funding a player wallet / account balance with flexible amounts used across sessions | Customer Address | Provides a persistent address per player for ongoing top-ups and balance management. |
| Dedicated address per player for recurring deposits, reconciliation, and linking on-chain flows to a user profile | Customer Address | Stable, per-customer address simplifies reconciliation and KYC/accounting. |
**Quick picker**
* Need exact amount + expiry for a single transaction? → Purchase Address
* Need recurring or flexible deposits tied to a player? → Customer Address
**Implementation notes**
* Both types support: confirmations policy, auto-sweep to Master Wallet, and coin/chain allow-lists.\
* Typically: shorter expiry for Purchase Address; no expiry (or long TTL) for Customer Address.
For a full description of widget types, their behavior, and recommended use cases, [see here](https://docs.inabit.com/inabit-terminal/terminal-guide/widget-types) :
***
**Functionality Settings**
Once the widget type is chosen, the Orchestrator customizes the widget based on the merchant’s requirements. inabit offers robust, per-widget configuration options that allow fine-tuning of how each widget behaves. Key parameters include:
* **Supported Coins** – Define which cryptocurrencies the widget will accept.
* **Deposit Amount** – Can be: (relevant Purchase Address only)
* **Predefined** - The widget displays a specific amount to be deposited by the end-customer.
* **Flexible** - The widget does not enforce a specific deposit amount, allowing users to send any amount to the assigned address. In this mode, the deposit address remains the same for that customer/session, and any funds received at that address will be credited accordingly.
* **Sweeping Frequency** – Set how often received funds are automatically moved to the Master Wallet.
* **Blockchain Confirmations** – Configure the required number of confirmations per chain.
These and other advanced options allow for flexible and secure integration into any existing merchant flow.
For the full list of available settings and best practices, refer to:
* [Creating Widgets Guide](/inabit-terminal/terminal-guide/creating-widgets)
* [Advanced Widget Settings](/inabit-terminal/terminal-guide/creating-widgets/advanced-settings)
***
**Customizing the Widget Interface / UX**
By default, you can adjust the following UI parameters:
* `Widget Name` – A unique name to identify your widget (e.g., “Basic Plan Payment”).
* `Description` (Optional) – Short text explaining what this widget is used for.
* `Merchant Name` (Optional) – Merchant name displayed to the end user (if applicable).
If further customization is required (logos, fonts, colors, layout, etc.), you can override the widget’s CSS.
The merchant (or the Orchestrator on their behalf) can also decide whether to let the end user select the asset & blockchain inside the widget. The widget can always be reviewed in preview mode before going live to ensure it looks and behaves as expected.
(Example widget preview details and images remain as in the original guide.)
***
### 9. Orchestrator Installs Widgets on the Merchant's Platform
inabit supports multiple, straightforward implementation methods per widget type. Choose the approach that best fits your stack and UX-each method is intuitive and easy to set up.
#### Customer Address (persistent address per player)
**Supported methods:**
1. `API`
2. `iframe`
3. `Redirect`
**1. Using API**
{% hint style="success" %}
This option is best for creating fully custom UI with your own components.
{% endhint %}
How it works: Use inabit’s APIs to create or fetch the customer’s persistent address, show it in your UI, and track status via webhooks
> #### [See full instructions here](/inabit-terminal/how-to-get-started/deploy-widgets-on-your-site/customer-address-widget/customer-address-widget-via-api)
**2. iframe (embedded hosted UI)**
* Best for: native feel while keeping low frontend effort.
* How it works: Generate the Customer Address URL (session/token) server-side → embed in an \
.png?alt=media&token=eefc466a-40ef-4755-aca1-c13adfb9a723)
.png?alt=media&token=049d731a-a66b-4680-a3c7-4060aae0ab5d)
.png?alt=media&token=1d737559-7078-4272-ad0c-226b569d9b7c)

.png?alt=media&token=08696d41-f508-4e27-b242-9b6d84199f73) ETH.
* If you're clearing in TRON / tokens in TRON chain - deposit
ETH.
* If you're clearing in TRON / tokens in TRON chain - deposit .svg?alt=media&token=1433412a-e5e5-47ff-ad3a-ecddea3f25c7) TRX.\
(and so on, refer to [Supported Blockchains](/what-we-support/blockchains))
* Necessary access permissions setup.
* Eligible roles - Owner / Admin / API Admin.
> #### :construction: One-time Must-Have Setup:
>
> Please ensure that you complete the [Approvals Docker Configuration](broken://pages/ccXJuwRwg2gczKSBaHay) and execute the [API signer Setup](broken://pages/0VYX2RSRtyBlvXJfXQqb) as a one-time prerequisite. Once this step is accomplished, you will be able to create your API wallets and addresses as needed.
### Additional Reference
We highly advise taking a look at the following guides as you develop your crypto clearing application with inabit:
* [API Login Access / Authentication](broken://pages/yGcNLF6nqjepcTpKqBXn)
* [Create Transfer Requests in API](broken://pages/K4GkRLVxss9hUk7ntC5H)
* [Create API wallet addresses](broken://pages/NrtC3jkcvkTrmIztgsg5)
* [Remote & Automatic Approvals (Docker Configuration)](broken://pages/ccXJuwRwg2gczKSBaHay)
* [Automate Signing Transactions](broken://pages/0VYX2RSRtyBlvXJfXQqb)
* [Receive Webhooks on Transaction Events](broken://pages/kUcWJEheyX7D0ertCXcn)
## Technical Architecture: How Transactions Flow?
TRX.\
(and so on, refer to [Supported Blockchains](/what-we-support/blockchains))
* Necessary access permissions setup.
* Eligible roles - Owner / Admin / API Admin.
> #### :construction: One-time Must-Have Setup:
>
> Please ensure that you complete the [Approvals Docker Configuration](broken://pages/ccXJuwRwg2gczKSBaHay) and execute the [API signer Setup](broken://pages/0VYX2RSRtyBlvXJfXQqb) as a one-time prerequisite. Once this step is accomplished, you will be able to create your API wallets and addresses as needed.
### Additional Reference
We highly advise taking a look at the following guides as you develop your crypto clearing application with inabit:
* [API Login Access / Authentication](broken://pages/yGcNLF6nqjepcTpKqBXn)
* [Create Transfer Requests in API](broken://pages/K4GkRLVxss9hUk7ntC5H)
* [Create API wallet addresses](broken://pages/NrtC3jkcvkTrmIztgsg5)
* [Remote & Automatic Approvals (Docker Configuration)](broken://pages/ccXJuwRwg2gczKSBaHay)
* [Automate Signing Transactions](broken://pages/0VYX2RSRtyBlvXJfXQqb)
* [Receive Webhooks on Transaction Events](broken://pages/kUcWJEheyX7D0ertCXcn)
## Technical Architecture: How Transactions Flow?
.svg?alt=media&token=4bb42868-b3a4-431c-b4ac-801d84cd814d)
.svg?alt=media&token=1e6b89d2-9c20-44b2-ac60-ad190ee630dc) (Clearer's customer)
* **Customer**
(Clearer's customer)
* **Customer** .svg?alt=media&token=6db1e672-3ed7-4eb5-b79a-309dd2a46e38)
.svg?alt=media&token=3dacb791-55cb-4cc4-9105-c15e86730934) )
* inabit also sends a new transaction event webhook to the clearer during this time.
* The clearer issues a withdrawal from the inabit wallet that contains native assets (for fee payment purposes) and transfers the "gas" to the desired customer API wallet (API wallet F in this case) (step 3)
* Once gas funds arrive to customer
)
* inabit also sends a new transaction event webhook to the clearer during this time.
* The clearer issues a withdrawal from the inabit wallet that contains native assets (for fee payment purposes) and transfers the "gas" to the desired customer API wallet (API wallet F in this case) (step 3)
* Once gas funds arrive to customer 
.svg?alt=media&token=55cab120-0cae-4556-a253-56ca9d837987)

.png?alt=media&token=0788caed-d19e-4ef1-998e-e96113eecad2) USDT on the Ethereum, TRON, and Polygon networks, as well as
USDT on the Ethereum, TRON, and Polygon networks, as well as .svg?alt=media&token=1502a099-6a1c-47de-aa33-c90f2efb8cf3) USDC on the Ethereum network.
# On-Ramp: Fiat to Crypto
Part of inabit's Crypto <> Bank Service
{% hint style="success" %}
Enable On-Ramping for your inabit account? [**Apply Here**](https://docs.google.com/forms/d/12NUVO7QbFCeHTUVeQbmmWOcBhqYTnVmws5aIBlHP1vo/prefill)
{% endhint %}
## What is On-Ramp?
An On-Ramp is a service or process that allows users to purchase cryptocurrency using traditional fiat currency. This is typically done through a cryptocurrency exchange or a payment service that accepts fiat currency (e.g., credit/debit card, bank transfer) in exchange for digital assets like Bitcoin, Ethereum, etc.
USDC on the Ethereum network.
# On-Ramp: Fiat to Crypto
Part of inabit's Crypto <> Bank Service
{% hint style="success" %}
Enable On-Ramping for your inabit account? [**Apply Here**](https://docs.google.com/forms/d/12NUVO7QbFCeHTUVeQbmmWOcBhqYTnVmws5aIBlHP1vo/prefill)
{% endhint %}
## What is On-Ramp?
An On-Ramp is a service or process that allows users to purchase cryptocurrency using traditional fiat currency. This is typically done through a cryptocurrency exchange or a payment service that accepts fiat currency (e.g., credit/debit card, bank transfer) in exchange for digital assets like Bitcoin, Ethereum, etc.
 **inabit Wallets**
The core offering of inabit, these wallets are designed for seamless management of digital assets within the inabit ecosystem.
#### **Key Features:**
* **Multi-Asset Support:** Manage a variety of cryptocurrencies across multiple blockchains.
* **User-Friendly Interface:** Accessible through the inabit platform, providing an intuitive experience for users of all skill levels.
* **Secure Storage:** Backed by industry-leading security protocols, including encryption and multi-signature (multi-sig) technology.
* **Gas Wallet Integration:** Includes an option to purchase and manage blockchain gas fees using a credit card for hassle-free transactions.
* **Recovery Options:** Built-in recovery tools to ensure assets remain accessible in case of technical or account issues.
#### **Use Cases:**
* Storing and managing personal or business digital assets.
* Performing blockchain transactions securely.
***
###
**inabit Wallets**
The core offering of inabit, these wallets are designed for seamless management of digital assets within the inabit ecosystem.
#### **Key Features:**
* **Multi-Asset Support:** Manage a variety of cryptocurrencies across multiple blockchains.
* **User-Friendly Interface:** Accessible through the inabit platform, providing an intuitive experience for users of all skill levels.
* **Secure Storage:** Backed by industry-leading security protocols, including encryption and multi-signature (multi-sig) technology.
* **Gas Wallet Integration:** Includes an option to purchase and manage blockchain gas fees using a credit card for hassle-free transactions.
* **Recovery Options:** Built-in recovery tools to ensure assets remain accessible in case of technical or account issues.
#### **Use Cases:**
* Storing and managing personal or business digital assets.
* Performing blockchain transactions securely.
***
###  **Exchange Wallets**
Specifically tailored for companies managing assets on exchanges, these wallets are designed to simplify interactions with exchange platforms.
#### **Key Features:**
* **Exchange Integration:** Compatible with major cryptocurrency exchanges for seamless asset transfers.
* **Monitoring and Reporting:** Track incoming and outgoing transactions and maintain a clear record of balances and activity.
* **High-Speed Transfers:** Optimized for quick deposits and withdrawals between exchanges and inabit’s ecosystem.
* **Multi-Exchange Support:** Manage multiple exchange accounts from a single interface.
#### **Use Cases:**
* Traders and institutions managing assets across multiple exchanges.
* Businesses requiring swift liquidity management.
***
###
**Exchange Wallets**
Specifically tailored for companies managing assets on exchanges, these wallets are designed to simplify interactions with exchange platforms.
#### **Key Features:**
* **Exchange Integration:** Compatible with major cryptocurrency exchanges for seamless asset transfers.
* **Monitoring and Reporting:** Track incoming and outgoing transactions and maintain a clear record of balances and activity.
* **High-Speed Transfers:** Optimized for quick deposits and withdrawals between exchanges and inabit’s ecosystem.
* **Multi-Exchange Support:** Manage multiple exchange accounts from a single interface.
#### **Use Cases:**
* Traders and institutions managing assets across multiple exchanges.
* Businesses requiring swift liquidity management.
***
###  **Web3 Wallets**
These wallets connect directly with decentralized applications (dApps) and smart contracts, empowering users in the Web3 ecosystem.
#### **Key Features:**
* **dApp Integration:** Securely connect and interact with decentralized finance (DeFi) platforms, NFT marketplaces, and more.
* **WalletConnect Support:** Integrated with WalletConnect, allowing users to connect their wallets to dApps effortlessly from their mobile or desktop devices.
* **Non-Custodial:** Users retain full control of their private keys and funds, ensuring decentralization and trustlessness.
* **Smart Contract Interaction:** Seamlessly execute transactions involving smart contracts.
#### **Use Cases:**
* Individuals and businesses engaging with DeFi protocols.
* Developers building Web3 applications requiring wallet connectivity.
***
###
**Web3 Wallets**
These wallets connect directly with decentralized applications (dApps) and smart contracts, empowering users in the Web3 ecosystem.
#### **Key Features:**
* **dApp Integration:** Securely connect and interact with decentralized finance (DeFi) platforms, NFT marketplaces, and more.
* **WalletConnect Support:** Integrated with WalletConnect, allowing users to connect their wallets to dApps effortlessly from their mobile or desktop devices.
* **Non-Custodial:** Users retain full control of their private keys and funds, ensuring decentralization and trustlessness.
* **Smart Contract Interaction:** Seamlessly execute transactions involving smart contracts.
#### **Use Cases:**
* Individuals and businesses engaging with DeFi protocols.
* Developers building Web3 applications requiring wallet connectivity.
***
###  **Monitored Wallets**
These wallets are designed for businesses and organizations that require detailed transaction oversight and reporting.
#### **Key Features:**
* **Real-Time Monitoring:** Track all incoming and outgoing transactions in real-time.
* **Advanced Reporting:** Generate detailed transaction reports for accounting, compliance, or internal audits.
* **Policy Enforcement:** Enforce custom transaction policies, such as whitelisting addresses or setting spending limits.
* **Integrated Alerts:** Receive notifications for specific wallet activities (e.g., large transactions, low balances).
#### **Use Cases:**
* Compliance teams ensuring adherence to AML (Anti-Money Laundering) and other regulatory requirements.
* Organizations needing granular control over wallet activity and fund movement.
***
#### **Why Choose inabit Wallets?**
* **Security First:** All wallet types are protected by advanced security measures, including encryption, two-factor authentication (2FA), and optional multi-sig.
* **Scalability:** Flexible solutions for individuals, developers, and enterprises.
* **Seamless Integration:** Wallets integrate effortlessly with other inabit services, such as the inabit API and Gas Wallet.
* **Customizability:** Tailored options to meet specific use cases, from personal use to enterprise-grade requirements.
***
By offering a variety of wallet types, inabit ensures that every user—whether an individual, developer, or enterprise—can find a solution tailored to their needs. If you're ready to explore these wallets or need assistance selecting the right type, our support team is here to help!
# Wallets Policy Guide
## Overview
Creating strong policy rules is a vital step in maintaining control over your transaction outflows. Owner and admin can set the policies rules, such as whitelisting addresses to prevent unauthorized transactions and setting spending limits for both the entire wallet and individual transactions.
Only approvers are allowed to edit/change a wallet's policy. (both tiers & settings)
{% hint style="info" %}
#### Who's an Approver?
An approver is a platform user with signing permissions that successfully paired their device. Applicable approver roles: (signer, admin, owner)
{% endhint %}
## Wallet Policy Settings
Our governance layer which we call "Transaction Policy", is defined per wallet, meaning each wallet can have its own custom policy settings.
The organization owner and his admins are the ones allowed to edit/change a wallet's policy settings.
Do note that every change in a wallet's policy setting will require the owner's approval via the mobile application.
You can view the list of wallets and their policies in the Policy tab.
Clicking on a wallet from the list will open the tiers tab first by default, you can then switch to the "Wallet Settings" tab.

Currently, there are two settings that can be changed within a wallet's policy:
* Allowance to send funds exclusively to saved addresses that the user defines.
* Allowance to perform off-ramp transfers from the wallet.
### Set Whitelisted Addresses
This policy setting is selected by default and allows you to send a wallet's funds to specific addresses that are saved (whitelisted) within the dedicated whitelist addresses list.
You can add/remove saved addresses directly through the wallet policy settings interface, as well as decide if you'd like to disable this setting (by toggling off the button).
### Allow Off Ramp Transfers
This policy setting is also selected by default and defines wether the wallet's funds can be used for off ramp transfers or not.
{% hint style="info" %}
**Reminder** - Each change made on the wallet settings / policy tiers will require the account's owner mobile approval.
{% endhint %}
## Wallet Policy Tiers
Wallet policy tiers are essentially an advanced policy setting that can be enabled on a wallet to apply an additional layer of security to govern your wallets assets.
There are three fields you can set according to your liking in a policy tier:
1. Transaction amount range.
2. Dedicated transaction approvers.
3. Minimum amount of approvals. (Taken from the dedicated transaction approvers)
**Monitored Wallets**
These wallets are designed for businesses and organizations that require detailed transaction oversight and reporting.
#### **Key Features:**
* **Real-Time Monitoring:** Track all incoming and outgoing transactions in real-time.
* **Advanced Reporting:** Generate detailed transaction reports for accounting, compliance, or internal audits.
* **Policy Enforcement:** Enforce custom transaction policies, such as whitelisting addresses or setting spending limits.
* **Integrated Alerts:** Receive notifications for specific wallet activities (e.g., large transactions, low balances).
#### **Use Cases:**
* Compliance teams ensuring adherence to AML (Anti-Money Laundering) and other regulatory requirements.
* Organizations needing granular control over wallet activity and fund movement.
***
#### **Why Choose inabit Wallets?**
* **Security First:** All wallet types are protected by advanced security measures, including encryption, two-factor authentication (2FA), and optional multi-sig.
* **Scalability:** Flexible solutions for individuals, developers, and enterprises.
* **Seamless Integration:** Wallets integrate effortlessly with other inabit services, such as the inabit API and Gas Wallet.
* **Customizability:** Tailored options to meet specific use cases, from personal use to enterprise-grade requirements.
***
By offering a variety of wallet types, inabit ensures that every user—whether an individual, developer, or enterprise—can find a solution tailored to their needs. If you're ready to explore these wallets or need assistance selecting the right type, our support team is here to help!
# Wallets Policy Guide
## Overview
Creating strong policy rules is a vital step in maintaining control over your transaction outflows. Owner and admin can set the policies rules, such as whitelisting addresses to prevent unauthorized transactions and setting spending limits for both the entire wallet and individual transactions.
Only approvers are allowed to edit/change a wallet's policy. (both tiers & settings)
{% hint style="info" %}
#### Who's an Approver?
An approver is a platform user with signing permissions that successfully paired their device. Applicable approver roles: (signer, admin, owner)
{% endhint %}
## Wallet Policy Settings
Our governance layer which we call "Transaction Policy", is defined per wallet, meaning each wallet can have its own custom policy settings.
The organization owner and his admins are the ones allowed to edit/change a wallet's policy settings.
Do note that every change in a wallet's policy setting will require the owner's approval via the mobile application.
You can view the list of wallets and their policies in the Policy tab.
Clicking on a wallet from the list will open the tiers tab first by default, you can then switch to the "Wallet Settings" tab.

Currently, there are two settings that can be changed within a wallet's policy:
* Allowance to send funds exclusively to saved addresses that the user defines.
* Allowance to perform off-ramp transfers from the wallet.
### Set Whitelisted Addresses
This policy setting is selected by default and allows you to send a wallet's funds to specific addresses that are saved (whitelisted) within the dedicated whitelist addresses list.
You can add/remove saved addresses directly through the wallet policy settings interface, as well as decide if you'd like to disable this setting (by toggling off the button).
### Allow Off Ramp Transfers
This policy setting is also selected by default and defines wether the wallet's funds can be used for off ramp transfers or not.
{% hint style="info" %}
**Reminder** - Each change made on the wallet settings / policy tiers will require the account's owner mobile approval.
{% endhint %}
## Wallet Policy Tiers
Wallet policy tiers are essentially an advanced policy setting that can be enabled on a wallet to apply an additional layer of security to govern your wallets assets.
There are three fields you can set according to your liking in a policy tier:
1. Transaction amount range.
2. Dedicated transaction approvers.
3. Minimum amount of approvals. (Taken from the dedicated transaction approvers)

 ## Approve Policy Changes
Once a change request has been made, the wallet's policy status will be changed to `Pending`.\
Afterwards the account owner will receive a mobile request.
## Approve Policy Changes
Once a change request has been made, the wallet's policy status will be changed to `Pending`.\
Afterwards the account owner will receive a mobile request.


.jpeg?alt=media&token=384b6084-5980-42c3-8d3f-9f3bff48324a)

.png?alt=media&token=cfa28653-6518-4501-8f21-a9ffb50bac16) Bitcoin.
Every transaction output in the Bitcoin blockchain that has not been spent yet is considered an unspent transaction output (UTXO). Each UTXO has an associated value (the amount of bitcoins) and a locking script, which specifies the conditions under which the bitcoins can be spent (usually by providing a public key or a script that corresponds to a private key).
## What is UTXO Consolidation?
If you regularly run operations on the Bitcoin blockchain, you will likely notice that the list of UTXOs in your wallets grows very quickly. This can be a major problem for retail-facing operations.
A process utilized by most companies is "consolidating UTXOs", or creating a transaction that will take many small unspent UTXOs and turn them into a **single larger UTXO (Consolidated UTXO)**.
## UTXO Consolidation in inabit
Every UTXO created from your transactions in Bitcoin or example, is saved in a database table with all UTXO relevant data (such as UTXO amount, is\_spent flag, etc.)
inabit developed a unique logic to calculate which UTXOs should be used to send a transaction in Bitcoin, instead of registering a new UTXO from a new transaction.
{% hint style="success" %}
By applying this logic, inabit takes another step forward towards optimizing Bitcoin transactions, making them much more efficient.
{% endhint %}
# Recovery and Backup
Discover what Disaster Recovery means in cryptocurrency and how it works in inabit
## What is Disaster Recovery?
In crypto, **Disaster Recovery** (**DR**) involves plans and procedures to restore and access digital assets after major disruptions (disasters) like cyberattacks or hardware failures. It includes backup systems, security measures, geographic redundancy, testing, communication plans, and regulatory compliance to ensure the safety and availability of assets in emergencies.
inabit - being a self-custody wallet solution, offers the option to recover digital assets from its wallets.
## Disaster Recovery in inabit
inabit offers an organization-based disaster recovery (DR).
In order to fully execute a truely self-custody recovery solution and ensuring the safety of the sensitive files (such as the encrypted wallet.dat file - the file in which all of the mnemonic seed phrases are held encrypted), inabit chose to partner with [Vaultinum](https://vaultinum.com/).
### About Vaultinum
Bitcoin.
Every transaction output in the Bitcoin blockchain that has not been spent yet is considered an unspent transaction output (UTXO). Each UTXO has an associated value (the amount of bitcoins) and a locking script, which specifies the conditions under which the bitcoins can be spent (usually by providing a public key or a script that corresponds to a private key).
## What is UTXO Consolidation?
If you regularly run operations on the Bitcoin blockchain, you will likely notice that the list of UTXOs in your wallets grows very quickly. This can be a major problem for retail-facing operations.
A process utilized by most companies is "consolidating UTXOs", or creating a transaction that will take many small unspent UTXOs and turn them into a **single larger UTXO (Consolidated UTXO)**.
## UTXO Consolidation in inabit
Every UTXO created from your transactions in Bitcoin or example, is saved in a database table with all UTXO relevant data (such as UTXO amount, is\_spent flag, etc.)
inabit developed a unique logic to calculate which UTXOs should be used to send a transaction in Bitcoin, instead of registering a new UTXO from a new transaction.
{% hint style="success" %}
By applying this logic, inabit takes another step forward towards optimizing Bitcoin transactions, making them much more efficient.
{% endhint %}
# Recovery and Backup
Discover what Disaster Recovery means in cryptocurrency and how it works in inabit
## What is Disaster Recovery?
In crypto, **Disaster Recovery** (**DR**) involves plans and procedures to restore and access digital assets after major disruptions (disasters) like cyberattacks or hardware failures. It includes backup systems, security measures, geographic redundancy, testing, communication plans, and regulatory compliance to ensure the safety and availability of assets in emergencies.
inabit - being a self-custody wallet solution, offers the option to recover digital assets from its wallets.
## Disaster Recovery in inabit
inabit offers an organization-based disaster recovery (DR).
In order to fully execute a truely self-custody recovery solution and ensuring the safety of the sensitive files (such as the encrypted wallet.dat file - the file in which all of the mnemonic seed phrases are held encrypted), inabit chose to partner with [Vaultinum](https://vaultinum.com/).
### About Vaultinum .png?alt=media&token=0dd034e1-82d0-4f39-830f-eebace29e375) **Vaultinum** is a trusted independent third party specialized in the protection and audit of digital assets.
Since 1976, they have enabled thousands of digital creators, digital businesses and tech investors secure their innovations by providing solutions to:
* Protect their Intellectual Property with IP Deposit and IP Audit.
* Ensure the continuity of their business activity with Software Escrow.
* Mitigate cyber and software risks through in-depth Technology Due Diligence (KYS-Know Your Software).
* Create an unforgeable proof of date and time of event with our Certified Time-stamping solution.
With secure servers based in Europe, ISO 27001 certification, and a unique double expertise in IT and legal, their clients benefit from the highest levels of security and protection for all their sensitive assets.
# Disaster Recovery Guide
inabit's Disaster Recovery guide using our Keys Recovery Tool
The following utility provides you with a simplified approach to generating a recovery package enabling you the ability to recovery your organization's keys in case of a disaster.
{% hint style="danger" %}
**WARNING:**
You should **never** perform this procedure unless a disaster event has occurred and you need to extract your private keys/mnemonic phrases. This procedure decrypts your encrypted keys and will revoke access to the organization!
{% endhint %}
In order to begin using inabit's recovery tool, you'll need to extract the following files:
1.
**Vaultinum** is a trusted independent third party specialized in the protection and audit of digital assets.
Since 1976, they have enabled thousands of digital creators, digital businesses and tech investors secure their innovations by providing solutions to:
* Protect their Intellectual Property with IP Deposit and IP Audit.
* Ensure the continuity of their business activity with Software Escrow.
* Mitigate cyber and software risks through in-depth Technology Due Diligence (KYS-Know Your Software).
* Create an unforgeable proof of date and time of event with our Certified Time-stamping solution.
With secure servers based in Europe, ISO 27001 certification, and a unique double expertise in IT and legal, their clients benefit from the highest levels of security and protection for all their sensitive assets.
# Disaster Recovery Guide
inabit's Disaster Recovery guide using our Keys Recovery Tool
The following utility provides you with a simplified approach to generating a recovery package enabling you the ability to recovery your organization's keys in case of a disaster.
{% hint style="danger" %}
**WARNING:**
You should **never** perform this procedure unless a disaster event has occurred and you need to extract your private keys/mnemonic phrases. This procedure decrypts your encrypted keys and will revoke access to the organization!
{% endhint %}
In order to begin using inabit's recovery tool, you'll need to extract the following files:
1. .png?alt=media&token=18563531-80c5-4f19-bce1-97ada6894d20) **Encrypted Master Key**
2.
**Encrypted Master Key**
2.  **Encrypted Wallets Key**
3.
**Encrypted Wallets Key**
3.  **Encrypted Password** (for Wallets Key file)
## Recovery Flow Steps
The flow of recovering your all of your organization's mnemonics, is split between two parts:
1. Issuing disaster recovery through inabit's platform (as the account Owner) and downloading the recovery package from the mobile application.
2. Extracting the walletKey file from Vaultinum.
3. Decrypting the mnemonics file using all three files.
In this page we'll go over the recovery flow and all three steps above.
{% hint style="info" %}
**What's a "Backup Email"?**
A backup email, or what we also call "Recovery Email" is the owner's set email for disaster recovery. This is set by upgrading an organization's security level via the owner's settings.
Once there's a request to set a backup email, our support team is contacting the owner in order to define a specific email address to serve as "backup"/"recovery". (this email will receive the encrypted password file from Vaultinum) (See below for further).
{% endhint %}
## Step 1: Extract the Recovery Package
**Encrypted Password** (for Wallets Key file)
## Recovery Flow Steps
The flow of recovering your all of your organization's mnemonics, is split between two parts:
1. Issuing disaster recovery through inabit's platform (as the account Owner) and downloading the recovery package from the mobile application.
2. Extracting the walletKey file from Vaultinum.
3. Decrypting the mnemonics file using all three files.
In this page we'll go over the recovery flow and all three steps above.
{% hint style="info" %}
**What's a "Backup Email"?**
A backup email, or what we also call "Recovery Email" is the owner's set email for disaster recovery. This is set by upgrading an organization's security level via the owner's settings.
Once there's a request to set a backup email, our support team is contacting the owner in order to define a specific email address to serve as "backup"/"recovery". (this email will receive the encrypted password file from Vaultinum) (See below for further).
{% endhint %}
## Step 1: Extract the Recovery Package

.png?alt=media&token=e8d481d0-c9a6-481d-95b4-744a55fb6b94)
.png?alt=media&token=b9a848e8-bfa3-4ad9-bc51-3bc91053ecf1)


.jpg?alt=media&token=7e077037-4094-4c7e-ba20-82a55242b39b)
.svg?alt=media&token=b47ef576-cb47-4216-b03c-40116bd96bea) BNB
BNB.svg?alt=media&token=d276ab7f-067f-43c1-9697-99e3aa444eb7) SOL
SOL.svg?alt=media&token=f68a1ad4-1cb8-4a7b-9f85-d7ea352b449d) XRP
XRP.svg?alt=media&token=afd83260-5cf0-4dfd-ab81-a2ab876b4cc2) MATIC
MATIC.svg?alt=media&token=bfa4ba0d-6e6f-4a6e-9e1e-bf5ba333ab73) BCH
BCH.svg?alt=media&token=a33144a1-589a-4a07-aa4f-8d10cf666378) LTC
LTC.svg?alt=media&token=824b1b0e-81d3-4b3a-8a5d-481f60f19d3a) Ton | Coming soon |
# Exchanges
Which exchange connections inabit currently supports
## Overview
inabit exchange connectivity enables you to connect exchange main accounts, allowing the following functionalities:
* **Funding exchange wallets:** Deposit, withdraw and rebalance between your connected accounts.
* **Monitor wallet balances:** Monitor assets, balances, and transactions for your connected accounts.
* **Send funds anywhere:** Transfer to any other wallet / address (whitelisted/non-whitelisted).
{% hint style="info" %}
Transfers from exchanges to some destination addresses may require additional configuration in the exchange API settings/management.
{% endhint %}
All the exchanges connected to your inabit organization appear in the wallets page and are apart of your organization balance once connected.
Assets held on the exchange are included and shown in your wallet balance.
### Exchange Account/Wallet Types
#### Main accounts
The primary account serves as the default gateway on the exchange platform. It acts as the central hub for inabit and other exchanges, exclusively facilitating deposits and withdrawals.
Depending on the exchange, you may need to whitelist destinations on the exchange to be able to withdraw to wallets and/or other destinations.
#### Sub-accounts
{% hint style="danger" %}
This feature is currently not supported in inabit.
{% endhint %}
Sub-accounts in exchanges refer to separate accounts created within a single user account. These accounts are often used to organize and manage different trading strategies, portfolios, or assets independently.
#### Trading accounts
{% hint style="danger" %}
This feature is currently not supported in inabit.
{% endhint %}
Trading accounts in exchanges are the primary accounts created by users to engage in buying, selling, and exchanging cryptocurrencies or other financial assets. They serve as the main interface for conducting trading activities on the exchange platform.
### Supported Exchanges
Ton | Coming soon |
# Exchanges
Which exchange connections inabit currently supports
## Overview
inabit exchange connectivity enables you to connect exchange main accounts, allowing the following functionalities:
* **Funding exchange wallets:** Deposit, withdraw and rebalance between your connected accounts.
* **Monitor wallet balances:** Monitor assets, balances, and transactions for your connected accounts.
* **Send funds anywhere:** Transfer to any other wallet / address (whitelisted/non-whitelisted).
{% hint style="info" %}
Transfers from exchanges to some destination addresses may require additional configuration in the exchange API settings/management.
{% endhint %}
All the exchanges connected to your inabit organization appear in the wallets page and are apart of your organization balance once connected.
Assets held on the exchange are included and shown in your wallet balance.
### Exchange Account/Wallet Types
#### Main accounts
The primary account serves as the default gateway on the exchange platform. It acts as the central hub for inabit and other exchanges, exclusively facilitating deposits and withdrawals.
Depending on the exchange, you may need to whitelist destinations on the exchange to be able to withdraw to wallets and/or other destinations.
#### Sub-accounts
{% hint style="danger" %}
This feature is currently not supported in inabit.
{% endhint %}
Sub-accounts in exchanges refer to separate accounts created within a single user account. These accounts are often used to organize and manage different trading strategies, portfolios, or assets independently.
#### Trading accounts
{% hint style="danger" %}
This feature is currently not supported in inabit.
{% endhint %}
Trading accounts in exchanges are the primary accounts created by users to engage in buying, selling, and exchanging cryptocurrencies or other financial assets. They serve as the main interface for conducting trading activities on the exchange platform.
### Supported Exchanges


 * Add the following details:
* **Address Description**
* This is where you copy the Kraken description generated for the saved address in inabit.
* You can copy the Kraken description in inabit from within the contacts page.\
View the saved address in the page and click on the 3 dots icon:
* Add the following details:
* **Address Description**
* This is where you copy the Kraken description generated for the saved address in inabit.
* You can copy the Kraken description in inabit from within the contacts page.\
View the saved address in the page and click on the 3 dots icon:  * Click on the "**Kraken** **Description**" option.

 {% endhint %}
# Changelog
Keep track on what's new/changed in inabit 📝
## [New Version Release - 2.9.0 ](https://use.inabit.com/)
### Release Notes:
* **Web3 - WalletConnect support:**
* Users can fully perform a connection to any wallet supported by walletconnet to inabit's platform.
* We've released the ability to perform a full disaster recovery in inabit.
### [Version 2.8.1 Patch - Merged to Main](https://use.inabit.com/) :tools:
* **Fixed**:
* Changed the previous Ethereum base-fee calculation in order to significantly lower the probability of Ethereum transactions failures
## [New Version Release - 2.8.0](https://use.inabit.com/) :tada:
### Release Notes:
* Bitcoin Transactions Acceleration
* Increased support of different countries & currencies for off-ramp.
* Additional security updates in the mobile approvals app.
* **New API Features:**
* Generation of dedicated API wallets via API.
* Ability to sign transactions directly through API (API Signer).
* Visual representation of API wallets in the platform's UI.
### [Added "Exchanges" Section to Documentation](/what-we-support/exchanges)
Added by **Itamar Korkos**\
4.1.2024
### [Added "API Infrastructure" Section to Documentation](broken://pages/tZP512vBBTeYfgAsxyWV)
Added by **Itamar Korkos**\
4.1.2024
# Introduction
Read our documentation and get up to speed on how to access our API capabilities.
Dive into the specifics of each API endpoint by checking out our complete documentation.
## Accessing our API
Refer to the page below for getting your access token to serve as your credentials for when you call queries and mutations through our graphql endpoint.
{% content-ref url="/pages/yGcNLF6nqjepcTpKqBXn" %}
[Authentication](/api-reference/introduction-to-graphql/authentication)
{% endcontent-ref %}
## Dictionary
Everything related to our system's infrastructure and what the API is built upon, please refer to the page below:
{% content-ref url="/pages/gP6tg361m6oGW6X2dNB2" %}
[Broken mention](broken://pages/gP6tg361m6oGW6X2dNB2)
{% endcontent-ref %}
# What is GraphQL?
[GraphQL](https://graphql.org/) is a query language for APIs that provides a powerful and flexible way for clients to request exactly the data they need from a server. Unlike traditional REST APIs that return predefined data structures, GraphQL allows you to specify the specific fields you want within a resource, eliminating the need for over-fetching or under-fetching of data. This approach leads to more efficient data transfer and reduces complexity on both the client and server sides.
GraphQL revolutionizes API interactions by letting you request exactly the data you need. Forget fetching everything and sifting through irrelevant details. Write precise queries specifying only the desired fields within a resource, and GraphQL delivers just that. This targeted approach streamlines data exchange, boosts performance, and simplifies development – like ordering a custom pizza, not the whole menu.
The key takeaway for GraphQL can be summarized as **ask for what you need** and **get exactly that .**
For more information about GraphQL visit
{% endhint %}
# Changelog
Keep track on what's new/changed in inabit 📝
## [New Version Release - 2.9.0 ](https://use.inabit.com/)
### Release Notes:
* **Web3 - WalletConnect support:**
* Users can fully perform a connection to any wallet supported by walletconnet to inabit's platform.
* We've released the ability to perform a full disaster recovery in inabit.
### [Version 2.8.1 Patch - Merged to Main](https://use.inabit.com/) :tools:
* **Fixed**:
* Changed the previous Ethereum base-fee calculation in order to significantly lower the probability of Ethereum transactions failures
## [New Version Release - 2.8.0](https://use.inabit.com/) :tada:
### Release Notes:
* Bitcoin Transactions Acceleration
* Increased support of different countries & currencies for off-ramp.
* Additional security updates in the mobile approvals app.
* **New API Features:**
* Generation of dedicated API wallets via API.
* Ability to sign transactions directly through API (API Signer).
* Visual representation of API wallets in the platform's UI.
### [Added "Exchanges" Section to Documentation](/what-we-support/exchanges)
Added by **Itamar Korkos**\
4.1.2024
### [Added "API Infrastructure" Section to Documentation](broken://pages/tZP512vBBTeYfgAsxyWV)
Added by **Itamar Korkos**\
4.1.2024
# Introduction
Read our documentation and get up to speed on how to access our API capabilities.
Dive into the specifics of each API endpoint by checking out our complete documentation.
## Accessing our API
Refer to the page below for getting your access token to serve as your credentials for when you call queries and mutations through our graphql endpoint.
{% content-ref url="/pages/yGcNLF6nqjepcTpKqBXn" %}
[Authentication](/api-reference/introduction-to-graphql/authentication)
{% endcontent-ref %}
## Dictionary
Everything related to our system's infrastructure and what the API is built upon, please refer to the page below:
{% content-ref url="/pages/gP6tg361m6oGW6X2dNB2" %}
[Broken mention](broken://pages/gP6tg361m6oGW6X2dNB2)
{% endcontent-ref %}
# What is GraphQL?
[GraphQL](https://graphql.org/) is a query language for APIs that provides a powerful and flexible way for clients to request exactly the data they need from a server. Unlike traditional REST APIs that return predefined data structures, GraphQL allows you to specify the specific fields you want within a resource, eliminating the need for over-fetching or under-fetching of data. This approach leads to more efficient data transfer and reduces complexity on both the client and server sides.
GraphQL revolutionizes API interactions by letting you request exactly the data you need. Forget fetching everything and sifting through irrelevant details. Write precise queries specifying only the desired fields within a resource, and GraphQL delivers just that. This targeted approach streamlines data exchange, boosts performance, and simplifies development – like ordering a custom pizza, not the whole menu.
The key takeaway for GraphQL can be summarized as **ask for what you need** and **get exactly that .**
For more information about GraphQL visit  Used to REST? Feeling more comfortable using [**Postman**](https://www.postman.com/)? No problem! Our team created a custom postman collection which includes all of the API queries & mutations listed in our [API Reference](broken://pages/X0iUk7M41qljvTxMV7cj).
{% file src="/files/nMvYgDQYVQDeQZlApAJn" %}
### How To Use?
Simply download the `JSON` file and import it to the Postman application in your desktop.\
There should be an "Import" () button next to the collections tab on the top left hand side in the application.
# Organizations
# Organization Info
Retrieve data on your organizations, per organization ID.
## Fetch Organization Data
Retrieving the user's organization info is done through querying the user's information. One can query details inside the organization.
```graphql
query User($where: UserWhereUniqueInput!) {
user(where: $where) {
fullName
organizations {
[id]
[name]
[city]
[email]
[industry]
[isIndividual]
[phone]
[street]
[phoneCountry]
[timezone]
[transferRequestOrders]
[unit]
[wallets]
[zipCode]
}
}
}
```
### Headers
| Name | Value |
| ------------- | ------------------ |
| Content-Type | `application/json` |
| Authorization | `Bearer
Used to REST? Feeling more comfortable using [**Postman**](https://www.postman.com/)? No problem! Our team created a custom postman collection which includes all of the API queries & mutations listed in our [API Reference](broken://pages/X0iUk7M41qljvTxMV7cj).
{% file src="/files/nMvYgDQYVQDeQZlApAJn" %}
### How To Use?
Simply download the `JSON` file and import it to the Postman application in your desktop.\
There should be an "Import" () button next to the collections tab on the top left hand side in the application.
# Organizations
# Organization Info
Retrieve data on your organizations, per organization ID.
## Fetch Organization Data
Retrieving the user's organization info is done through querying the user's information. One can query details inside the organization.
```graphql
query User($where: UserWhereUniqueInput!) {
user(where: $where) {
fullName
organizations {
[id]
[name]
[city]
[email]
[industry]
[isIndividual]
[phone]
[street]
[phoneCountry]
[timezone]
[transferRequestOrders]
[unit]
[wallets]
[zipCode]
}
}
}
```
### Headers
| Name | Value |
| ------------- | ------------------ |
| Content-Type | `application/json` |
| Authorization | `Bearer .png) BTC
BTC.png) ETH
ETH.svg) TRX
TRX.svg) BNB
BNB.svg) SOL
SOL.svg) XRP
XRP.svg) MATIC
MATIC.svg) Bitcoin Cash | Coming soon |
|
Bitcoin Cash | Coming soon |
| .svg) Litecoin | Coming soon |
# Exchanges
Which exchange connections inabit currently supports
## Overview
inabit exchange connectivity enables you to connect exchange main accounts, allowing the following functionalities:
* **Funding exchange wallets:** Deposit, withdraw and rebalance between your connected accounts.
* **Monitor wallet balances:** Monitor assets, balances, and transactions for your connected accounts.
* **Send funds anywhere:** Transfer to any other wallet / address (whitelisted/non-whitelisted).
{% hint style="info" %}
Transfers from exchanges to some destination addresses may require additional configuration in the exchange API settings/management.
{% endhint %}
All the exchanges connected to your inabit organization appear in the wallets page and are apart of your organization balance once connected.
Assets held on the exchange are included and shown in your wallet balance.
### Exchange Account/Wallet Types
#### Main accounts
The primary account serves as the default gateway on the exchange platform. It acts as the central hub for inabit and other exchanges, exclusively facilitating deposits and withdrawals.
Depending on the exchange, you may need to whitelist destinations on the exchange to be able to withdraw to wallets and/or other destinations.
#### Sub-accounts
{% hint style="danger" %}
This feature is currently not supported in inabit.
{% endhint %}
Sub-accounts in exchanges refer to separate accounts created within a single user account. These accounts are often used to organize and manage different trading strategies, portfolios, or assets independently.
#### Trading accounts
{% hint style="danger" %}
This feature is currently not supported in inabit.
{% endhint %}
Trading accounts in exchanges are the primary accounts created by users to engage in buying, selling, and exchanging cryptocurrencies or other financial assets. They serve as the main interface for conducting trading activities on the exchange platform.
### Supported Exchanges
Litecoin | Coming soon |
# Exchanges
Which exchange connections inabit currently supports
## Overview
inabit exchange connectivity enables you to connect exchange main accounts, allowing the following functionalities:
* **Funding exchange wallets:** Deposit, withdraw and rebalance between your connected accounts.
* **Monitor wallet balances:** Monitor assets, balances, and transactions for your connected accounts.
* **Send funds anywhere:** Transfer to any other wallet / address (whitelisted/non-whitelisted).
{% hint style="info" %}
Transfers from exchanges to some destination addresses may require additional configuration in the exchange API settings/management.
{% endhint %}
All the exchanges connected to your inabit organization appear in the wallets page and are apart of your organization balance once connected.
Assets held on the exchange are included and shown in your wallet balance.
### Exchange Account/Wallet Types
#### Main accounts
The primary account serves as the default gateway on the exchange platform. It acts as the central hub for inabit and other exchanges, exclusively facilitating deposits and withdrawals.
Depending on the exchange, you may need to whitelist destinations on the exchange to be able to withdraw to wallets and/or other destinations.
#### Sub-accounts
{% hint style="danger" %}
This feature is currently not supported in inabit.
{% endhint %}
Sub-accounts in exchanges refer to separate accounts created within a single user account. These accounts are often used to organize and manage different trading strategies, portfolios, or assets independently.
#### Trading accounts
{% hint style="danger" %}
This feature is currently not supported in inabit.
{% endhint %}
Trading accounts in exchanges are the primary accounts created by users to engage in buying, selling, and exchanging cryptocurrencies or other financial assets. They serve as the main interface for conducting trading activities on the exchange platform.
### Supported Exchanges



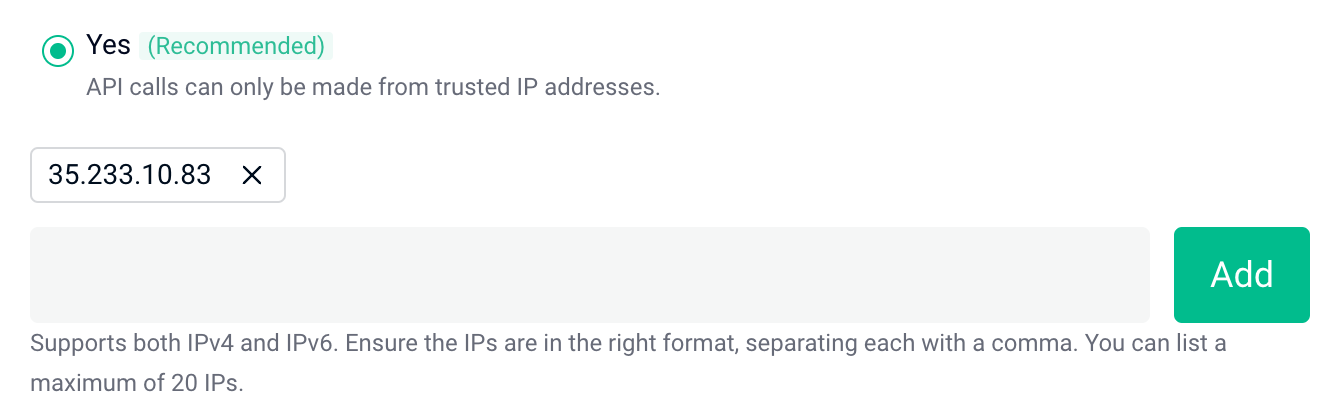
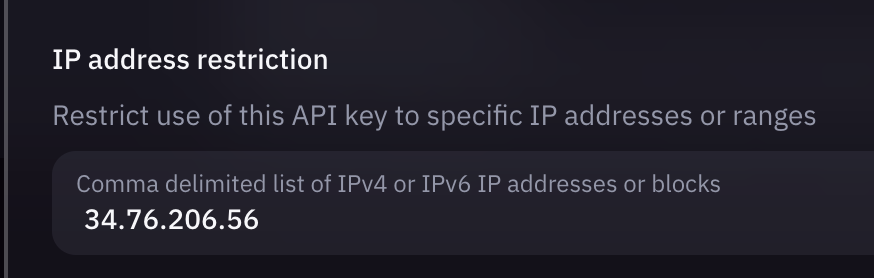
 * Add the following details:
* **Address Description**
* This is where you copy the Kraken description generated for the saved address in inabit.
* You can copy the Kraken description in inabit from within the contacts page.\
View the saved address in the page and click on the 3 dots icon:
* Add the following details:
* **Address Description**
* This is where you copy the Kraken description generated for the saved address in inabit.
* You can copy the Kraken description in inabit from within the contacts page.\
View the saved address in the page and click on the 3 dots icon:  * Click on the "**Kraken** **Description**" option.
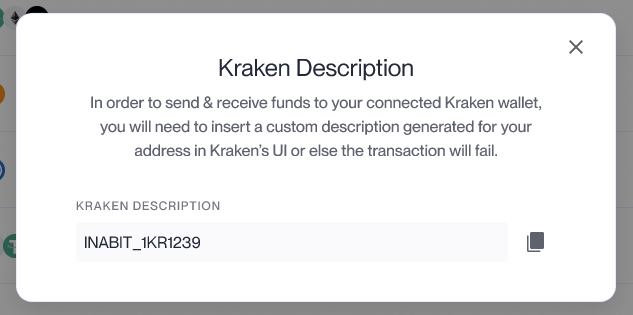
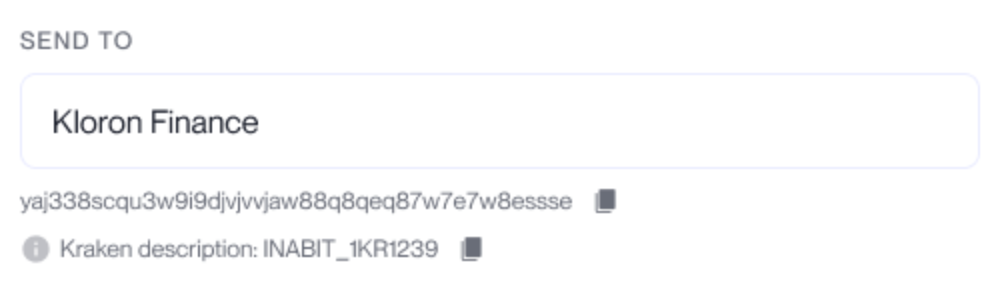 {% endhint %}
# Changelog
Keep track on what's new/changed in inabit 📝
## [New Version Release - 2.11.0 ](https://use.inabit.com/):tada:
### Release Notes:
* **inabit. x Changelly** - Added the ability to swap in inabit wallets.
* **Transaction Confirmations to transactions**:
* Ability to define required confirmations before transactions are counted as completed and affecting your wallets & organization balance.
* Added new status: "Confirming" for transactions.
* **Track incoming & outgoing funds with ease**:
* inabit now displays indicators for incoming and outgoing pending balances on both wallets and assets, affected by pending transactions.
* **Effortless navigation between assets & wallets**:
* Revampled the way to move between assets & wallets in the platform.
## [New Version Release - 2.9.0 ](https://use.inabit.com/):tada:
### Release Notes:
* **Web3 - WalletConnect support:**
* Users can fully perform a connection to any wallet supported by walletconnet to inabit's platform.
* We've released the ability to perform a full disaster recovery in inabit.
### [Version 2.8.1 Patch - Merged to Main](https://use.inabit.com/) :tools:
* **Fixed**:
* Changed the previous Ethereum base-fee calculation in order to significantly lower the probability of Ethereum transactions failures
## [New Version Release - 2.8.0](https://use.inabit.com/) :tada:
### Release Notes:
* Bitcoin Transactions Acceleration
* Increased support of different countries & currencies for off-ramp.
* Additional security updates in the mobile approvals app.
* **New API Features:**
* Generation of dedicated API wallets via API.
* Ability to sign transactions directly through API (API Signer).
* Visual representation of API wallets in the platform's UI.
### [Added "Exchanges" Section to Documentation](/api-reference/what-we-support/exchanges)
Added by **Itamar Korkos**\
4.1.2024
### [Added "API Infrastructure" Section to Documentation](/api-reference/remote-approver-app/setup-and-configuration)
Added by **Itamar Korkos**\
4.1.2024
# Overview
Read our documentation and get up to speed on how to access our API capabilities.
## Introduction
The **inabit Terminal** is your command center for managing digital assets, processing payments, and automating Web3 operations - all in one secure, intuitive interface.
Whether you're embedding crypto widgets into your platform, automating fund flows, or fueling cross-chain transactions, this documentation will guide you through everything you need to know to get started and scale confidently.
### What Is Our Terminal?
Inabit Terminal is a crypto payment gateway that allows platforms, merchants, and service providers to accept cryptocurrency directly from their users in a secure, compliant, and customizable way.
It provides an all-in-one infrastructure for generating deposit addresses, tracking blockchain payments, and settling transactions in crypto or fiat, without needing to manage wallets, private keys, or custom smart contracts.
Think of Inabit Terminal as your crypto-native checkout engine, fully managed and easy to integrate via API or UI.
### Who Is It For?
* Payment Service Providers (PSPs) – who want to offer crypto payments to their merchants.
* Merchants and eCommerce stores – accepting crypto as part of checkout (POS or online).
* Platforms and SaaS products – embedding crypto flows inside digital apps.
* White-label/Embedded Finance Providers – offering crypto to their downstream clients (Terminal-as-a-Service).
### What Can You Do With Our Terminal?
* Generate on-chain deposit addresses (Purchase or Customer Address types)
* Monitor incoming payments in real time
* Receive webhook callbacks when payment is complete
* Accept a wide range of crypto assets across supported blockchains
* Settle in crypto or convert to fiat
* Define widget settings like confirmations, expiration, and reuse
* Use either UI (no code) or GraphQL API (developer-first)
### How It Works (High-Level Flow)
1. Enable Terminal for your organization (via support)
2. Create a widget (via the Inabit Dashboard or API)
3. Display the widget to your customer - a QR code + address will be generated
4. Customer pays in crypto
5. Inabit monitors the blockchain
6. You receive a webhook (or poll API) once confirmed
7. You fulfill the order or service, and optionally settle to fiat
You can manage the entire flow through the Inabit Dashboard - no code required.
### Types of Widgets
Inabit Terminal supports two widget types, depending on your payment model:
| Widget Type | Use Case | Reuse Address? | Expiration? | Best For |
| ---------------- | -------------------------------- | -------------- | ----------- | ------------------------------- |
| Purchase Address | One-time purchases or invoices | Optional | Yes | eCommerce, donation, QR-POS |
| Customer Address | Persistent user/account deposits | Yes | Optional | Wallet top-ups, recurring users |
{% hint style="info" %}
[Read more about widget types →](/inabit-terminal/terminal-guide/widget-types)
{% endhint %}
### Environments
| Environment | Description | Real Blockchain? |
| ----------------------------------------------------- | ------------------------------------ | ------------------- |
| :diamonds-4: `Mainnet` | Used for live production payments | Yes (real funds) |
| :vial-virus: `Sandbox` | Used for testing with testnet assets | Yes (testnet coins) |
The Sandbox environment allows you to run full end-to-end tests using real blockchain behavior, without any financial risk.
{% hint style="info" %}
Having trouble collecting assets on testnet? When testing through our APIs, inabit can provide you with testnet assets including tokens to get going with your tests! All you need to do is request tokens through our support team at:
{% endhint %}
# Changelog
Keep track on what's new/changed in inabit 📝
## [New Version Release - 2.11.0 ](https://use.inabit.com/):tada:
### Release Notes:
* **inabit. x Changelly** - Added the ability to swap in inabit wallets.
* **Transaction Confirmations to transactions**:
* Ability to define required confirmations before transactions are counted as completed and affecting your wallets & organization balance.
* Added new status: "Confirming" for transactions.
* **Track incoming & outgoing funds with ease**:
* inabit now displays indicators for incoming and outgoing pending balances on both wallets and assets, affected by pending transactions.
* **Effortless navigation between assets & wallets**:
* Revampled the way to move between assets & wallets in the platform.
## [New Version Release - 2.9.0 ](https://use.inabit.com/):tada:
### Release Notes:
* **Web3 - WalletConnect support:**
* Users can fully perform a connection to any wallet supported by walletconnet to inabit's platform.
* We've released the ability to perform a full disaster recovery in inabit.
### [Version 2.8.1 Patch - Merged to Main](https://use.inabit.com/) :tools:
* **Fixed**:
* Changed the previous Ethereum base-fee calculation in order to significantly lower the probability of Ethereum transactions failures
## [New Version Release - 2.8.0](https://use.inabit.com/) :tada:
### Release Notes:
* Bitcoin Transactions Acceleration
* Increased support of different countries & currencies for off-ramp.
* Additional security updates in the mobile approvals app.
* **New API Features:**
* Generation of dedicated API wallets via API.
* Ability to sign transactions directly through API (API Signer).
* Visual representation of API wallets in the platform's UI.
### [Added "Exchanges" Section to Documentation](/api-reference/what-we-support/exchanges)
Added by **Itamar Korkos**\
4.1.2024
### [Added "API Infrastructure" Section to Documentation](/api-reference/remote-approver-app/setup-and-configuration)
Added by **Itamar Korkos**\
4.1.2024
# Overview
Read our documentation and get up to speed on how to access our API capabilities.
## Introduction
The **inabit Terminal** is your command center for managing digital assets, processing payments, and automating Web3 operations - all in one secure, intuitive interface.
Whether you're embedding crypto widgets into your platform, automating fund flows, or fueling cross-chain transactions, this documentation will guide you through everything you need to know to get started and scale confidently.
### What Is Our Terminal?
Inabit Terminal is a crypto payment gateway that allows platforms, merchants, and service providers to accept cryptocurrency directly from their users in a secure, compliant, and customizable way.
It provides an all-in-one infrastructure for generating deposit addresses, tracking blockchain payments, and settling transactions in crypto or fiat, without needing to manage wallets, private keys, or custom smart contracts.
Think of Inabit Terminal as your crypto-native checkout engine, fully managed and easy to integrate via API or UI.
### Who Is It For?
* Payment Service Providers (PSPs) – who want to offer crypto payments to their merchants.
* Merchants and eCommerce stores – accepting crypto as part of checkout (POS or online).
* Platforms and SaaS products – embedding crypto flows inside digital apps.
* White-label/Embedded Finance Providers – offering crypto to their downstream clients (Terminal-as-a-Service).
### What Can You Do With Our Terminal?
* Generate on-chain deposit addresses (Purchase or Customer Address types)
* Monitor incoming payments in real time
* Receive webhook callbacks when payment is complete
* Accept a wide range of crypto assets across supported blockchains
* Settle in crypto or convert to fiat
* Define widget settings like confirmations, expiration, and reuse
* Use either UI (no code) or GraphQL API (developer-first)
### How It Works (High-Level Flow)
1. Enable Terminal for your organization (via support)
2. Create a widget (via the Inabit Dashboard or API)
3. Display the widget to your customer - a QR code + address will be generated
4. Customer pays in crypto
5. Inabit monitors the blockchain
6. You receive a webhook (or poll API) once confirmed
7. You fulfill the order or service, and optionally settle to fiat
You can manage the entire flow through the Inabit Dashboard - no code required.
### Types of Widgets
Inabit Terminal supports two widget types, depending on your payment model:
| Widget Type | Use Case | Reuse Address? | Expiration? | Best For |
| ---------------- | -------------------------------- | -------------- | ----------- | ------------------------------- |
| Purchase Address | One-time purchases or invoices | Optional | Yes | eCommerce, donation, QR-POS |
| Customer Address | Persistent user/account deposits | Yes | Optional | Wallet top-ups, recurring users |
{% hint style="info" %}
[Read more about widget types →](/inabit-terminal/terminal-guide/widget-types)
{% endhint %}
### Environments
| Environment | Description | Real Blockchain? |
| ----------------------------------------------------- | ------------------------------------ | ------------------- |
| :diamonds-4: `Mainnet` | Used for live production payments | Yes (real funds) |
| :vial-virus: `Sandbox` | Used for testing with testnet assets | Yes (testnet coins) |
The Sandbox environment allows you to run full end-to-end tests using real blockchain behavior, without any financial risk.
{% hint style="info" %}
Having trouble collecting assets on testnet? When testing through our APIs, inabit can provide you with testnet assets including tokens to get going with your tests! All you need to do is request tokens through our support team at: